quinoa with salmon, feta, and dill

I imagine that most people have a set of ten, twenty, or maybe even thirty dinners that they regularly make. Some people might try a new recipe every couple of weeks. But for the most part, I suspect that dinner on any given night is something familiar.

Then there are a class of people who have so many recipes they want to try that they know there simply aren’t enough nights in the week, month, year, life. Every time an old favorite is made is an opportunity lost to try something new. Not that I don’t have a rotation; it’s just that meals are considered on the rotation if they’re made only once or twice a year. Something in heavy rotation might be made six or seven times per year.

This was a surprise addition to my rotation. If I didn’t think we’d like it, I wouldn’t have made it, but I didn’t know we’d like it as much as we did. Dave compared it sushi bowls, with the grain base, fish, and cucumbers, but the lemon, dill, and feta take it in a different direction.

Of course, it takes more than good flavor to be added to my rotation – dishes have to be healthy, which means no refined carbs, limited oil and butter, and plenty of protein and vegetables. Recipes also have to be easy if there’s any hope of me making them often, and the limited amount of ingredient prep required here can be accomplished while the quinoa cooks. Not only have I made this three times in the last year, I’ve made it twice in the last month – heavy rotation indeed.

One year ago: Shrimp Burgers
Two years ago: Roasted Baby Artichokes
Three years ago: Double (or Triple) Chocolate Cookies

Printer Friendly Recipe
Quinoa with Salmon, Feta, and Dill (adapted from Apple a Day)

Serves 6

You can use also fresh salmon and cook it either on the stove or in the oven. Kelsey has directions for stovetop cooking. If you use fresh salmon instead of smoked, increase the salt in the quinoa cooking water to ½ teaspoon.

While you can serve this immediately after mixing, it will be better if you give the flavors some time to meld, even just 15 minutes. This is particularly true if you’re using salty smoked salmon.

1 cup quinoa
2 cups water
¼ teaspoon salt
1 lemon, juice and zest
8 ounces smoked salmon, chopped small
1 tablespoon extra virgin olive oil
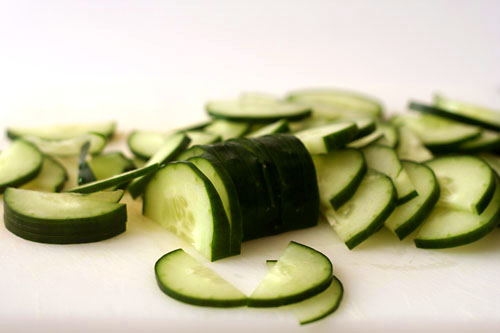
½ cucumber, quartered lengthwise and sliced ¼-inch thick
½ cup feta cheese, chopped
1 tablespoon fresh dill, minced

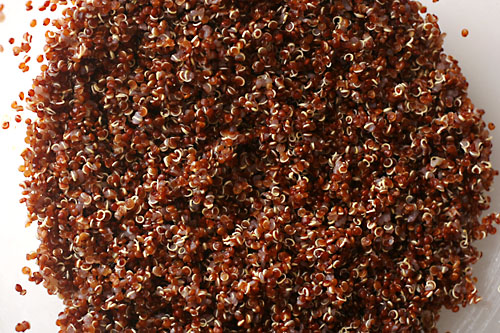
1. Place the quinoa in a fine-mesh strainer; rinse until the water no longer foams. In a medium saucepan, bring the water to a boil. Add the quinoa, salt, and the zest of the lemon. Reduce the heat to low, cover, and simmer for 15 minutes. After 15 minutes, turn the heat off; let the quinoa set, still covered, for another 5 minutes. Drain off any unabsorbed water.

2. Squeeze the juice of the lemon over the quinoa, then mix in the salmon and remaining ingredients. Serve immediately or refrigerate overnight.

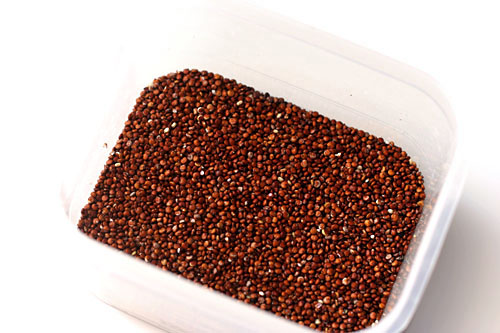
Oh yeah, I used red quinoa!  Regular quinoa will work every bit as well though.
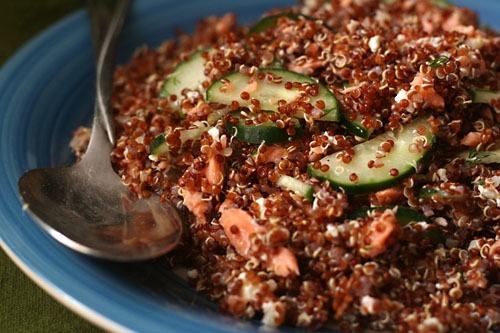
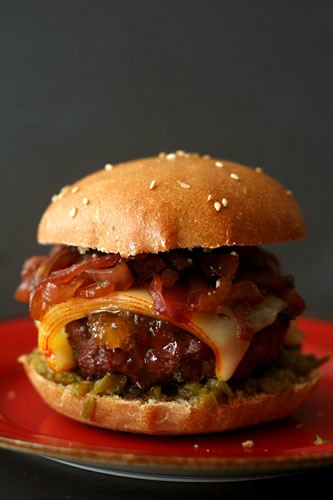
fig-glazed burgers with onion jam

We’ve gotten into a loose routine with our weekend meals. Friday is usually some sort of pizza, unless we get takeout sushi; Saturday with its meat-carb-vegetable makeup is the only day of the week I bother with side dishes; and Sunday is something sandwich-like. I’m not going to say that sandwich night is my favorite, but there’s something undeniably happy-making (or maybe that’s the Sunday champagne habit) about carbs and their fillings, whether its tacos, gyros, burgers, or whatever else.

We’re pretty attached to our backyard these days, so Sunday sandwiches are usually cooked on the grill. Not that I’m bored of green chile cheeseburgers (or that I won’t put green chile on a fig-glazed burger), but there are so many great burger ideas out there, it would be a shame to stick to one favorite. This is just the first on a long list of great options.

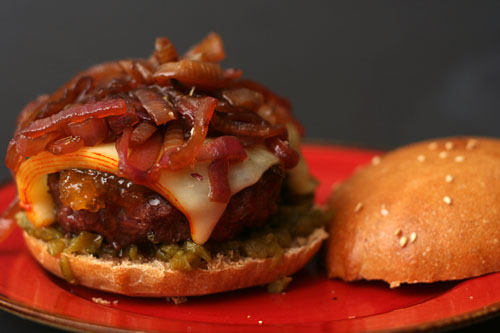
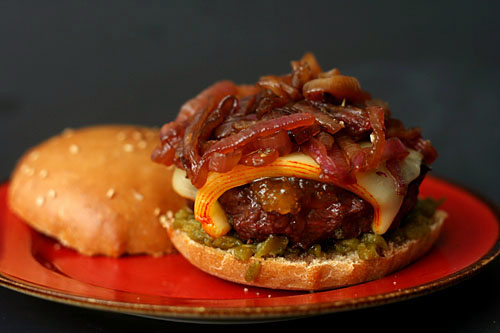
It’s odd that I chose the sweet plus meat burger off of that list, since it isn’t a combination I often crave. Or it wasn’t. It might be now. It doesn’t hurt that it’s also mixed with vinegary onion jam and melty cheese. Our Sunday dinner sandwich habit might turn into a Sunday fig-glazed burgers habit.

One year ago: Pizza with Figs, Prosciutto, Gorgonzola, Balsamic, and Arugula (oddly similar flavors)
Two years ago: Pasta with Cauliflower, Walnuts, and Ricotta Salata
Three years ago: Creamy Buttermilk Coleslaw (This is no longer my favorite classic coleslaw. I’ll post the new recipe soon.)

Printer Friendly Recipe
Fig-Glazed Burgers with Red Onion Jam (adapted from Southern Living via Pink Parsley)

Makes 4 burgers

I like my burgers a little smaller, so I made six out of this amount of meat mixture instead of four.

Red onion jam:
1 teaspoon olive oil
1 large red onion, sliced thin
Pinch salt
2 tablespoons brown sugar
¼ cup balsamic vinegar
¾ teaspoon chopped fresh thyme

Cheeseburgers:
1½ pounds ground chuck
2 tablespoons chopped fresh oregano
1 teaspoon kosher salt
1 tablespoon Dijon mustard
¼ teaspoon garlic powder
½ teaspoon ground black pepper
3 tablespoons fig preserves
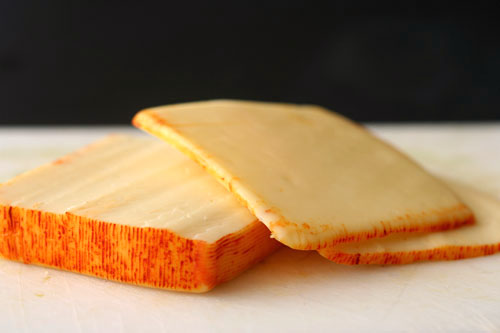
4 (½-oz) Muenster cheese slices
4 hamburger buns, split and toasted

1. In a large skillet, heat the oil over medium-high heat until it flows like water when you tilt the pan. Add the onions and salt; cook, stirring often, for 5 minutes, until the onions are just golden around the edges. Reduce the heat to medium-low; add the sugar, vinegar, and thyme; cover and cook 10 minutes, until the onion is tender and most of the liquid is absorbed.

2. Gently mix the beef, oregano, salt, mustard, garlic powder, and black pepper. Divide the mixture into four portions and shape each one into a ½-inch thick patty. Form a divot in the center of each patty.

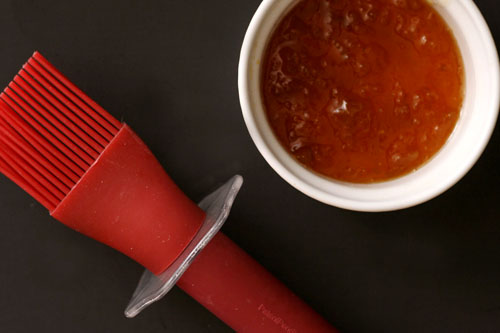
3. Prepare a medium-hot grill. Using a paper towel, grease the grates with vegetable oil. Grill the patties for 5 minutes; flip, and continue grilling another 5 minutes. Brush each patty with fig preserves and top with a slice of cheese. Grill an additional 2 minutes, or until the beef is cooked and the cheese is melted. Serve on buns with onion jam.

green pea ravioli in lemon broth

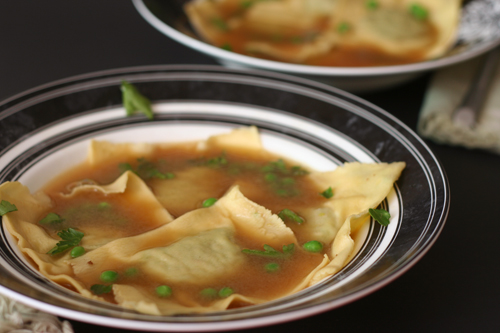
My notes call this Saturday night cooking adventure “Light Italian Meal”. I was experimenting with wet scallops – scallops that have been treated with sodium triphosphate to help them retain moisture. Cooks Illustrated has a recipe designed to make wet scallops palatable, so I gave it a go. I tried to keep the rest of the meal relatively light to compliment the scallops, starting with these ravioli, then moving onto insalata di crudita before serving the seared scallops with almond cream sauce. Pinot grigio and whole wheat ciabatta accompanied every part of the meal.

This was the only recipe I made that night that I was really excited by. The only reason the ciabatta doesn’t qualify is because I didn’t follow much of a recipe, and the salad, although crisp and fresh, was a fairly typical side salad. The scallops were a disaster. Not only was the almond cream sauce too rich, but the scallops themselves didn’t brown until they had overcooked into balls of rubber. What’s worse, while I set them aside to finish the sauce, the cooked scallops released a freaky blue liquid. I choked a down few and filled up on bread.

I wish I had made enough ravioli to fill up on those, rather than teasing myself with a small starter course serving. These pasta pouches with their vibrant filling were the highlight of my meal that night. There aren’t many ingredients in the filling, but each one has something to offer: the peas are both sweet and earthy, the shallots are bright, the parmesan salty. This humble mixture might have not had much to live up to compared to the rest of the meal, but it would have been just as special on its own.

One year ago: Vodka Gimlets
Two years ago: Pasta with Roasted Red Pepper Sauce
Three years ago: Cinnamon Rolls

Printer Friendly Recipe
Green Pea Ravioli with Lemon Broth (adapted from Gourmet via epicurious)

6 servings

I’ve doubled the amount of filling, because I only had enough filling for 9 ravioli, not the 18 the original recipe indicates.

Pasta:
1⅓ cups (6.4 ounces) all-purpose flour
2 eggs, lightly beaten

Filling:
2 cups baby peas, defrosted
1 tablespoon olive oil
2 shallots, minced
Salt
6 tablespoons freshly grated parmesan
6 tablespoons fresh bread crumbs

Broth:
4 cups chicken broth
2 garlic cloves, smashed
1 teaspoon freshly grated lemon zest
Squeeze fresh lemon juice

Garnish: fresh chervil or parsley and cooked peas

1. Combine the flour and eggs until smooth (either by hand, with a food processor, or with a stand mixer). Add more flour if the dough is sticky or more water if it’s crumbly. If you stick a dry finger into the center of the dough, it should come out nearly clean. Wrap the dough in a damp towel and set aside to rest while you prepare the filling.

2. Force the peas through the fine disk of a food mill into a bowl to remove their skins. Heat the oil in a small skillet over medium heat; add the shallot and a pinch of salt; cook until shallot is softened, 3-4 minutes, stirring occasionally. Combine the pea puree, cooked shallot, parmesan, and bread crumbs.

3. Divide the dough into 6 portions. Working with one portion at a time, flatten it and fold in thirds, like a letter. Roll it through the widest setting on a pasta roller. Repeat the folding and rolling 3-4 more times, flouring the dough as needed to prevent sticking. Adjust the pasta roller to the next thinnest setting; roll the pasta sheet through. Continue thinning the pasta until the next-to-thinnest setting. Lay the thinned pasta sheet on a dry dish towel. Repeat with the remaining portions of pasta.
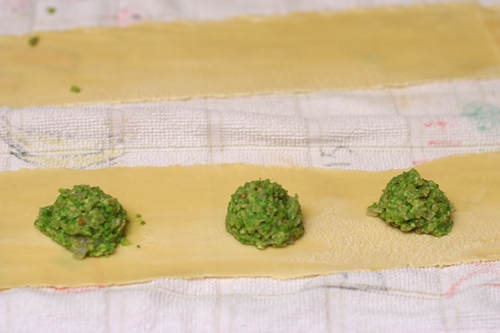
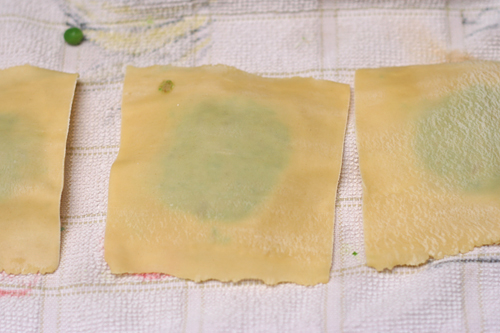
4. Place one rounded teaspoon of filling every 3 inches along the length of a pasta sheet. Using a pasta brush or your fingers, wet the pasta in between the rounds of filling. If the pasta sheet is at least 4 inches wide, fold it lengthwise over the filling. If the pasta sheet is too thin to fold lengthwise, lay a second pasta sheet over the filling. Press around each ball of filling to seal the two layers of pasta together. Use a pizza roller to cut between the filling to form squares of ravioli. Store the ravioli on a dry dish towel (there’s no need to cover it). Repeat with the remaining dough and filling.

5. Combine the broth, garlic, lemon zest, and salt and pepper to taste in a saucepan; bring to a simmer. Lower the heat and cover to keep warm.

6. Bring a large pot of water to a boil; add a tablespoon of salt and lower the heat until the water is at a lively simmer. Cook the ravioli in small batches until al dente, 2 to 3 minutes, using a skimmer or large slotted spoon to remove the ravioli from the boiling water. Divide the cooked ravioli between six soup bowls.

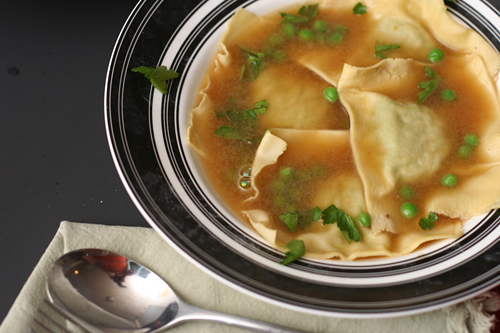
7. Discard the garlic in the broth. Ladle the hot broth over the ravioli. Garnish with herbs and cooked peas, if desired; serve immediately.

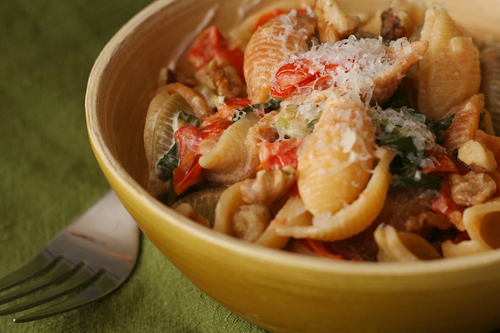
pasta with tomatoes, swiss chard, and goat cheese

I think people have the wrong impression about meals around here, particularly on weeknights. The assumption seems to be that someone who loves cooking must be hanging out in the kitchen making elaborate meals every single night. If only.

The reality is that my weeknight evenings are so full of other necessary chores that any meal that takes longer than half an hour stresses me out. A delay in dinner puts me behind schedule for the laundry folding and showering and ultimately ends up cutting into my sleep. And the less sleep I get, the more hateful my alarm is in the morning and the slower I get ready for work and the later I get to work and the later I have to stay at work and the less time I have for cooking the next evening.

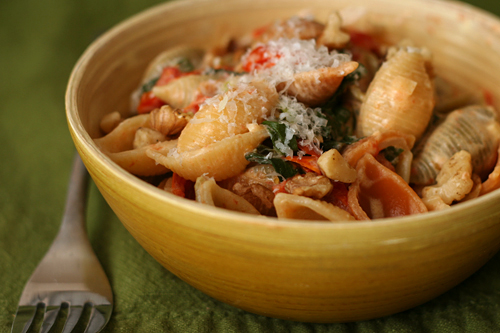
Pasta dishes that can be made in the time it takes to boil the pasta are a great option for a quick meal that breaks that cycle.  But the original version of this one wasn’t quite working for me.  I loved the idea of roasting the grape tomatoes before combining them with the other ingredients to accentuate their sweetness.  However, that extra step of heating the oven and throwing in the tomatoes apparently put me over the edge, because I felt vaguely flustered every time I made this.

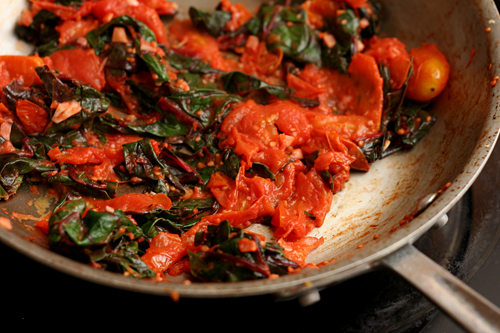
I needed to simplify it somehow, but I didn’t want to lose that step of concentrating the tomatoes’ flavor.  I love roasted tomatoes, but in this case, where they’re roasted quickly instead of low and slow, it seemed like the stovetop could get the effect right in the same pan used to cook the greens.  In fact, the juice released from the tomatoes helped the chard cook.  With only two dishes, one appliance, and half an hour, this was the perfect weeknight-friendly version of the dish.

One year ago: Artichoke Ravioli
Two years ago:  Cooks Illustrated’s Perfect Chocolate Chip Cookies
Three years ago: Spinach Feta Pine Nut Tart

Printer Friendly Recipe
Pasta with Green, Tomatoes and Goat Cheese (adapted from Food and Wine via Savory Spicy Sweet)

1 pound fusilli pasta
Salt
2 teaspoons olive oil
3 garlic cloves, sliced
Pinch of crushed red pepper
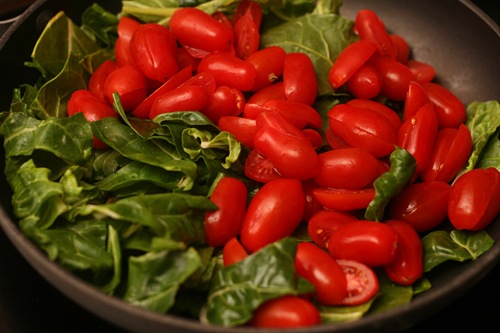
1 pint cherry tomatoes, halved
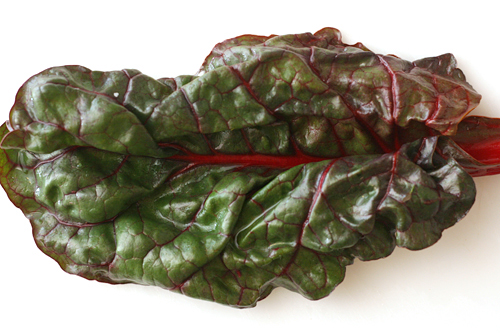
½ pound swiss chard, rinsed and coarsely chopped
½ pound soft goat cheese, thickly sliced
½ cup walnut halves, toasted
¼ cup freshly grated Parmigiano-Reggiano cheese

1. Bring 4 quarts water to rolling boil, covered, in stockpot. Add 1 tablespoon salt and pasta, stir to separate, and cook until al dente. Drain and return to stockpot.

2. In a large nonstick skillet over medium heat, heat the oil, garlic, and pepper flakes until the oil flows like water when the pan is tilted. Add the cherry tomatoes, swiss chard, and ¼ teaspoon salt; cover the pan and simmer, stirring occasionally and smashing the tomatoes, until the chard is tender and the tomatoes are soft.

3. Reserve 1 cup of pasta cooking water; drain pasta. Return the pasta to the cooking pot; stir in the goat cheese and ½ cup of the reserved cooking water. Add the chard and tomato mixture, walnuts, and cheese; stir to combine, adding more pasta water to loosen sauce if necessary.

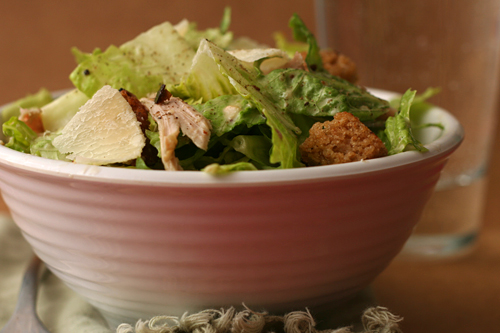
caesar salad

I didn’t always get Caesar salad. It seemed like it was just salad that was all lettuce and no goodies. Where’s the tomatoes, hard-boiled eggs, carrots, or cured meats?

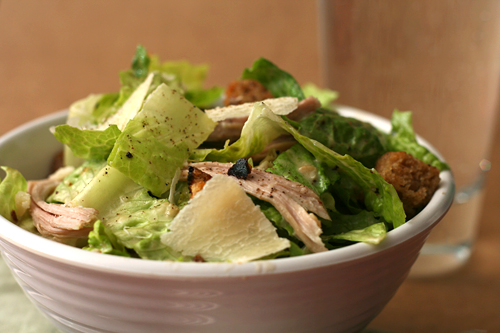
I understand now that that’s the point of it – that even without a range of colors, a salad can have a range of textures and flavors. Crisp lettuce, crunchy croutons, creamy dressing; salty parmesan, lightly bitter romaine, and most importantly, stinky garlic and wonderful savory anchovies.

Not everyone thinks anchovies are wonderful, I know. Some people – people who are otherwise not picky at all despite their reticence toward brownies – think they’re actually quite disgusting. Those people were not implicitly told about the anchovies in this recipe, and even when the amount was accidentally doubled one time, those people (or the one of those people I regularly cook for) still raved about the salad. Do not fear the anchovy.

But if you want to fear the raw egg (which I do not, as we all know from my cookie dough habit), you may, because I tested this out with mayonnaise instead of the yolks, and it was nearly as good as the original. With the addition of some leftover shredded chicken, this salad becomes a simple (if surprisingly unhealthy) meal.

One year ago: Cherry Tomato Salad
Two years ago: Lemon Poppy Seed Waffles
Three years ago: Sushi Rolls

Printer Friendly Recipe
Caesar Salad (from Cooks Illustrated)

Serves 4

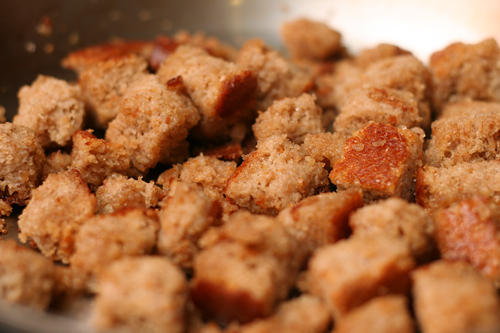
I confess that I did not care for this method of toasting the croutons. I was not able to achieve evenly browned croutons on the stovetop, probably because I wasn’t willing to use the full amount of oil. I’ll reproduce the original recipe below, but in the future, I’ll toast the lightly oiled croutons the oven and then toss them with the oil/garlic mixture.

If you don’t want to work with raw egg, substitute 1-2 tablespoons of mayonnaise for the yolks.  This will result in a slightly thicker dressing, but not a bad one.

Croutons:
5 tablespoons extra virgin olive oil
1 medium garlic clove, pressed through a garlic press (or pureed on the tines of a fork)
5 cups (¾-inch) ciabatta bread cubes
¼ cup water
¼ teaspoon table salt
2 tablespoons finely grated Parmesan

Salad:
1 large garlic clove, pressed through a garlic press (or pureed on the tines of a fork)
2-3 tablespoons juice from 1 to 2 lemons
½ teaspoon Worcestershire sauce
6 anchovy fillets, mashed to a paste with a fork (1 tablespoon)
2 large egg yolks
5 tablespoons canola oil
5 teaspoons extra virgin olive oil
1½ ounces (¾ cup) finely grated Parmesan
Ground black pepper
2-3 romaine hearts, cut crosswise into ¾-inch-thick slices, rinsed, and dried very well (8-9 lightly pressed cups)

1. For the croutons: Combine 1 tablespoon oil and garlic paste in small bowl; set aside. Place bread cubes in large bowl. Sprinkle with water and salt. Toss, squeezing gently so bread absorbs water. Place remaining 4 tablespoons oil and soaked bread cubes in 12-inch nonstick skillet. Cook over medium-high heat, stirring frequently, until browned and crisp, 7 to 10 minutes.

2. Remove skillet from heat, push croutons to sides of skillet to clear center; add garlic/oil mixture to clearing and cook with residual heat of pan, 10 seconds. Sprinkle with Parmesan; toss until garlic and Parmesan are evenly distributed. Transfer croutons to bowl; set aside.

3. For the salad: Whisk garlic paste and 2 tablespoons lemon juice together in large bowl. Let stand 10 minutes.

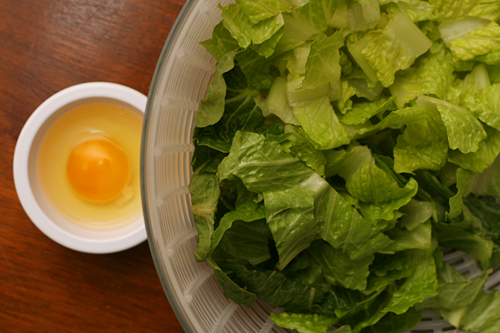
4. Whisk Worcestershire sauce, anchovies, and egg yolks into garlic/lemon juice mixture. While whisking constantly, drizzle canola oil and extra virgin olive oil into bowl in slow, steady stream until fully emulsified. Add ½ cup Parmesan and pepper to taste; whisk until incorporated.

5. Add romaine to dressing and toss to coat. Add croutons and mix gently until evenly distributed. Taste and season with up to additional 1 tablespoon lemon juice. Serve immediately, passing remaining ¼ cup Parmesan separately.

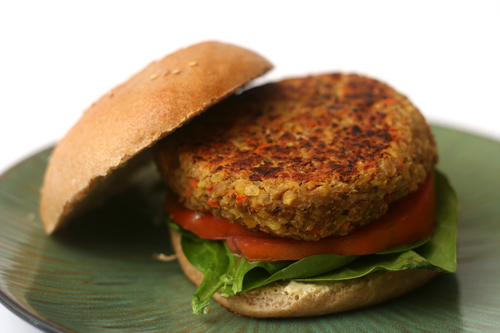
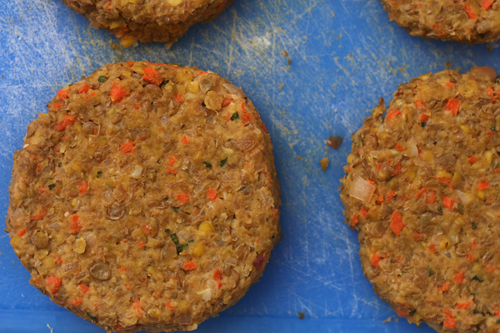
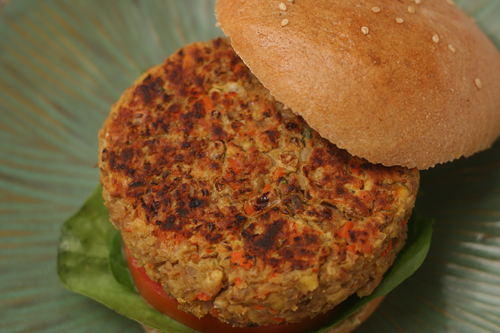
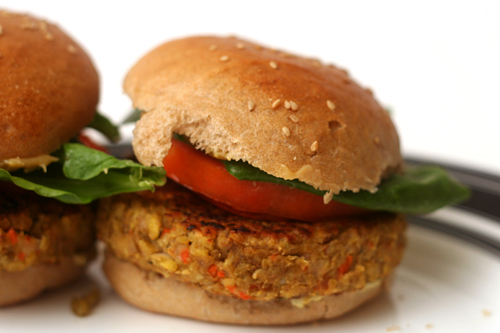
lentil goat cheese burgers

Burgers are just sandwiches with patties in the middle. I don’t care if that patty is beef, bird, or beans. What I do require is that it not be bread.

A carb-filled patty between two ends of a bun doesn’t make nutritional sense, but it does seem like most vegetarian burgers are bound by large amounts of bread crumbs, oatmeal, or other grains. Whether whole or refined, these are still grains where I want there to be protein.

Cara is a great source for high-protein, low-carb ideas like these lentil burgers, which are bound with just a tablespoon of bread crumbs per serving. The protein – and, more importantly, the flavor – is increased even more with the addition of creamy, tangy goat cheese, one of my favorite ingredients.

While certainly healthy enough for a good weeknight dinner, prepping these burgers is not a short process from start to finish. However, the active time is not unreasonable, making these a great option to make ahead of time, leaving just the final searing for dinner time. It’s nice to have a meal as hearty but nutritious as this one stashed in the freezer.

One year ago: Brown Soda Bread
Two years ago: Deli-Style Rye Bread
Three years ago: Rice Pudding

Printer Friendly Recipe
Lentil Goat Cheese Burgers (adapted from Cara’s Cravings)

Make 4 burgers

Don’t be shy with the salt. I always need more than I expect in these.

¾ cup dried lentils
1 bay leaf
salt
1 large carrot, coarsely chopped
2 large shallots, coarsely chopped
2 cloves garlic
1 tablespoon olive oil, divided
1 tablespoon balsamic vinegar
4 ounces goat cheese
¼ cup breadcrumbs (fresh or dried)
¼ teaspoon black pepper
1 egg
for serving: buns, mustard, lettuce, tomato

1. Combine lentils, bay leaf, ½ teaspoon salt and 3 cups water in medium saucepan; bring to a boil over medium-high heat. Reduce the heat and simmer until the lentils are tender, 18-20 minutes. Drain the lentils, discarding the bay leaf.

2. Meanwhile, process the carrot, shallots, and garlic in the food processor until finely chopped but not pureed, about 5 seconds. (Do not clean processor bowl or blade.) Heat 1½ teaspoons olive oil in a medium nonstick skillet over medium heat; sauté the vegetables with a pinch of salt until softened and the shallots just browns around the edges, about 5 minutes. Add the vinegar; cook, stirring occasionally, until it has reduced to a syrupy consistency, 1-2 minutes.

3. Combine the lentils, sautéed vegetables, cheese, bread crumbs, and pepper in the food processor; process until evenly mixed and finely ground. Taste and adjust the seasoning if necessary. Add the egg; pulse until just combined.

4. Divide the dough into four portions; shape each one into a disk about ½-inch tall and 4 inches across (or approximately the diameter of your burger buns). Chill, uncovered, for at least 30 minutes or up to 2 days (cover if longer than 30 minutes).

5. Heat the remaining 1½ teaspoons of oil in a 12-inch nonstick pan over medium to medium-high heat. Using a spatula, carefully lower each patty into the pan; cook without moving for 4 minutes, until the bottom side is browned. Flip the patties and continue cooking for another 6 minutes until the second side is browned. Serve immediately with buns and toppings.

baked reuben dip

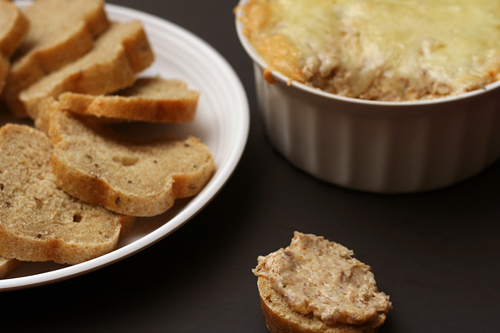
You don’t have to make this the way I made this. Making things more difficult than necessary is the way I do things, but I understand that I am a weirdo. Feel free to buy corned beef at the deli instead of brining and boiling your own brisket. I’m sure you can also pick up some perfectly respectable rye bread. I draw the line at using Thousand Island salad dressing instead of mixing up a few ingredients for the traditional Russian dressing (which is similar, but not identical, to Thousand Island).

I make mayonnaise-based baked dips exactly once a year, for the Super Bowl. Because I love them, but they are, after all, a bowl of fat that you spread on carbs.  This was our third-quarter snack, and even after a quarter of chips and dips and another of vegetables with dip, we scarfed down a considerable amount of this dip.

My biggest worry with this recipe was that it was not a sandwich, as reubens are one of Dave’s favorite foods. I was fully expecting Dave to consider this “good…but I’d rather just have a reuben.” He said nothing of the sort. Now that’s a good dip – fully worthy of being my one choice this year, and, it goes without saying, of the time I spent obsessively making most of the components from scratch.

One year ago: Honey Ginger Pork Tenderloin
Two years ago: Chicken Artichoke Pesto Calzones
Three years ago: Banana Walnut Pancakes

Printer Friendly Recipe
Baked Reuben Dip
(adapted liberally from allrecipes and epicurious)

Serves 4

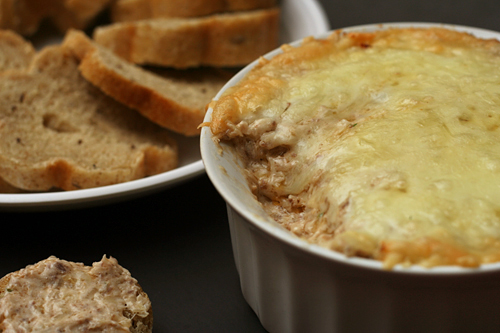
See that thick layer of swiss cheese on top? Don’t do that. Let the mixture itself brown, not just the cheese. There’s no need to have a layer of cheese armor on top of the dip.

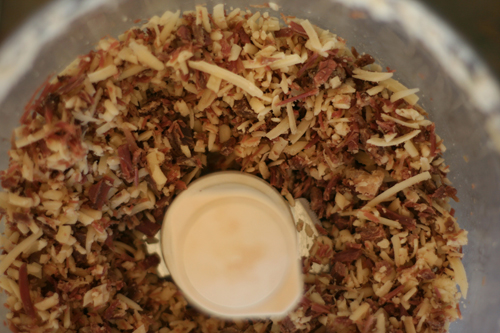
I used the food processor to shred the cheese, chop the meat, and mix everything. All that mixing probably accounts for the uniform grey-ness of my dip. Another factor is that my home corned beef is more of a muted purple color than storebought version because it doesn’t have the nitrates that keep the meat red.

I just actually read through that allrecipes recipe for the first time, and apparently it doesn’t call for mixing all of the ingredients together anyway, just layering them. That might make this more attractive too. Although sometimes taste trumps looks, and ugly food is okay.

¼ cup mayonnaise
2 ounces cream cheese, softened
1 tablespoon ketchup
1 tablespoon grated onion
1 tablespoon horseradish
1 teaspoon Worcestershire sauce
2 tablespoons minced parsley
8 ounces sauerkraut, rinsed and squeezed dry
4 ounces corned beef, shredded
6 ounces (1½ cups) shredded Swiss cheese

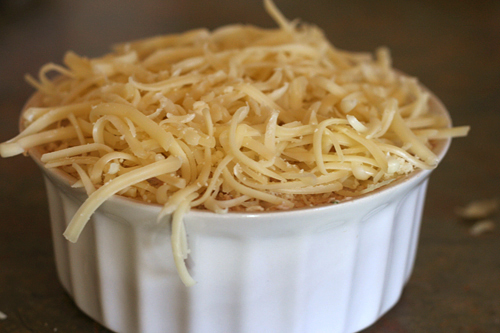
Preheat oven to 350 degrees. In a large bowl, mix the mayonnaise, cream cheese, ketchup, onion, horseradish, Worcestershire sauce, and parsley until evenly combined. Stir in the sauerkraut, beef, and cheese. Spread the mixture in a 1-quart casserole dish. Bake 20-25 minutes, until bubbling and golden. Serve with rye bread.

corniest corn muffins

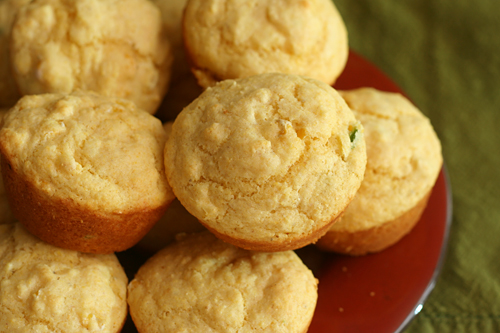
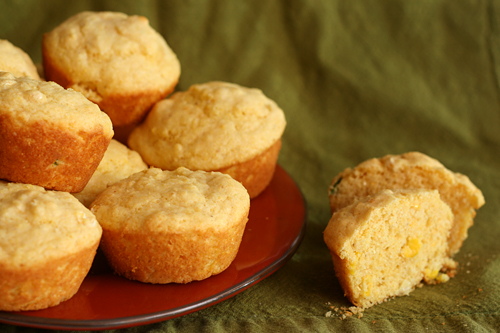
I hemmed and hawed over these more than muffins probably deserve. The issue is that while I like corn on its own, I struggle to enjoy the crisp kernels in soups, breads, or stews. On the other hand, it’s nice to have some textural contrast in muffins – and what better to provide that in a corn muffin than corn?

In the end, in the spirit of Not Being Picky, I left the corn in (without pureeing it like I’d also considered). And I’ll be darned if one of these, served alongside a small bowl of chili topped with large amounts of Greek yogurt and avocado, wasn’t one of the most satisfying meals I’ve eaten in days.

These muffins were chosen for Tuesdays with Dorie by Jill, and she will post the recipe. I reduced the sugar to ¼ cup (per Deb’s recommendation), added half a minced jalapeno, and did not increase the salt(!). The cornmeal I used (Arrowhead) was finely ground, which I believe is what leant my muffins such a tender, almost flaky texture.

One year ago: Thumbprints for Us Big Guys
Two years ago: Lemon Cup Custard (my pick)


roasted tomato soup

When I was a kid, my friend Katie and I played a game in which we had a restaurant. We wrote up a menu and would let our parents order food from it, and then we’d bring them what they ordered. In other words, our parents paid for their food twice – once at the grocery store, and then a second time to Katie and I after we heated it up in the microwave for them.

Among other delicacies, our menu included nachos (Cheez Whiz and chips) and tomato soup. Tomato soup was probably our specialty. At Katie’s house, the Campbell’s concentrate was mixed with milk, but at my house, we added water. Katie and I were nothing if not accommodating to our customers’ preferences.

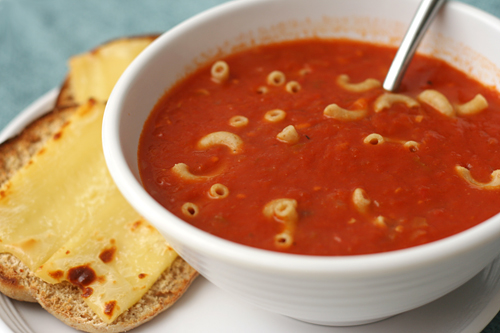
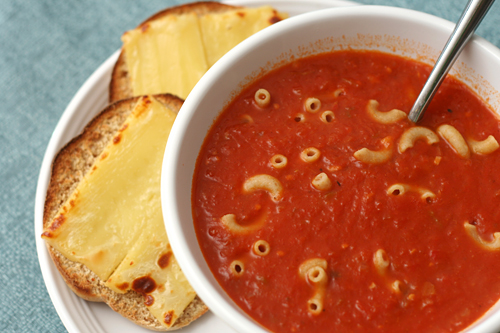
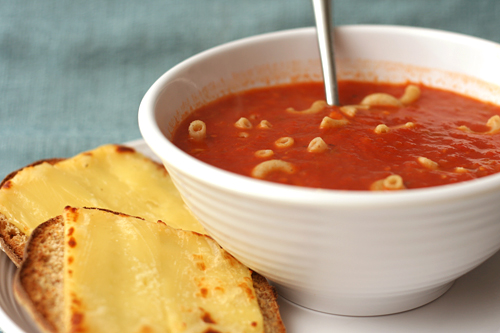
This tomato soup is not that tomato soup. It’s brighter, fresher, but still deeply flavored from the roasted tomatoes. The shallots make it just a little sweet, and a pinch of allspice adds warmth. This soup, topped with whole wheat macaroni noodles and served alongside cheese toast, is my favorite meal. It’s even worth ordering in a real restaurant.

One year ago: Masa Pancakes with Chipotle Salsa and Poached Eggs (I’m about halfway through that same bag of masa harina.)
Two years ago: Spinach Bread
Three years ago: Raspberry Bars

Printer Friendly Recipe
Roasted Tomato Soup (adapted from Cooks Illustrated)

6 servings

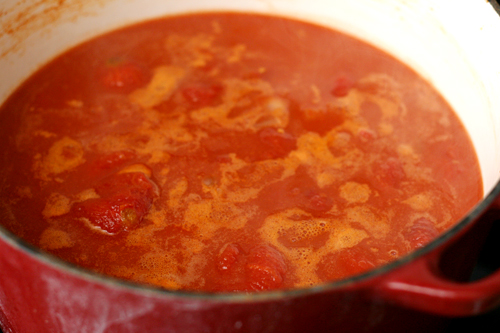
This recipe is messier without an immersion blender, but I made it that way for years. Use a large slotted spoon to transfer the solids to the blender with a cup or two of liquid and blend to puree. Pour the pureed mixture back into the liquid; stir in the brandy. You can blend everything instead of just the solids, but the soup will turn orange instead of red.

Feel free to add in a few tablespoons of cream (or pureed cottage cheese for a healthier alternative) at the end if you’re like Katie’s family and prefer your tomato soup creamy.

2 (28-ounce) cans whole tomatoes in juice
1½ tablespoons brown sugar
2 tablespoons butter
4 shallots, chopped
1 tablespoon tomato paste
⅛ teaspoon allspice
1¾ cup low-sodium chicken broth
¼ cup brandy

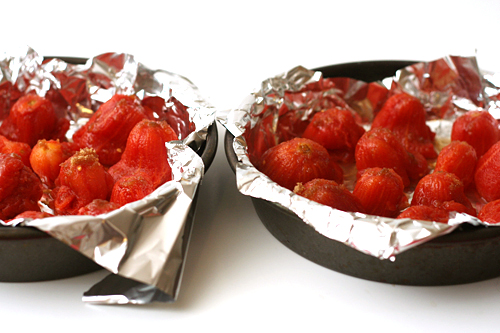
1. Adjust an oven rack to the upper middle position and heat the oven to 450 degrees. Line the bottom and sides of two 8- or 9-inch round pans with aluminum foil. Use a slotted spoon to remove the tomatoes, one by one, from their juice. Open the tomato on the side opposite the stem. Holding the tomato loosely in a fist, gently squeeze the tomato to remove most of its juice. Place the tomato stem-side up on one of the prepared pans. Repeat with the remaining tomatoes. Sprinkle the tomatoes with the brown sugar.  Roast the tomatoes until they are dry and lightly browned, about 45 minutes. Reserve the tomato juice.

2. Melt the butter in a large saucepan over medium-low heat. Add the shallots, tomato paste, and allspice to the pot; stir, then cover the pot and cook, stirring occasionally, until the shallots are soft, about 10 minutes. Add the chicken broth, reserved tomato juice, and roasted tomatoes. Bring to a simmer over medium-high heat, then reduce the heat to low, cover, and simmer 15 minutes. Use an immersion blender to puree the soup. Stir in the brandy and serve.

This recipe is in one of my earliest blog entries, but I have simplified and healthified (but not de-tastified) the soup since then, so I thought it was worth posting an updated version.

braised white beans with zucchini, tomatoes, and potatoes

Dave tends to have healthier food preferences than me. It was his suggestion that we eat vegetarian or seafood meals on weekdays and save meat for the weekends. My initial efforts to find a vegetarian cookbook that reflected how I liked to cook was years ago, and the pickings then, unlike now, were slim. Back then, most vegetarian cookbooks seemed to tend toward the gourmet end of the spectrum, with lengthy preparations and rare ingredients.

Jeanne Lemlin’s Vegetarian Classics was exactly what I was looking for. Generally, the dishes are quick, based on common ingredients and cooking techniques, and accessible to non-vegetarians. I liked it so much that I bought it for my sister. She’s a busy working mom with no interest in becoming a vegetarian, but I still thought this was a cookbook she’d get a lot of use of.

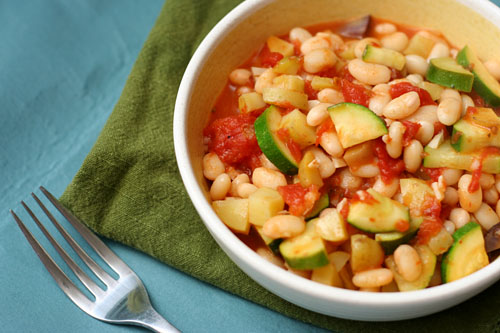
This recipe is one of my favorites from the book. It fulfills that ultimate trifecta – easy, healthy, delicious. It’s the slightest bit spicy from crushed red pepper, the zucchini is just tender, and the beans and potato soak up all of the garlicky tomato juice. And I have Dave to thank; otherwise, I don’t know that I ever would have searched out a vegetarian cookbook.

One year ago: Roasted Garlic Balsamic White Bean Dip
Two years ago: Honey Yogurt Dip
Three years ago: Apple Galette

Printer Friendly Recipe
Braised White Beans with Zucchini, Tomatoes, and Potatoes (adapted from Jeanne Lemlin’s Vegetarian Classics)

Serves 2-3

1 tablespoon extra virgin olive oil
4 garlic cloves, minced
¼ teaspoon crushed red pepper flakes
1 (14-ounce) can diced tomatoes
¼ cup water
¼ teaspoon dried rosemary, crushed
¼ teaspoon salt
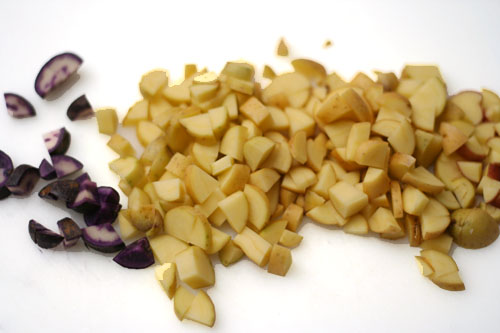
1 medium Yukon gold potato, cut into ¼-inch dice
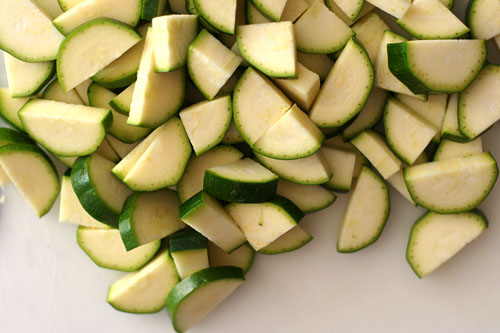
1 zucchini, quartered lengthwise and sliced into ¼-inch slices
1 (14-ounce) can Great Northern beans, rinsed and drained

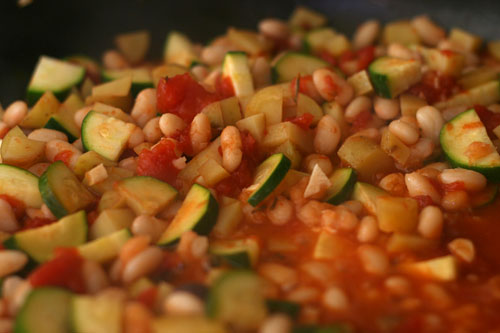
1. Heat the oil, garlic, and red pepper in a 12-inch nonstick skillet over medium heat. Cook for about 30 seconds after the garlic begins to sizzle. (It should not become at all colored.) Stir in the tomatoes, water, rosemary, salt, and potatoes. Cook, covered, at a lively simmer for 15 minutes, or until the potatoes are almost cooked through.
2. Mix in the zucchini and beans. Cover the pan again and cook, stirring often, 10 minutes more, or until the zucchini and potatoes are tender. At this point check the consistency of the sauce; it should be thick and soupy, not dry or watery. Add a bit of water if the mixture doesn’t have much sauce; cook it uncovered if the juices seem watery. Serve in large pasta bowls, preferably, or on plates.
I have blogged about this recipe before, but I felt that a recipe as good as this one deserved a fresh entry.