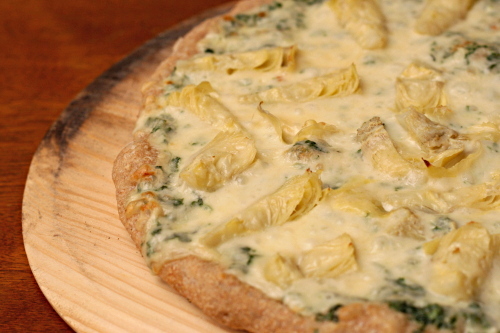
spinach artichoke pizza

I learned a fun fact at work the other day. The word bikini comes from Bikini Atoll, where a nuclear test bomb had recently been dropped. The designer of the bikini expected his new fashion to be “explosive”, and nuclear anything was all the rage back then. Yes, only sixty years ago, bikinis were nonexistent.

Now that they are available, I have a few, and they’re cute, and I want to wear them. So spinach artichoke dip, always tempting me from restaurant menus, generally has to be avoided. Dipping bread into a bubbling pot of cream cheese, mayonnaise and mozzarella will have me exploding right out of my bikini.

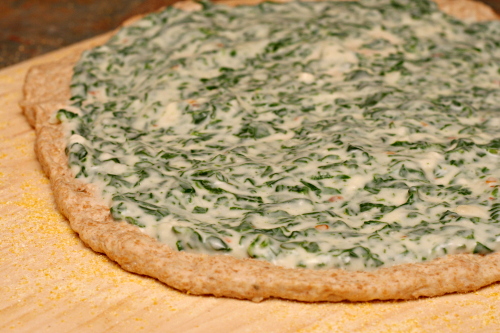
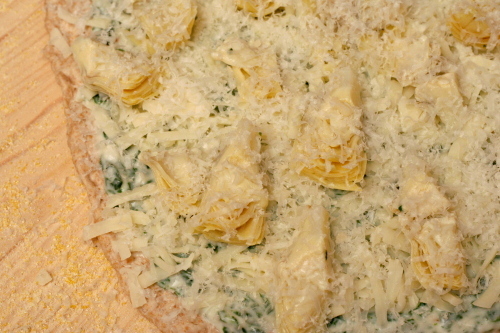
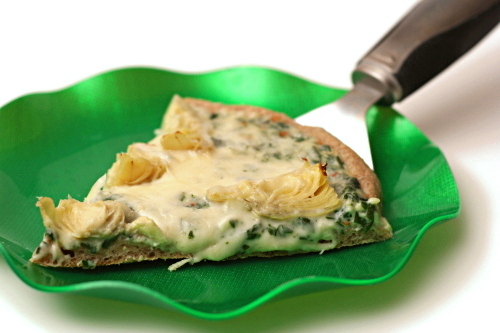
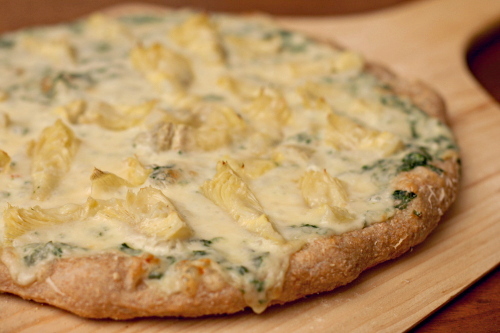
The flavors, however, are a natural for pizza. Keep the bread, but make it whole wheat with my favorite whole wheat adaptation trick. Replace the cream cheese and mayonnaise with a thick béchamel, and the rest of the ingredients – spinach, artichoke, mozzarella, parmesan – are reasonably healthy and adapt perfectly for pizza.

Okay, so here’s the problem with my “make healthier food –> wear bikini” philosophy. If the healthy food is this good, I’m going to end up eating more of it than I should! I mean, bread topped with cheese, artichokes and spinach? Of course that was irresistible. Of course I’m going to need several slices to be satisfied, and of course I’ll still look longingly at the leftovers. Okay, so maybe I’ll end up looking longingly at my bikinis this summer, but at least I’ll be satisfied with my one-pieces suits.

One year ago: Potato Galette
Two years ago: Orange Vanilla Opera Cake

Printer Friendly Recipe
Spinach Artichoke Pizza

Makes 2 12-inch pizzas or about 6 servings

You can use frozen artichokes instead (they’re not available in my town), although I’ve never been sure if those need pre-cooking before they’re added to pizza. If you used canned artichokes, I recommend rinsing them, because they’re canned in citric acid, and the acidity was a little distracting.

Of course you can make pizza without a pizza stone. Just use a baking sheet (possibly preheated). However, if you make pizza or rustic breads often, a pizza stone is a small investment for a large increase in perfectly crisp crusts.

2 tablespoons butter
2 cloves garlic, minced
½ teaspoon crushed red pepper flakes
2 tablespoons flour
1½ cup milk (any fat content)
¼ teaspoon salt
½ ounce (¼ cup) parmesan plus 1 ounce (½ cup)
7 ounces fresh spinach, washed and roughly chopped
½ recipe (whole wheat, if you want) pizza dough or 1 pound of your favorite pizza dough
6 ounces (1½ cup) shredded mozzarella (skim works great)
1 (14-ounce) can artichokes, drained, rinsed and dried, quartered

1. Place a pizza stone on the bottom rack of the oven and preheat the oven to 525ºF.

2. In a medium heavy-bottomed saucepan, melt the butter over medium heat. When the foaming subsides, add the garlic and red pepper flakes; cook, stirring constantly, until fragrant, 30 to 60 seconds. Add the flour; continue cooking and stirring for 2 minutes. Gradually whisk in the milk. Bring the mixture to a simmer over medium-high heat, stirring frequently, then reduce the heat to medium-low. Continue to simmer, stirring occasionally for about 5 minutes. Stir in the salt and ¼ cup (½ ounce) of the parmesan.

3. Meanwhile, add the spinach (if the spinach isn’t damp from being washed, also add a couple tablespoons of water) to a medium saucepan set over medium-high heat. Cook and stir until the spinach just wilts, about 1 minute. Remove the spinach from the pan and place it in a clean kitchen towel. Squeeze the spinach as dry as possible, then add it to the béchamel from step 1.

4. Divide the dough and shape each portion into a ball. Let the balls of dough relax for 10-30 minutes. Work with one ball of dough at a time on a lightly floured surface. Flatten the dough, then pick it up and gently stretch it out, trying to keep it as circular as possible. Curl your fingers and let the dough hang on your knuckles, moving and rotating the dough so it stretches evenly. If it tears, just piece it together. If the dough stretches too much, put it down and gently tug on the thick spots.

5. Dust a pizza peel (or the back of a large baking sheet) generously with cornmeal and transfer the round of dough to the peel. Rearrange the dough to something reasonably circular; stab it several times with a fork. Spread ½ of the spinach mixture over the dough, then top with half of the mozzarella, half the artichokes, and half of the remaining parmesan.

6. Transfer the pizza to the hot baking stone, and bake for about 6-10 minutes, until the cheese is bubbling and the crust is spotty brown. Let the pizza cool on the peel for about 5 minutes before slicing and serving. Repeat with the remaining ingredients.
quinoa tabbouleh

I have annoying eating habits at work. Carrots – crunchy. Bananas – smelly. Hard-boiled eggs – crunchy (during the peeling) and smelly. My officemate is very tolerant. And on our first day in the office together, she asked me, “So is that how you stay thin? By eating healthy all the time?” Hmm…

  1. Call me thin some more, if you will. I will use it as an excuse to skip my workout this evening.
  2. Define “all the time.” Because…no. Not so much.

She asked me what I normally make for dinner, and I was at a loss for an answer. I’m a food blogger; I repeat dinners maybe once every couple of months. The quickest way I could think to answer that question was to give her the link to my blog. My third day at work, and I already outed myself as Food Obsessed.

She asked me what I was making for dinner that night, and when I answered, she asked what quinoa was. I was reminded: I’m the weird one when it comes to food. And so are you, probably, if you’re reading a food blog. I wonder what percentage of people in my small isolated desert town know what quinoa is?

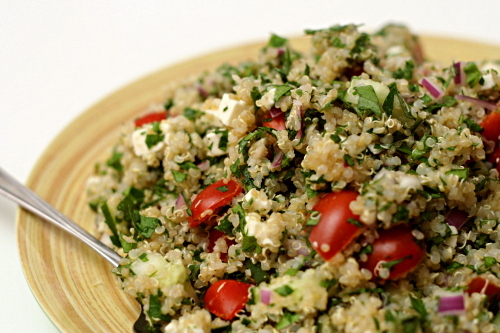
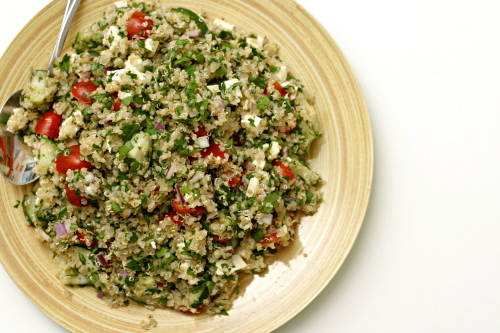
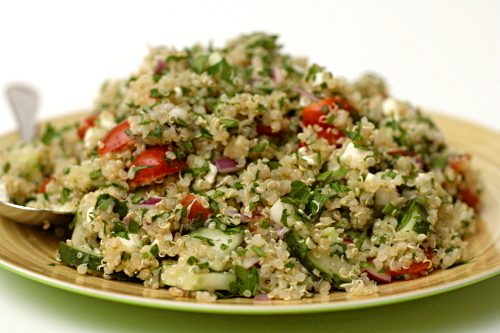
Which is sad, because, as you know if you are also one of the Food Obsessed, quinoa is what all of the other whole grains (I know, I know, not technically a grain) want to be – hearty and healthy, but fluffy and slightly sweet, the way most grains don’t taste until they’re refined. Mixing it with vegetables, herbs, and feta makes it even healthier, which is perfect because that way I get dessert.  No one can eat healthy all the time, right?

One year ago: Strawberry Lemon Sorbet
Two years ago: Ricotta Spinach Tofu Ravioli

Printer Friendly Recipe
Quinoa Tabbouleh (adapted from Bookcook via the kitchn)

Makes 3-4 main course servings

Some things: I didn’t quite follow this method to mellow the bite of the onions, and my method did not work. The leftovers were particularly intense. Soak the onion in water! You may want to add the garlic too, although I have no evidence that this method would work for garlic. It just seems like it could.

The original recipe includes mint, but I don’t usually like mint with savory food. It also called for olive oil, and I intended to add it but after tasting the salad, the oil didn’t seem necessary. And less oil in dinner means more cookies for dessert.

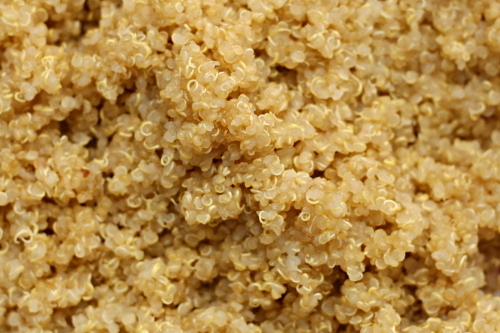
The standard directions for cooking quinoa seem to be 1 cup quinoa to 2 cups water, so I’ve left that as it was in the original recipe. But I’m suspicious: my pot had a lot of water left in it at the end of cooking that had to be drained off. Next time I’m trying 1½ cups water for 1 cup quinoa.

I know traditional tabbouleh is more parsley than grain, but it’s also more side dish than main, which wasn’t what I was going for.

1 cup dry quinoa
2 cups water
½ teaspoon salt
½ red onion, diced fine
2 cloves garlic, minced
1 cup cherry tomatoes, halved
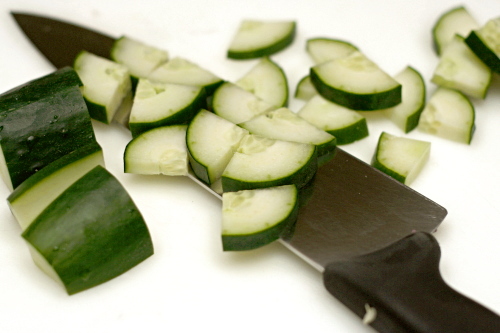
1 cucumber, quartered lengthwise and sliced ⅛-inch thick
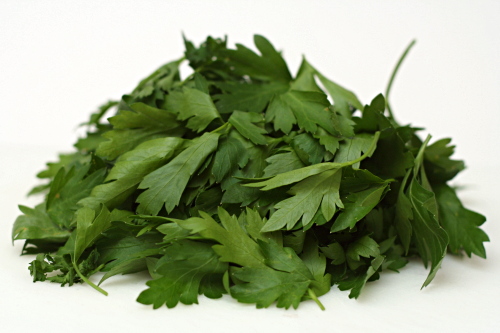
1 bunch parsley (about 2 cups), minced
8 ounces feta, crumbled
2 tablespoons fresh lemon juice

1. Rinse the quinoa well under cold water. Put it in a medium saucepan with 2 cups of water and ½ teaspoon salt. Bring the water to a boil over high heat, then reduce the heat to low and cook, covered, for 20 minutes. Transfer the cooked quinoa to a large bowl to cool slightly.

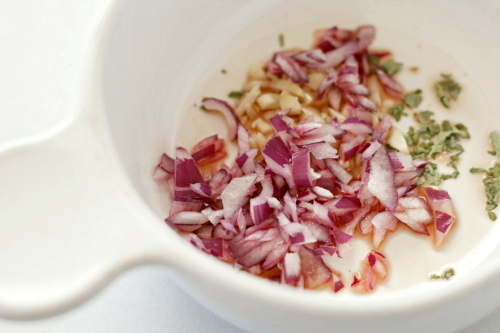
2. Meanwhile, in a small bowl, cover the diced onion and a pinch of salt with water. Let the onion soak while you prepare the other ingredients.
3. Drain the onions; add them to the bowl along with the garlic, tomatoes, cucumber, parsley, and feta; stir to combine. Add the lemon juice and toss to coat. Taste for seasoning (more salt? more lemon juice?) and serve.

grilled artichokes

When it comes to groceries, I’m not particularly thrifty. I don’t know if my old grocery store (the much-missed Wegman’s) even had sales, and if they did, it wasn’t on anything I was buying. I see more sales at my new grocery store; I don’t plan my shopping around them, but I can’t always resist them either.

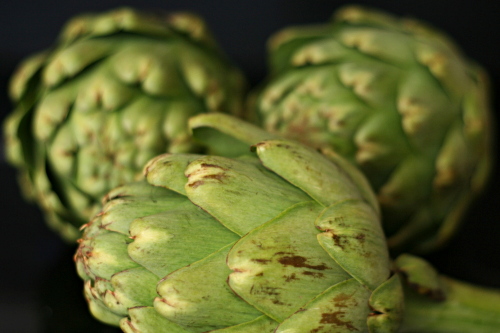
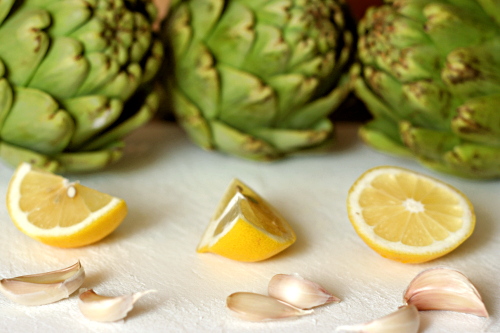
Fresh artichokes for 69 cents each! That is a deal that is not to be passed up, especially when I was keeping an eye out for some fancy sides to compliment my celebration lamb.

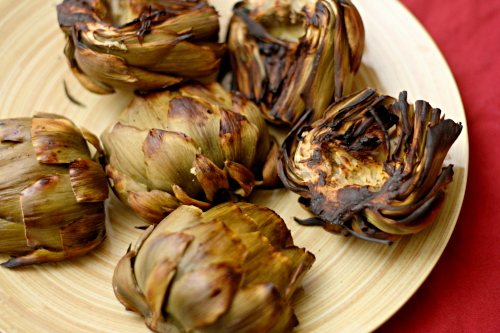
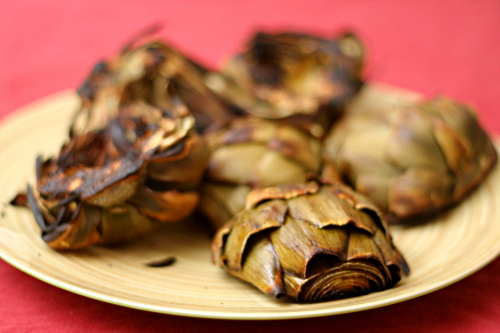
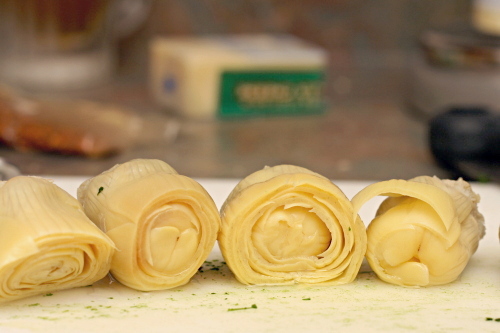
When Dave and I grill, we like to cook the whole meal on the grill, so I definitely wanted to grill the artichokes. Katie’s recipe uses the perfect approach, because the artichokes are steamed in foil packets first, and then unwrapped and seared over a hot flame. The artichokes end up both perfectly tender and decorated with beautiful grill marks.

Artichokes aren’t as time-consuming to prepare as I used to think, but they’re still pretty messy to eat. You remove individual leaves and scrape the meaty edible part off with your teeth, until you get to that delicious heart. Artichokes are good on their own, but they’re even better with a decadent dipping sauce; we used the sauce that was served with the lamb. It made a perfect compliment to perfect artichokes that accompanied a perfect meal.

Two years ago: Asparagus and Arugula Salad with Cannellini Beans

Grilled Artichokes (adapted from Good Things Catered)

Katie added extra lemon to the packets and served the grilled artichokes with cherry tomatoes. It makes for a beautiful presentation, but didn’t compliment the flavors I was serving these with. However, it serves as a great example of how easily this recipe can be adapted to the meal you’re serving.

Serves 4

8 cloves garlic, smashed and peeled
4 globe artichokes
salt and pepper
1 lemon, quartered
about 2 tablespoons olive oil

1. Prepare a two-level fire, where one side of the grill is hotter than the other.

2. Tear off four 12-inch pieces of aluminum foil. Place two cloves of garlic in the center of each square of foil.

3. Working with one artichoke at a time, cut the stem off and the top 1½ inches of leaves. Cut the sharp tips off of the outside leaves. Halve the artichoke and carve out the fuzzy purple choke. Place the artichoke halves in one square of foil, season with salt and pepper, squeeze one lemon quarter over it, and drizzle with about 1½ teaspoons of oil. Enclose the artichoke in the foil. Repeat with the remaining three artichokes.

4. Place the foil packets on the cooler side of the grill and cook, rotating occasionally, for 25-30 minutes, until the center of the artichokes are tender. Remove the artichokes from the foil and place, cut side down, on the hot side of the grill. Cook for about 2 minutes, until seared.

5. Serve immediately, with a dipping sauce if desired.

corned beef hash

One time at the zoo, I walked by the reindeer exhibit, but they weren’t out. Huh, I thought. Bummer. I would have liked to see the reindeer. But on the other side of the path, there was another animal to ooh and ahh over, and I moved on. When the reindeer came back out just a few minutes later, I overheard someone tell her friend that they could go see them now, and the lady said “Reindeer? I was excited about that 10 minutes ago!”

Reindeer lose their interestingness after 10 minutes apparently.

The moral of the story is this: No one cares about corned beef in May. You were excited about that 2 months ago. But, I am not the type of person to sit on an entry (or two, in this case) for 11 months until its season of popularity comes back, so if you’re not one to cook corned beef outside of March, you are missing out you can bookmark this post for next year.

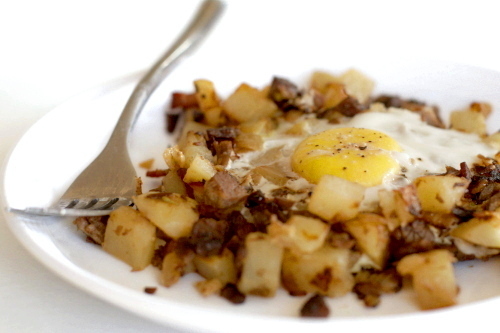
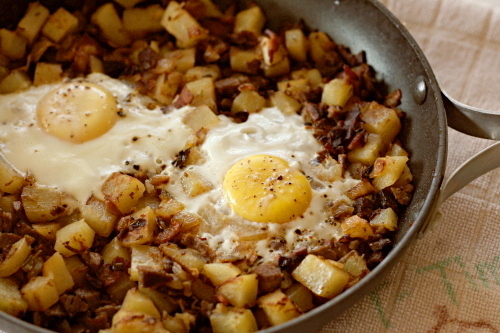
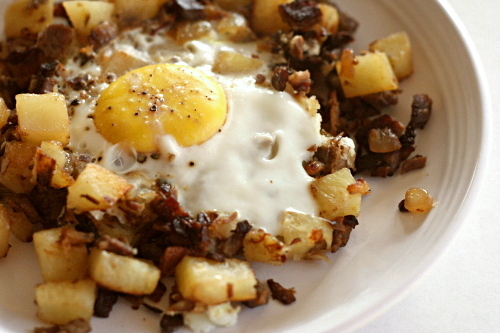
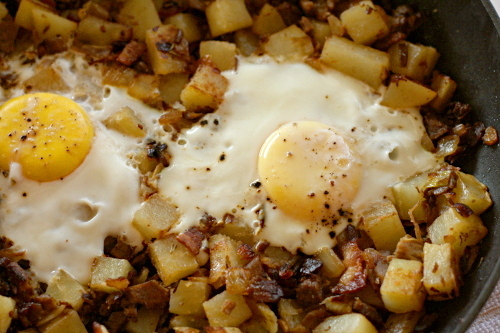
And don’t forget about it! That would be sad, because this is not just the best way to use corned beef leftovers, it is one of the best breakfasts, ever. It’s bacon, browned onions, crispy potatoes, salty seasoned beef, drippy yolks. What more could you ask for for breakfast? I’m excited about corned beef hash all year.

One year ago: Orange-Oatmeal-Currant Cookies (This is the recipe that’s had me complaining about not being able to find currants. But I recently discovered that the flavors are perfect with dried cranberries too.)
Two years ago: Double (or Triple) Chocolate Cookies

Printer Friendly Recipe
Corned Beef Hash (from Cooks Illustrated)

You absolutely do not need corned beef leftovers to make this. I often make it with thick-sliced deli corned beef, and it’s still delicious. That being said, last time I made it, I par-boiled the potatoes in the liquid leftover from cooking the corned beef, and was that ever good!

I like to give Cooks Illustrated recipes exact, because they’re so nicely detailed. However, this is one of those recipes that I’ve made so often that I often cut corners now – skipping the hot sauce, which I never have around; leaving the corned beef in large chunks; using Yukon Gold potatoes so I don’t have to peel them; pouring in a bit of whatever milk I have around instead of using cream. As long as you have the same basic ingredients and everything is crisped and browned, you can’t go wrong here.

2 pounds russet potatoes, peeled and cut into ½-inch dice
salt
2 bay leaves
4 ounces (4 slices) bacon, diced
1 medium onion, diced
2 medium garlic cloves, minced or pressed through a garlic press
½ teaspoon minced fresh thyme leaves
1 pound corned beef, minced (pieces should be ¼-inch or smaller)
½ cup heavy cream
¼ teaspoon hot pepper sauce
4 large eggs
ground black pepper

1. Bring the potatoes, 5 cups water, ½ teaspoon salt, and the bay leaves to a boil in a medium saucepan over medium-high heat. Once the water boils, cook the potatoes for 4 minutes, drain, and set aside.

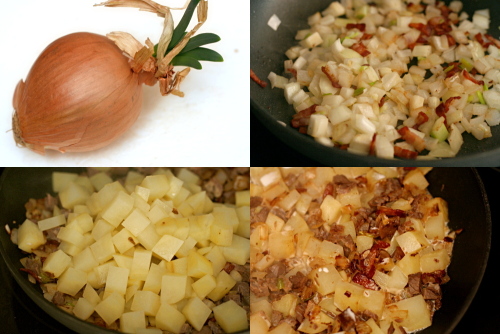
2. Place the bacon in a 12-inch nonstick skillet over medium-high heat and cook until the fat is partially rendered, about 2 minutes. Add the onions and cook, stirring occasionally, until the onion has softened and browned around the edges, about 8 minutes. Add the garlic and thyme and cook until fragrant, about 30 seconds. Add the corned beef and stir until thoroughly combined with the onion mixture. Mix in the potatoes and lightly pack the mixture into the pan with a spatula. Reduce the heat to medium and pour the heavy cream and hot pepper sauce evenly over the hash. Cook, undisturbed, for 4 minutes, then, with the spatula, invert the hash, a portion at a time, and fold the browned bits back into the hash. Lightly pack the hash into the pan. Repeat the process every minute or two until the potatoes are thoroughly cooked, about 8 minutes longer.

3. Make 4 indentations (each measuring about 2 inches across) equally spaced on the surface of the hash. Crack 1 egg into each indentation and season the egg with salt and pepper to taste. Reduce the heat to medium-low, cover the pan, and cook until the eggs are just set, about 6 minutes. Cut the hash into 4 wedges, making sure each has an egg, and serve immediately.

slaw tartare

“Here, taste this”, I requested, bringing Dave a cornichon.

He obliged, then made a face. “Euck, it’s a pickle.”

I sighed. Brined food is Dave’s single food hangup, but the cornichons had seemed relatively mild to me. I was hoping he wouldn’t mind them.

I went back into the kitchen to finish the salad, snacking on at least one cornichon for every one I chopped.

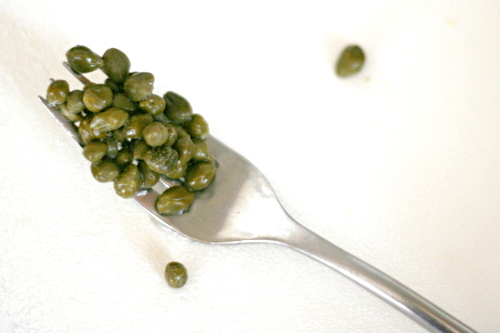
Before too long, I tried again, this time with capers. “Too briny”, he insisted.

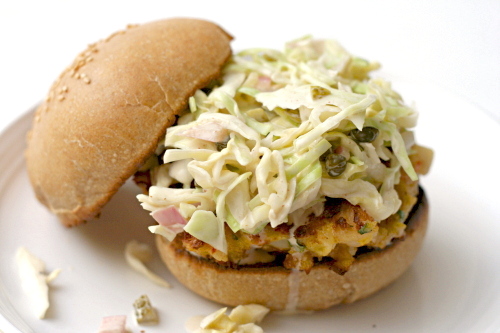
I was starting to get worried about whether Dave would tolerate this slaw at all. Instead of coleslaw, he might be topping his shrimp burger with arugula and, uh…ketchup? We were out of mayonnaise; it had all gone into the dressing.

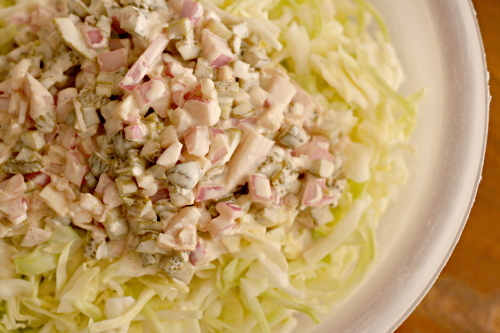
I forged on, but halved the capers and reduced the vinegar by even more. After mixing the dressing into the salad, I started tasting for seasoning. Results were inconclusive, so I tasted again. Seems okay, but I should take one more taste. When I realized that all my tasting was simply to keep eating, I decided the seasoning was just fine.

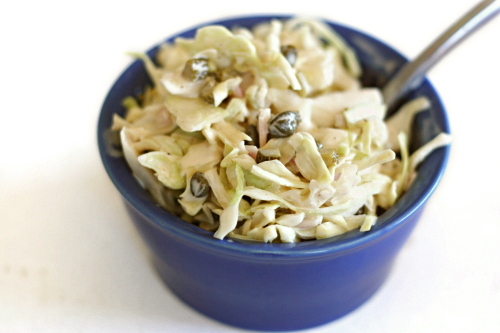
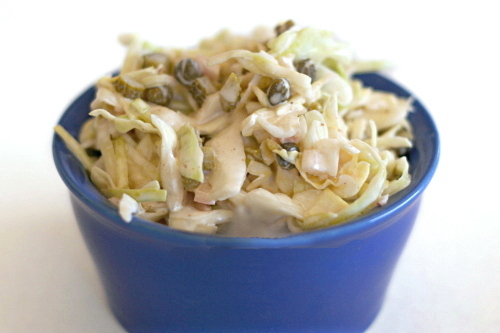
But it was time for the real test. I took a small bowl of the coleslaw to Dave. “Ooh, this is good slaw!” he exclaimed, finishing the bowl off in no time. I let out the breath I’d been holding. He was right. It is good slaw.

(The shrimp burgers were delicious.  They will be my next entry.)

One year ago: Pasta with Cauliflower, Walnuts, and Ricotta Salata
Two years ago: Creamy Buttermilk Coleslaw (okay, that’s kind of wierd)

Printer Friendly Recipe
Slaw Tartare (adapted from Smitten Kitchen who adapted it from Rebecca Charles’ and Deborah Di Clementi’s Lobster Rolls and Blueberry Pies)

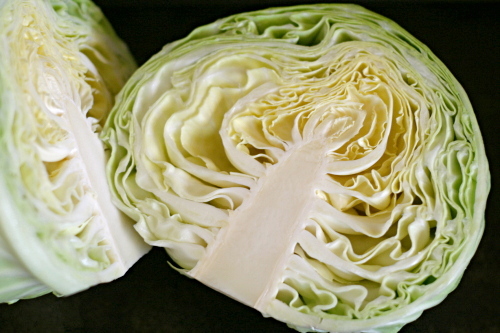
Not a fan of watery coleslaw, these days I salt all of my cabbage destined for slaw.

Also, the recipe on Deb’s site, which reportedly already has less mayonnaise than the original, still seems to have a crazy amount of it. I’ve reduced it to about a third of what she recommends and thought the slaw was perfectly creamy. I’ve reduced some of the other dressing components accordingly.

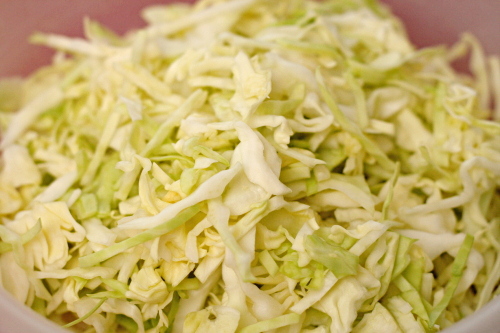
½ cabbage (about 1 pound), shredded fine (5-6 cups)
kosher salt
¼ cup chopped red onion
2 tablespoons sherry vinegar
½ teaspoon sugar
¼ cup capers
¼ cup chopped cornichons, plus 1 tablespoon of the juice
2 teaspoons Dijon mustard
6 tablespoons mayonnaise
½ teaspoon freshly ground black pepper

1. Toss the shredded cabbage and 1 teaspoon salt in a colander or large mesh strainer set over a medium bowl. Let it stand until cabbage wilts, at least 1 hour or up to 4 hours. Rinse the cabbage under cold running water. Spin the cabbage in a salad spinner until it’s dry or press, but do not squeeze, to drain it; pat dry with paper towels. Place the wilted cabbage in a large bowl.

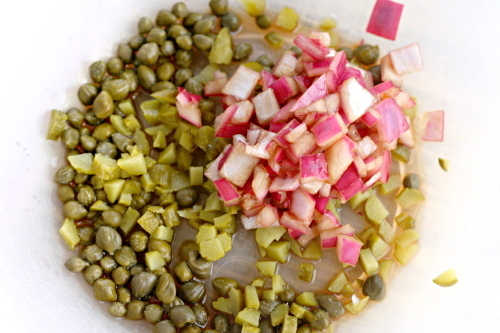
2. Mix the onions, sherry vinegar, and sugar together in a small bowl. Let it set for about 15 minutes, then mix in the capers, cornichons, cornichon juice, mustard, mayonnaise, and pepper. Fold the dressing into the cabbage and serve, or refrigerate for several hours for serving.

pizza with figs, prosciutto, gorgonzola, balsamic, and arugula

I went to dinner at a fancy pizza place with my parents and Dave a few months ago, and my dad ordered a pizza that seemed appropriate for him – cheeseburger.  Because the more meat, the better!  Hold the vegetables please, is generally his motto.  Oh, I laughed and laughed when his pizza arrived covered in lettuce.  He scraped it right off.

Not that I’ve been much better about the idea of salad on pizza.  It’s a pretty popular concept, but so far I’ve wanted to keep my bread and cheese unadulterated by large amounts of greenery.

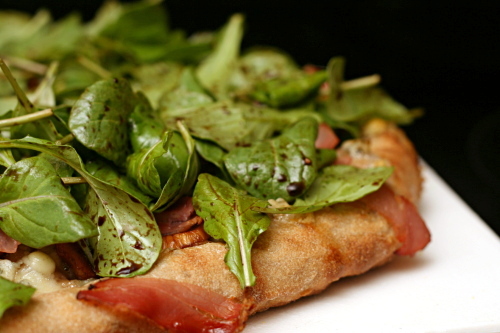
I guess when you’re already putting figs on pizza (oh, how I’d love to see my dad’s face if there were figs on his pizza!), arugula doesn’t seem so weird by comparison.  It turns out that the figs and arugula work really well together.  The figs add sweetness, the prosciutto saltiness, the arugula freshness, and the blue cheese…um…stinky-feetiness?  But in a good way.  In a very, very good way, in fact.

One year ago: Brandied Berry Crepes
Two years ago: Breakfast Strata with Sausage, Mushrooms, and Monterey Jack

Printer Friendly Recipe
Pizza with Figs, Prosciutto, Gorgonzola, Balsamic, and Arugula (adapted from Bon Appetit via epicurious)

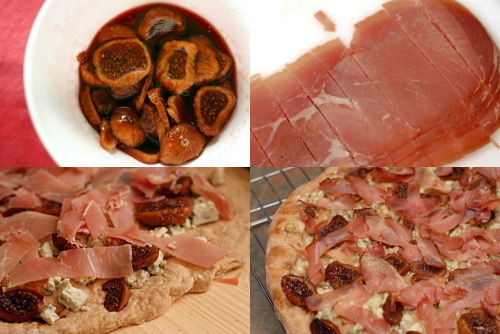
The original recipe calls for fresh figs; since I used dried, I soaked them in port for a while to plump them.  However, I’m not sure this is necessary.

Makes 1 12-inch pizza, serving about 3 people

6 small fresh figs, cut into thin slices
2 tablespoons balsamic vinegar, divided
cornmeal (for sprinkling)
12 ounces (¾ pound) pizza dough (⅓ of this recipe), after its first rise
1 cup crumbled Gorgonzola cheese (about 4 ounces)
3 ounces thinly sliced prosciutto, cut into strips
2 teaspoons extra-virgin olive oil
3 ounces stemmed arugula

1. Place a pizza stone on the bottom rack of the oven and preheat the oven to 500ºF. Put the figs in a medium bowl and drizzle 1 tablespoon of the vinegar over them. Set aside.

2. Gently flatten the dough, then pick it up and stretch it out, keeping it as circular as possible. Curl your fingers and let the dough hang on your knuckles, moving and rotating the dough so it stretches evenly. If it tears, piece it together. If the dough stretches too much, put it down and gently tug on the thick spots.
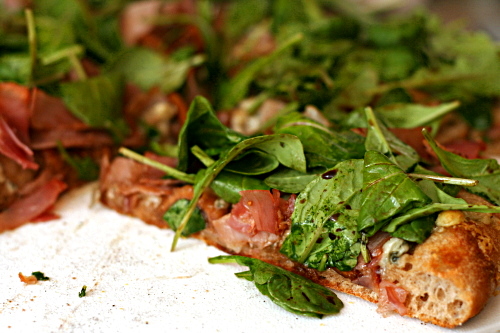
3. Dust a pizza peel with cornmeal and transfer the round of dough to the peel. Rearrange the dough to something reasonably circular; stab it several times with a fork. Top the pizza with the cheese, figs, and prosciutto.

4. Transfer the pizza from the peel to the hot stone. Bake for 8-10 minutes, until the crust is spotty brown. Let the pizza cool on the peel for about 5 minutes.
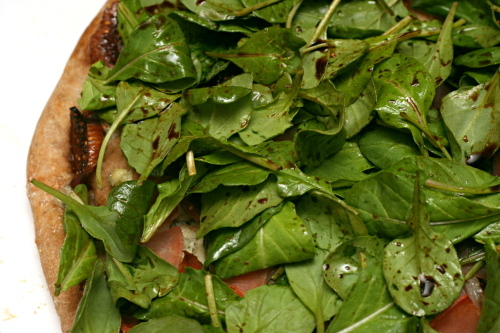
5. Meanwhile, whisk the remaining 1 tablespoon vinegar with the oil and a pinch of salt and pepper; toss the arugula with the dressing. Spread the salad evenly over the pizza. Slice and serve.
cauliflower cheese pie with grated potato crust

I have a hard time figuring out where I fit on the healthy eating spectrum. Some things are obvious. I eat a lot of fresh fruits, vegetables, and lean proteins: good. I also eat dessert often, although not necessarily a lot of it: still, bad. But everything in between, I’m not so sure.

For example, I love these bran muffins, and I consider them very healthy, as they’re completely whole grain, have a large portion of pure bran, a good dose of dried fruit, and less than 1 teaspoon fat per muffin. But someone commented, “it would be interesting to know the calorie/fat/carb ratios and that way know exactly how healthy these are…” Well, I don’t know; to me, they’re considered healthy. Maybe others disagree based on their versions of what healthy means.

Branny often “brannifies”, as she calls it, recipes by reducing the cheese and other fat, increasing the vegetables, substituting whole grains for refined, using egg whites instead of whole eggs, and choosing less saturated fats than butter. She used many of those tricks when she made this pie, but then when I made it, I…well, I unbrannified it, making the original Moosewood recipe instead of Branny’s healthier adaptation.

I like healthy foods too, and I have no problem decreasing fat and increasing vegetables when it seems reasonable, but by my standards, the original version of this recipe was healthy enough, with just a couple tablespoons of butter in the whole pie and 1 ounce of cheese per main course serving.  Perhaps milk, eggs, and potatoes are all questionable ingredients, but by my standards, they’re all fine in moderation.

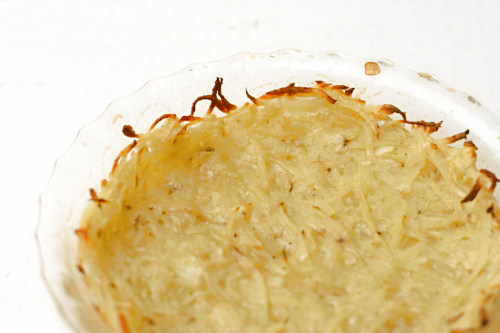
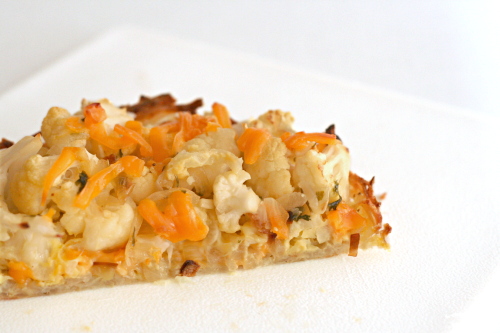
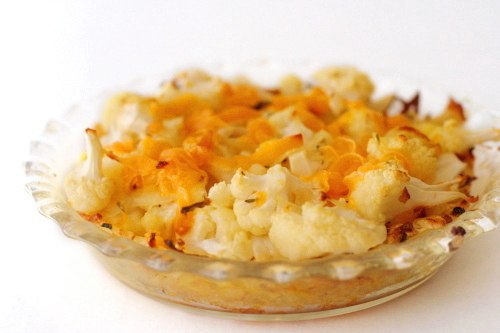
But while we may disagree on just how healthy this is, I think we can all agree that it tastes great. And if you don’t like cauliflower, I think it would be at least as good with broccoli. The crust in particular is a revelation – made of grated potatoes and held together by an egg, there is no butter or oil anywhere. How about that for a flaky delicious pie crust? I can’t wait to use it with a quiche. Because even I know that buttery regular pie crust is decadent.

One year ago: Anadama Bread (another Moosewood recipe)
Two years ago: Sichuan Green Beans (still one of my favorites)

Printer Friendly Recipe
Cauliflower Cheese Pie with Grated Potato Crust (adapted from Moosewood via Branny Boils Over)

Serves 8 as a side dish; 4 as a main course

Looking at online versions of this recipe now, I’m seeing that most call for the shredded potatoes to be salted and drained. I didn’t do this, and in fact, I thought the starch from the potatoes would help form a cohesive crust. I was very happy with how my crust turned out without the draining step.

I recommend using a food processor to shred the potatoes, grate the onion, and shred the cheese.

Crust:
2 cups packed shredded raw potatoes, preferably russet
¼ cup grated onion
½ teaspoon salt
1 egg, beaten

Filling:
2 tablespoons butter
½ onion, diced small
1 garlic clove, minced
1 dash thyme
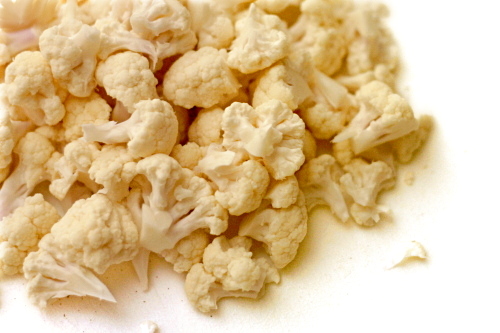
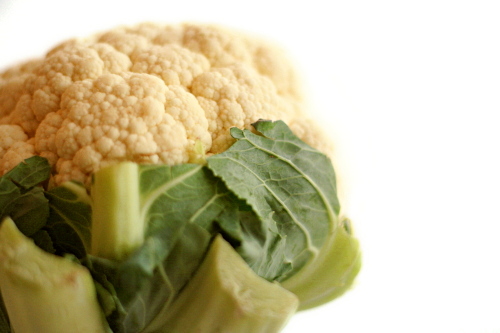
1 medium cauliflower, broken into small florets
1 cup packed grated strong cheddar cheese
½ teaspoon salt
2 eggs
¼ cup milk
black pepper
paprika

1. Adjust a rack to the middle position and heat the oven to 400ºF. Spray a 9-inch pie pan with nonstick spray.

2. Combine the shredded potatoes, onion, salt, and egg. Pat the potato mixture into an even layer over the bottom and up the sides of the prepared pan. Bake for 30 minutes, then give the crust a spritz with nonstick spray. Continue baking for another 10 to 15 minutes, until browned. Lower the oven temperature to 375ºF.

3. Meanwhile, melt the butter in a medium saucepan over medium heat. When the foaming subsides, add the onion and cook just until they start to brown at the edges, about 5 minutes. Add the garlic and cook, stirring constantly, until fragrant, about 30 seconds. Add the thyme, cauliflower, and salt; cover the pan, and cook, stirring occasionally, until the cauliflower is just tender, about 8 minutes.

4. In a small bowl, whisk the eggs, a pinch of salt and another of black pepper, and the milk until evenly colored.

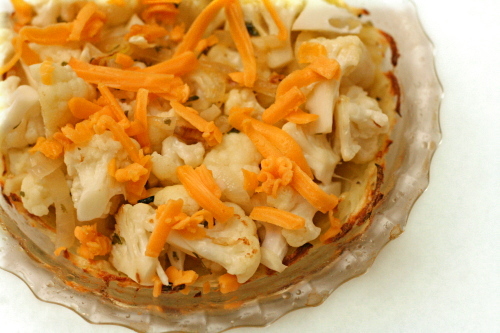
5. Spread half of the cheese on the baked crust. Top with the cauliflower mixture and the rest of the cheese. Pour the egg mixture over the pie. Dust with paprika.

6. Bake the pie until the custard is set and the top is slightly browned, 35 to 40 minutes. Let it cool for about 5 minutes before serving.

chicken fajitas

I guess they don’t call it “manning” the grill for nothing. Why is it that so many men who have no interest in cooking inside are willing to stand outside and grill? I really thought I’d be the one doing the grilling around here, just like I do the ovening and the stoving, but so far, it’s all Dave. I kind of feel like I should get some practice cooking over fire too, but I can never resist the opportunity to clean up the kitchen or work on the sides or, let’s be honest, mix up my favorite cocktail, while Dave takes care of the cooking.

But while he does enjoy the actual grilling, he really isn’t into the reading the recipe part of the procedure. That means there are constant calls asking me what the next step is. Is there any funny business with the coals? How long does everything cook? What should be on the hotter and on the cooler sides of the grill? And on and on.

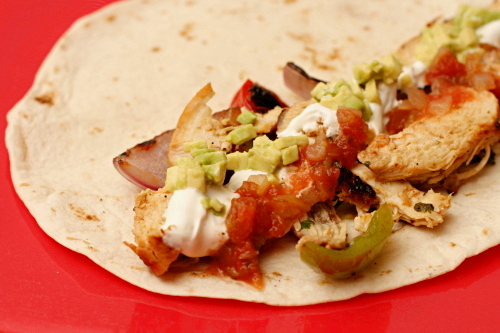
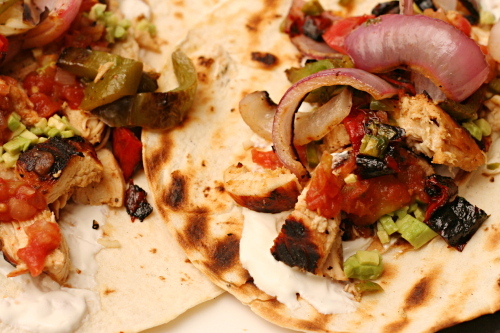
And since this is a Cooks Illustrated recipe, there are a fair amount of details to straighten out. But with only 15 minutes of marinating and 10 minutes of grilling, this really is an easy recipe. And what’s so great about it, besides the obvious – charred flavor on everything from the chicken to the vegetables to the tortillas, is the hit of marinade everything gets after it’s cooked. You marinate the meat beforehand, like you’d expect, and then when it comes off the grill, you dump some more flavor on it, as well as on the vegetables. It makes the whole thing taste fresh and citrusy.

One of the things that makes Dave and I such a great team is that we tend to love the same recipes, like this one. Plus, while he mans the grill, I can rush in to wash his tongs for him, bring a clean plate, or, maybe, if the sides are done and the kitchen is reasonably clean and my cocktail is mixed up, stand over the fire and admire the sunset with my husband. Grilling has more advantages than just great food.

One year ago: Pasta with Roasted Red Pepper Sauce
Two years ago: Cinnamon Rolls

Printer Friendly Recipe
Chicken Fajitas (from Cooks Illustrated)

Serves 4 to 6

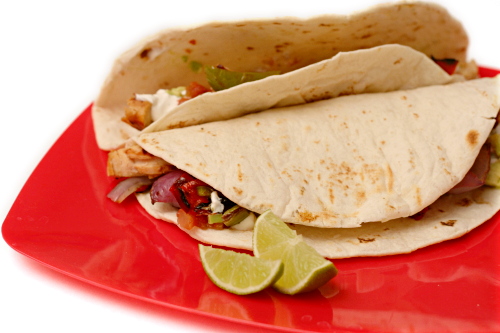
CI’s note: The chicken and vegetables in these fajitas are only mildly spicy. For more heat, include the jalapeno seeds and ribs when mincing. When you head outside to grill, bring along a clean kitchen towel or a large piece of foil in which to wrap the tortillas and keep them warm as they come off the grill. Although the chicken and vegetables have enough flavor to stand on their own, accompaniments (guacamole, salsa, sour cream, shredded cheddar or Monterey Jack cheese, and lime wedges) can be offered at the table.

My note: I think the oil can be significantly reduced, especially in the part of the marinade used to flavor the vegetables and chicken after they’re cooked.

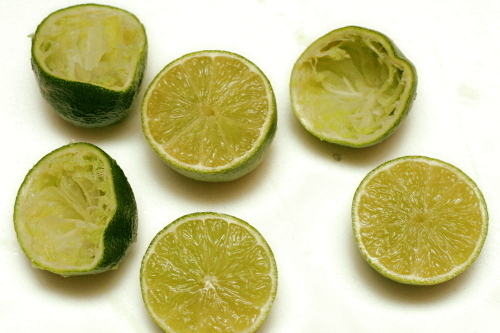
⅓ cup juice from 2 to 3 limes
6 tablespoons vegetable oil
3 medium garlic cloves, minced
1 tablespoon Worcestershire sauce
1½ teaspoons brown sugar
1 jalapeno, seeds and ribs removed, minced
1½ tablespoons minced fresh cilantro leaves
table salt and ground black pepper
3 boneless, skinless chicken breasts (about 1½ pounds), trimmed of fat, tenderloins removed, pounded to ½-inch thickness
1 large red onion (about 14 ounces), peeled and cut into ½-inch-thick rounds (do not separate rings)
1 large red bell pepper (about 10 ounces), quartered, stemmed, and seeded
1 large green bell pepper (about 10 ounces), quartered, stemmed, and seeded
8-12 (6-inch) flour tortillas

1. In a medium bowl, whisk together the lime juice, 4 tablespoons oil, garlic, Worcestershire, brown sugar, jalapeno, cilantro, 1 teaspoon salt, and ¾ teaspoon pepper. Reserve ¼ cup marinade in a small bowl; set aside. Add another teaspoon salt to the remaining marinade. Place the chicken in the marinade; cover with plastic wrap and refrigerate 15 minutes. Brush both sides of the onion rounds and the peppers with the remaining 2 tablespoons oil and season with salt and pepper.

2. Meanwhile, using a large chimney starter, ignite 6 quarts of charcoal briquettes and burn until the coals are fully ignited, about 20 minutes. Empty the coals into the grill, spreading them in a single layer; place an additional 20 unlit coals over the lit coals on one side of grill to create a two-level fire. Position the grill grate over the coals and heat the grate for 5 minutes; scrape clean with a grill brush. (For a gas grill, light all burners and turn to high, cover, and heat the grill until hot, about 15 minutes; scrape the grill grate clean with a grill brush. Leave one burner on high heat while turning the remaining burner(s) down to medium.)

3. Remove the chicken from the marinade and place it smooth side down on the hotter side of the grill; discard the remaining marinade. Place the onion rounds and peppers (skin side down) on the cooler side of the grill. Cook the chicken until it’s well browned, 4 to 5 minutes; using tongs, flip the chicken and continue grilling until it’s no longer pink when cut into with a paring knife or an instant-read thermometer inserted into the thickest part registers about 160 degrees, 4 to 5 minutes longer. Meanwhile, cook the peppers until spottily charred and crisp-tender, 8 to 10 minutes, turning once or twice as needed; cook the onions until tender and charred on both sides, 10 to 12 minutes, turning every 3 to 4 minutes. When the chicken and vegetables are done, transfer them to a large plate; tent with foil to keep warm.

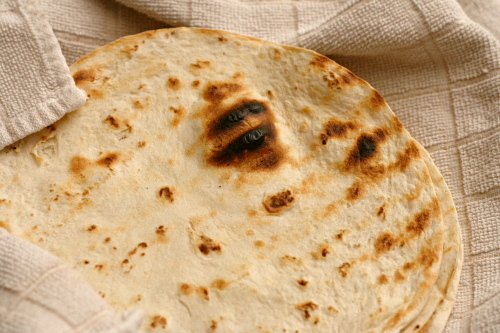
4. Working in 2 or 3 batches, place the tortillas in a single layer on the cooler side of the now-empty grill and cook until warm and lightly browned, about 20 seconds per side (do not grill too long or the tortillas will become brittle). As the tortillas are done, wrap them in a kitchen towel or a large sheet of foil.

5. Separate the onions into rings and place them in a medium bowl; slice the bell peppers lengthwise into ¼-inch strips and place them in the bowl with the onions. Add 2 tablespoons reserved unused marinade to the vegetables and toss well to combine. Slice the chicken into ¼-inch strips and toss with the remaining 2 tablespoons reserved marinade in another bowl; arrange the chicken and vegetables on a large platter and serve with the warmed tortillas.

artichoke ravioli

Spring break was last week. I miss it already.

On the other hand, I’m apparently bad at spring break. I had plans to do all these big things, and then when I didn’t get every single one of them done, to perfection, every day, I got all annoyed. Plus, you know what I did instead of work? Chores. I hate chores, and I like my job, so…forget what I said about missing spring break.

I’m sure it’s a surprise to no one that the one thing I did find time for was cooking. I kept to the mostly-healthy, mostly-vegetarian routine we normally stick to on weekdays instead of going for the all-out, life-is-a-celebration, let’s-eat-meat-and-drink-wine routine we tend toward on the weekends. And I realized that another reason I often stick to vegetarian meals on weekdays is that they’re easier.

Not so with ravioli, of course. Once you mix and knead the pasta dough, roll it out, make your filling, fill the ravioli, cook the ravioli, make your sauce – well, that adds up to a nice project for a day off from work.

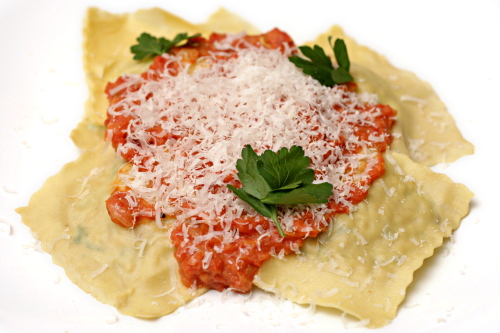
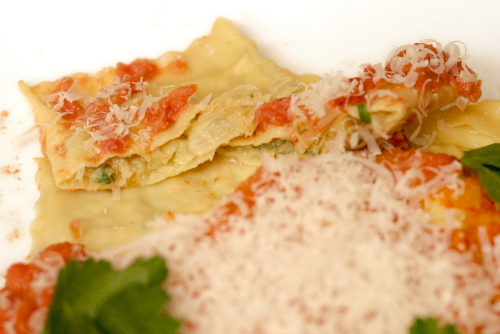
Fortunately, the end result of this one is definitely worth avoiding chores over. The artichokes are subtle, but not invisible. The sauce is rich, but not heavy. And the fresh pasta – well, it’s fresh pasta. You can’t go wrong.

It’s meals like this that make me miss spring break.

One year ago: Cooks Illustrated’s Perfect Chocolate Chip Cookies
Two years ago: Spinach Feta Pine Nut Tart

Printer Friendly Recipe
Artichoke Ravioli With Tomatoes
(adapted from Gourmet via Smitten Kitchen)

4 to 6 servings

This is a good time to utilize your food processor if you have one. I think the best order to process the ingredients in (to avoid cleaning the bowl in between uses) is parmesan, onions, artichoke mixture, tomatoes. You could also make the pasta dough in the food processor, although I’ve had better luck using the stand mixer or kneading by hand.

Ravioli take well to freezing.  Just freeze them in a single layer on a flour-dusted baking sheet.  Once they harden on the pan, transfer them to freezer bags.

Pasta:
6 ounces (1¼ cups) all-purpose flour, plus more for dusting the work surface
2 large eggs

Filling:
2 tablespoons unsalted butter, cut into pieces
1 onion, chopped (½ cup)
2 (14-ounce) cans quartered artichoke hearts, drained
2 ounces (1 cup) finely grated Parmigiano-Reggiano
½ cup chopped fresh flat-leaf parsley
1 large egg
½ teaspoon salt
½ teaspoon black pepper
½ teaspoon freshly grated nutmeg

Sauce:
2 tablespoons unsalted butter
1 onion, minced
1 (28-ounce) can diced tomatoes
½ teaspoon salt
¼ teaspoon black pepper
2 ounces (1 cup) finely grated Parmigiano-Reggiano
2 tablespoons heavy cream

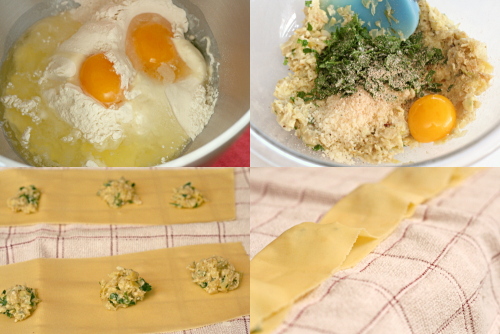
1. For the pasta: Add the flour and egg to the bowl of a stand mixer fitted with the paddle attachment. Mix on low speed until thoroughly incorporated. Change to the dough hook and knead for 5-6 minutes, until smooth. Add flour as necessary – the dough shouldn’t be sticky.  Shape the dough into a ball and wrap it in plastic wrap. Let the dough rest for at least 30 minutes. (You can also mix and knead the dough by hand. It’s easiest – less messy – in a large, wide bowl.)

2. For the filling: In a 12-inch skillet over medium heat, melt the butter. When the foam subsides, add the onion and sauté, stirring occasionally, until golden, about 6 minutes. Add the artichoke hearts and continue cooking while stirring occasionally, until they’re tender, 8 to 10 minutes. Transfer the artichoke mixture to the food processor (scraping but not washing the pan), and process in pulses until the artichokes are coarsely chopped. Stir in the parmesan, parsley, yolk, salt, pepper, and nutmeg.

3. Divide the dough into 6 balls. Work with one ball of dough at a time and leave the others covered with a damp dishtowel. Flatten the dough slightly, then roll it through the widest setting on a pasta roller. Fold it in thirds like a piece of paper going into an envelope, then roll it through the pasta roller again, feeding it with one of the open sides first. If at any point the dough is sticky, brush it with flour. Repeat the folding into thirds and rolling a few times. Without folding, run the pasta through the widest setting once more. Adjust the pasta roller to the next-thinner setting and roll the dough through the machine. Continue to gradually thin the dough until the second-to-last setting. Brush it with flour if the dough starts to stick at all. If the strip of dough becomes too long to handle, cut it into two shorter strips and work with each strip separately. Repeat the rolling, folding, and thinning with the remaining balls of dough, laying the sheets of pasta on dishtowels.

4. For the sauce: Melt the butter in the now-empty skillet over medium heat. When the foaming subsides, add the onion and sauté until just golden around the edges, about 5 minutes. Add the tomatoes with their juice and the salt and simmer over low heat until the sauce is thickened, 15-20 minutes. Stir in the pepper, most of the parmesan and the heavy cream. Set aside.

5. The pasta sheets should be approximately 4 inches across. Place small balls of filling (about one rounded teaspoon each) in a line one inch from the bottom of the pasta sheet. Leave one and one-quarter inches between each ball of filling. Fold over the top of the pasta and line it up with the bottom edge. Seal the bottom and the two open sides with your finger. Use a fluted pastry wheel to cut along the two sides and bottom of the sealed pasta sheet. Run pastry wheel between balls of filling to cut out the ravioli.

6. Bring 4 quarts of water to boil in a large stockpot. Add about a tablespoon of salt and half of the pasta. Cook until doubled edges are al dente, 3-4 minutes. With a slotted spoon, remove the ravioli from the pot and transfer them to warmed bowls or plates. Keep warm in a warm oven while the remaining ravioli are boiled. Top the ravioli with sauce and the remaining parmesan; serve immediately.

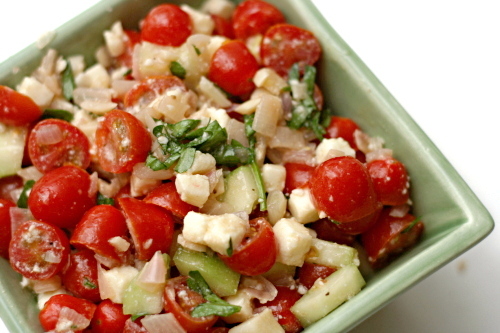
cherry tomato salad

Here are two common pairings that seem impractical to me – bread served with pasta and fries served with burgers. Of course they’re tasty combinations – who doesn’t love more carbs? – but do they make nutritional sense?

Granted, a leafy green salad would be too refined, and roasted or steamed vegetables don’t go with the casual feel of a burger. That’s why I love a non-lettuce based salad to go along with burgers, instead starring something like mushrooms or peppers or tomatoes.

Even though my little desert town has perfect grilling weather nearly year-round, it does not have perfect tomatoes. That’s a nice thing about this salad – you can make it with grape tomatoes, the only decent tomato option at the grocery store for most of the year.

What’s more, the tomato flavor is enhanced by draining the watery juice from the tomatoes and reducing it to use with the dressing. The dressing ends up somewhat sweet, which is nicely balanced by tart red wine vinegar, fresh cucumber (I can’t believe I used to not like cucumber), and salty feta. I’d take this salad over fries any day.

One year ago: Lemon Poppy Seed Waffles
Two years ago: Whole Wheat Pasta with Greens, Beans, Tomatoes, and Garlic Chips

Printer Friendly Recipe
Greek Cherry Tomato Salad (from Cooks Illustrated)

If in-season cherry tomatoes are unavailable, substitute vine-ripened cherry tomatoes or grape tomatoes from the supermarket. Cut grape tomatoes in half along the equator rather than quartering them.

If you don’t have a salad spinner, after the salted tomatoes have stood for 30 minutes, wrap the bowl tightly with plastic wrap and gently shake to remove seeds and excess liquid. Strain the liquid and proceed with the recipe as directed.

The amount of liquid given off by the tomatoes will depend on their ripeness. If you have less than ½ cup of juice after spinning, proceed with the recipe using the entire amount of juice and reduce it to 3 tablespoons as directed.

2 pints ripe cherry tomatoes, quartered (about 4 cups) (see note)
table salt
½ teaspoon sugar
2 medium garlic cloves, minced or pressed through a garlic press (about 2 teaspoons)
½ teaspoon dried oregano
1 medium shallot, minced (about 3 tablespoons)
1 tablespoon red wine vinegar
2 tablespoons extra virgin olive oil
ground black pepper
1 small cucumber, peeled, seeded, cut into ½-inch dice
½ cup chopped pitted kalamata olives
4 ounces feta cheese, crumbled (about 1 cup)
3 tablespoons chopped fresh parsley

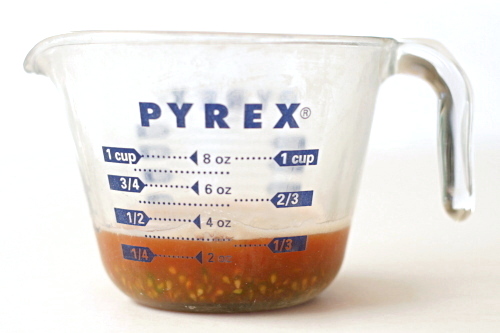
1. Toss tomatoes, ¼ teaspoon salt, and sugar in a medium bowl; let stand for 30 minutes. Transfer the tomatoes to a salad spinner and spin until the seeds and excess liquid have been removed, 45 to 60 seconds, stirring to redistribute the tomatoes several times during spinning. Return the tomatoes to the bowl and set aside. Strain the tomato liquid through a fine-mesh strainer into a liquid measuring cup, pressing on the solids to extract as much liquid as possible.

2. Bring ½ cup tomato liquid (discard any extra), the garlic, oregano, shallot, and vinegar to a simmer in a small saucepan over medium heat. Simmer until the mixture is reduced to 3 tablespoons, 6 to 8 minutes. Transfer the mixture to a small bowl and cool to room temperature, about 5 minutes. Whisk in the oil and pepper to taste until combined. Taste and season with up to ⅛ teaspoon table salt.

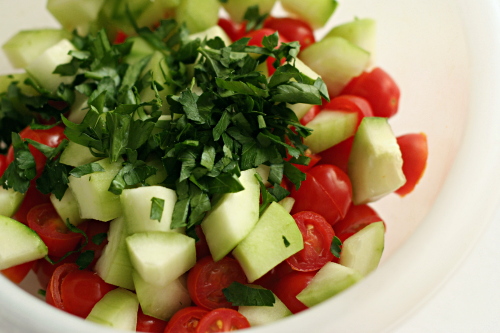
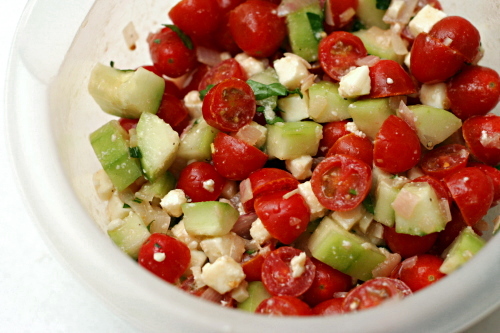
3. Add the cucumber, olives, feta, dressing, and parsley to the bowl with the tomatoes; toss gently and serve.