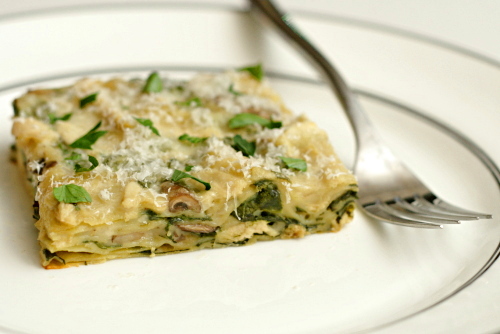
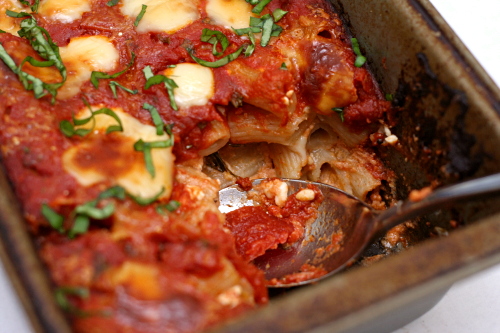
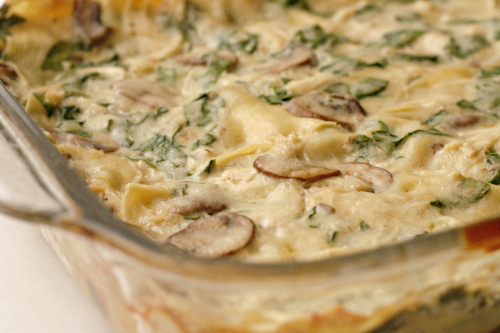
chicken mushroom spinach lasagna

I’m hardcore – I made an Emeril recipe more complicated. I did skip a few of his steps, so maybe I’m not completely ridiculous.

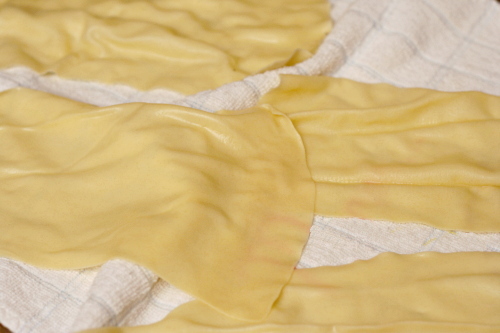
It’s just that if I’m going to go through all the trouble of making lasagna, with cooking chicken, stirring béchamel, layering and baking, I might as well go all the way – homemade pasta and damn good chicken.

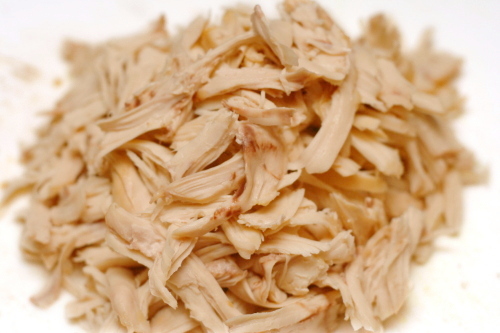
So there was no cooking of boneless skinless chicken breasts in a dry pan – weird, isn’t it, that I’m not a fan of dry tasteless meat. Heck no, I roasted those suckers – bone-in, skin-on, thankyouverymuch. And before that, I brined them – hey, it’s a step that takes about 2 minutes of effort and you ensure fully seasoned, moist meat. Why not do it?

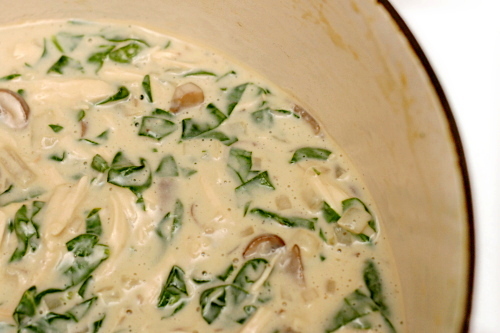
But if I’m going to add homemade pasta and brined, roasted, shredded chicken to an already ambitious recipe, I probably needed to cut some corners somewhere. Since I can’t seem to convince myself to enjoy cooked spinach, I decided to skip the cooking and blanching of the spinach and just add shredded baby spinach directly to the béchamel. I wasn’t able to use quite as much, but that’s okay – it was still a colorful, healthy, easy addition.

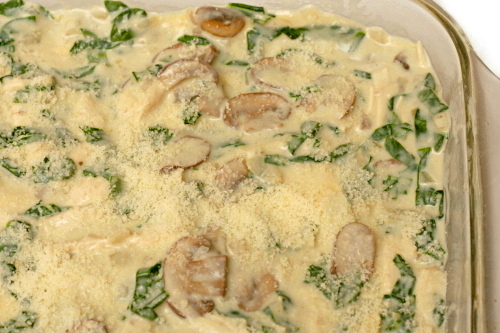
Okay, so I guess I only skipped one little step in Emeril’s recipe. Oh wait, I also mixed all the chicken and parmesan into the sauce, so I was really only layering two things – sauce and noodles. That probably saved 30 seconds or so of effort. That’s okay, I had fun making the lasagna, and I was completely confident that the extra bit of work I put into it would give me a perfect result, and, yes, it did.

One year ago: Deli-Style Rye Bread
Two years ago: (Almost) No-Knead Bread

Printer Friendly Recipe
Chicken, Mushroom and Spinach Alfredo Lasagna (adapted from Emeril Lagasse)

This is how I made the lasagna, but there are some things you could do differently. The original recipe keeps the chicken and some of the parmesan separate from the béchamel, laying pasta-béchamel-cheese-chicken instead of just alternating pasta and chickeny parmesany béchamel, like I did.

Also, the type of pasta you use is entirely up to you. You could use the no-cook dry noodles or buy fresh noodles or make your own. And I don’t know for sure that fresh homemade noodles need to be blanched for lasagna, but the one time I skipped that step was a disaster.

One more thing – the original recipes calls for double these ingredients to be layered into a 9- by 13-inch pan, but I was concerned that I’d have overflow. While my lasagna is a little on the short side, I think twice this height would have been too much for my standard 9- by 13-inch pan. But maybe the quantity of ingredients that I used would make an ideal 8- by 8-inch lasagna?

6 to 8 servings

1 teaspoon vegetable oil
1 pound chicken breasts, bone-in, skin-on, trimmed of excess fat and skin
salt and pepper
4 tablespoons (1 stick) unsalted butter
8 ounces button mushrooms, thinly sliced
2 large shallots, finely chopped
4 cloves minced garlic
¼ cup all-purpose flour
3½ cups milk
¼ teaspoon freshly ground black pepper
¼ teaspoon freshly grated nutmeg
4 ounces spinach, stemmed, washed, sliced into ¼-inch ribbons
3 ounces (1½ cups) grated Parmesan, divided
fresh lasagna noodles (if homemade, use 1 egg + ⅔ cup (3.2 ounces) flour, kneaded and rolled to the
next-to-thinnest setting on a pasta roller, blanched as described here)

1. (Optional) Stir 2 tablespoons salt into 2 cups cold water until it dissolves. Add the chicken; refrigerate for 30 minutes, then remove the chicken from the brine and pat it dry.

2. Adjust an oven rack to the middle-low position and heat the oven to 450ºF. Heat a small oven-safe skillet over medium-high heat. Add the oil and swirl to coat the bottom of the pan; place the chicken breast in the pan skin-side down. Cook without moving until well-browned, about 5 minutes. Turn the chicken over and move the pan to the oven. Roast until an instant-read thermometer inserted into the thickest part of the chicken measures 160ºF or the juices run clear when small cut is made in the chicken. Remove the pan from the oven and set aside. When the chicken has cooled enough to handle, remove and discard the skin (or eat it, because it’s crisp and delicious!) and shred the meat with your fingers or two forks. Decrease the oven temperature to 375ºF.

3. Béchamel: Melt the butter in a large saucepan over medium heat. Add the mushrooms and cook, stirring often, until their liquid has evaporated and the mushrooms are slightly browned, about 5 to 7 minutes. Add the shallots to the pan and sauté until soft and translucent, 3 to 4 minutes. Stir in the garlic and sauté for about 30 seconds, until fragrant. Add the flour and cook, stirring with a wooden spoon, to make a light roux, about 1 minute. Whisking constantly, slowly add the milk and continue to cook, stirring occasionally, until thickened, 5 minutes. Add ¾ teaspoon of the salt, the pepper, nutmeg, spinach and 2½ ounces (1¼ cups) of the Parmesan and cook, stirring, until thickened, about 2 minutes, then add the shredded chicken. Taste the sauce to decide if it needs more salt. Remove the béchamel from the heat and place a piece of plastic wrap directly on the surface until ready to assemble the lasagna.

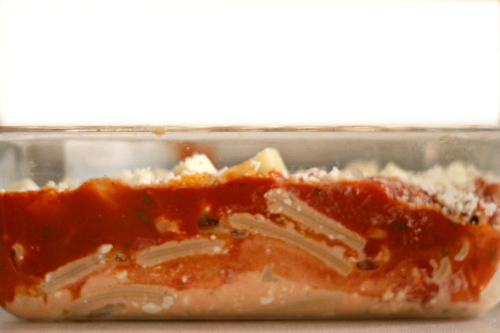
4. Spray a 9 by 13-inch pan with nonstick spray, and spread about ¼ cup of the béchamel sauce on the bottom of the dish, avoiding any large chunks of chicken. Arrange a single layer of noodles evenly over the sauce. Then alternate layering béchamel and noodles until you run out of noodles – I was able to make 4 layers, I believe. End with the remaining béchamel and sprinkle the top with the remaining parmesan.

5. Cover the pan with aluminum foil and bake for 20 minutes. Remove the foil and continue baking for about 20 minutes, until bubbly. Let the lasagna rest for about 10 minutes before slicing and serving.
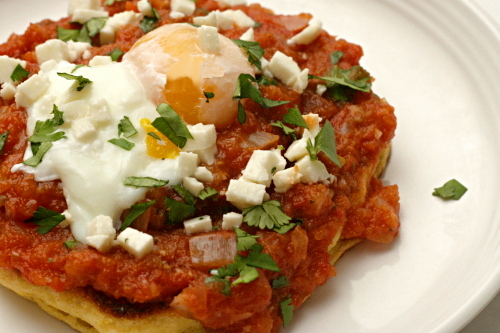
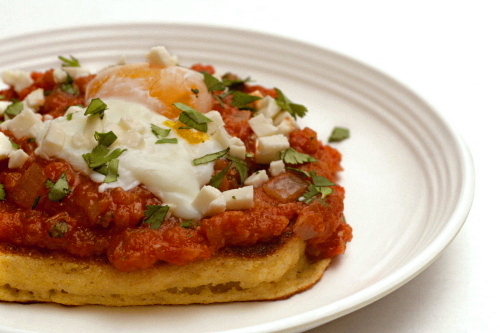
masa pancakes with chipotle salsa and poached eggs

After buying four and a half pounds of masa harina for a recipe that used, oh, about a cup of it, I completely messed up the recipe I was making. While I learned quite a bit about the chemistry of cooking beans (hint: don’t add tomatoes at the beginning), I have a feeling I won’t be trying that recipe again. Yes, I know it would be much better if I tried that  following-the-directions idea, but the whole thing left me a bad taste in my mouth. Literally.

It also left me with about 4.45 pounds of masa harina. Fortunately, masa is seriously good stuff. It kind of reminds me of Dave’s jokes – intensely corny. Hey, speaking of intensely corny jokes! Anyway, my point is that it’s good, and I was hoping to find something easier than tamales to make with it. (Although I plan on making tamales as well.)

Fortunately, the internet exists, and epicurious had all sorts of fun masa recipes to choose from, like masa pancakes topped with homemade chipotle salsa, poached eggs, and fresh cheese. I thought the recipe had the potential to be complicated, but it’s really just pancakes, sauce, eggs, and some garnish.

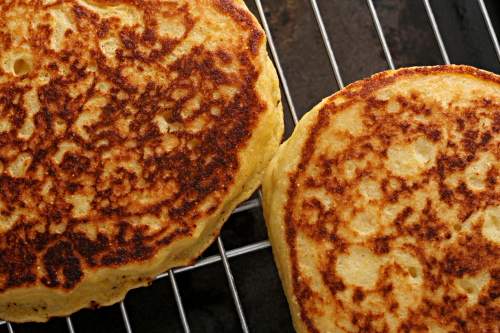
The masa pancakes seemed more like pan-fried cornbread than pancakes, and if there’s anything that sounds better than masa pancakes, well, it’s pan-fried cornbread. No, it’s pan-fried cornbread topped with warm chipotle salsa, eggs, and cheese. Only, let’s see, about 4.40 pounds of masa left to use up! I better get to making more pancakes!

One year ago: Orange Berry Muffins
Two years ago: Rice Pudding

Printer Friendly Recipe
Masa Pancakes Topped with Poached Eggs and Chipotle Ranchera Salsa (adapted from Bon Appétit via epicurious.com)

Serves 6

The poached egg directions that I’ve included here are pretty much directly from the original recipe, and they are…shall we say, vague (or I might just call them crap if I wasn’t trying to be diplomatic). I would offer my own set of instructions for poaching eggs, but I have lost my egg-poaching mojo lately. Instead, I will direct you here. Or I would just fry the damn eggs using my foolproof method (add a bit of water to the skillet after the eggs start to set and cover the pan; no flipping and you can get away with using less oil!). I’m also curious to try cooking the salsa in a skillet and then poaching the eggs right in the finished salsa.

¾ cup masa harina (corn tortilla mix)
½ cup (2.4 ounces) all purpose flour
½ cup yellow cornmeal
1 teaspoon sugar
1 teaspoon salt
1 teaspoon baking powder
½ teaspoon baking soda
1½ cups buttermilk
2 large eggs
3 tablespoons corn oil, plus more for cooking the pancakes
12 large eggs + vinegar + salt
Chipotle Ranchera Salsa (recipe follows)
¼ cup chopped fresh cilantro
¼ cup crumbled queso fresco or shredded Monterey Jack cheese

1. Adjust a rack to the middle position and heat the oven to 350°F. Spread masa harina on a heavy baking sheet and bake until fragrant and golden, stirring often, about 15 minutes. Cool completely. Place a baking sheet lined with a cooling rack in the oven and reduce the oven temperature to 200°F.

2. Whisk masa, flour, cornmeal, sugar, salt, baking powder, and baking soda in a large bowl. Whisk the buttermilk, 2 eggs and 3 tablespoons oil in a medium bowl to blend. Add the buttermilk mixture to the dry ingredients and whisk just until blended (the batter will be thick).

3. Lightly coat a griddle or 9-inch nonstick skillet with oil. Heat over medium heat. Working in batches, spoon scant ½ cup batter onto the griddle. Using a spoon, spread the batter to a make 4-inch-diameter pancake. Cook until the bottom is golden, about 4 minutes. Turn and cook until the second side is golden, about 3 minutes. Transfer to the baking sheet in the oven to keep warm. Repeat to make 6 pancakes total, brushing the griddle with oil as needed.

4. Meanwhile, bring a large skillet of salted vinegary water to a simmer. Working in batches, crack 12 eggs into the skillet. Simmer until the eggs are softly poached, about 3 minutes. Remove the eggs from the water; drain.

5. Divide the pancakes among plates. Top each pancake with salsa and 2 poached eggs and sprinkle with cilantro and cheese. Serve immediately.

Chipotle Ranchera Salsa (adapted from Bon Appétit via epicurious.com)

2 tablespoons corn oil
1 onion, chopped course
4 garlic cloves, minced
1 jalapeno, minced
1 28-ounce can diced tomatoes in juice
¼ teaspoon salt
1 chipotle chili in adobo, minced
¼ cup chopped fresh cilantro

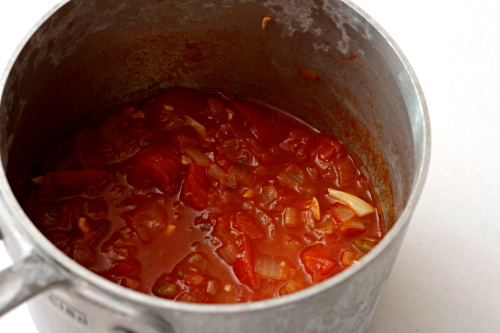
1. Heat the oil in a heavy medium saucepan over medium-high heat. Add the onions and sauté until they begin to soften, about 5 minutes. Add the garlic and jalapeno and cook, stirring continuously, until fragrant, about 30 seconds. Add the tomatoes with their juice, the salt, and the chipotle. Bring to a boil, then reduce the heat to medium-low. Cover and simmer 15 minutes to blend the flavors, stirring occasionally.

2. Puree 1 cup of the salsa in a blender (or blend with an immersion blender). Return to the saucepan and stir in the cilantro. Adjust the salt if necessary. (Can be made 1 day ahead. Cover and chill. Rewarm over medium heat.)

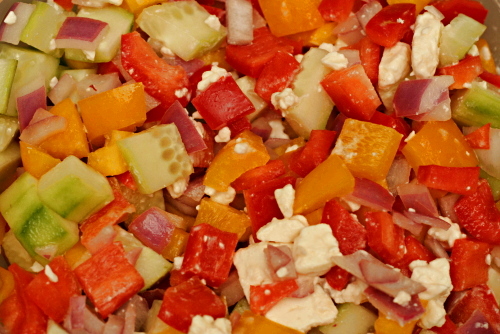
mediterranean pepper salad

When my friend Ramie visited me last spring, it was the first time I’d seen her in eight years. I wanted to cook a great meal for her on her first night, but we’d lost touch for a lot of those eight years, and I wasn’t sure what kind of eater she was. I knew she used to be a vegetarian and wasn’t anymore.

I thought a hodgepodge of Middle Eastern dishes would be perfect – most of it could be made in advance, it was fairly light in case she was a health nut (uh, apparently not), it was vegetarian in case she was picky about meat, it went with either red or white wine in case she didn’t care for one, it could sit out for nibbles while we sat and chatted, and, of course, it was delicious. I made hummus, fresh pita, falafel, and tabbouli, but got stuck when it came time to plan a salad.

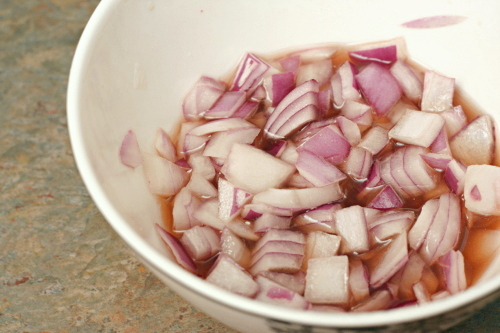
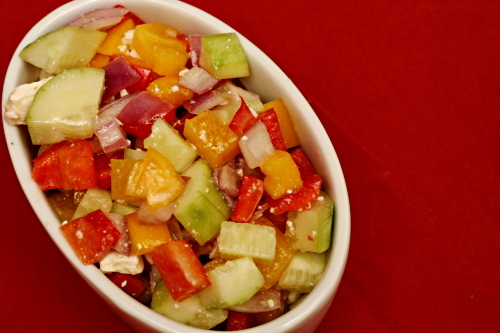
I ended up making a cucumber-tomato salad, which was fine but uninspired. I wish I had known about this pepper salad then. This salad is most definitely inspired. I particularly love the idea of a quick pickle for the red onions to tame their bite.

Peppers are one of the many foods I used to be picky about and now like quite a bit, but I was a little hesitant about a salad that starred them. However, everything in this salad came together perfectly. The sweet peppers were balanced by the tart dressing was balanced by the creamy feta was balanced by the fresh cucumber. I need someone else whose eating habits I’m not familiar with to come visit now that I can make their welcoming meal that much more perfect.

One year ago: Beer-Battered Fish
Two years ago: Green Chile Chicken Enchiladas

Printer Friendly Recipe
Mediterranean Pepper Salad (adapted slightly from Smitten Kitchen)

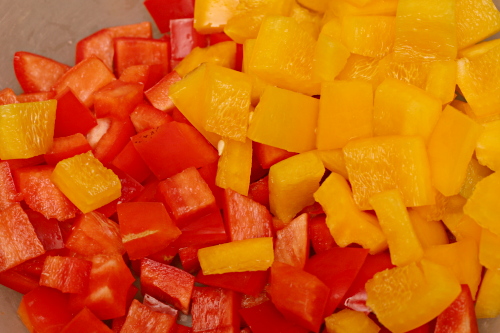
Cut the peppers, cucumbers, and tomatoes while the onion rests in the vinegar solution.

I left out the olives because Dave is not a fan and the tomatoes because…eh, I just wasn’t in a tomato mood.

As much as I loved this salad, it was a little salty for our tastes. For that reason, I’ve decreased the kosher salt in the onion pickling solution from 1 tablespoon (3 teaspoons) to 2 teaspoons. I’ve also increased the feta slightly, as Dave and I felt that the feta really brought everything together.

¼ cup red wine vinegar
¼ cup cold water
2 teaspoons kosher salt
2 teaspoons sugar
½ medium red onion, cut into a ½-inch cubes
3 bell peppers, your choice of colors, cut into ½-inch cubes
1 cucumber, cut into ½-inch cubes
1 cup grape tomatoes, halved
6 ounces firm feta cheese, crumbled
¼ to ½ cup pitted kalamata olives
¼ cup extra virgin olive oil
Salt and pepper to taste

1. Stir together the red wine vinegar, water, kosher salt and sugar in a small bowl until the salt and sugar are dissolved. Add the red onion and set aside for at least 15 minutes.

2. Combine the vegetables, cheese, olives, and drained onions in a large bowl. Pour a quarter cup of the vinegar mixture leftover from the onions over the salad, then drizzle with the olive oil. Adjust the seasonings to taste and either serve immediately or refrigerate for up to one day.

roasted garlic balsamic white bean dip

No matter how hard I try, I can’t get excited about the Thanksgiving feast. Turkey, stuffing, cranberries – I don’t know, they’re all just fine, but Thanksgiving isn’t the eat-until-you-pop day for me that it is for a lot of people. I do love the idea of a free for all food day though. I also love football, so the Super Bowl tends to be my big overeating event.

But even a day of unapologetic binging requires some vegetables. Besides the ubiquitous salsa and guacamole, that is. Since I was already treating myself, I suppose I could have made a delicious mayonnaise and sour cream based dip, but I wanted to leave plenty of belly space for the brownies, meatball sliders, and that guacamole, so I stuck to a light bean dip for the vegetables.

The problem with bean dip is that it’s always a battle between how healthy it is and how much flavor it has. If you don’t want to add cream cheese or butter or nut butters, it can be difficult to find ingredients to bump up the flavor.

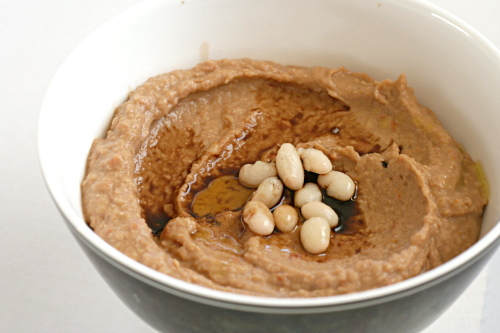
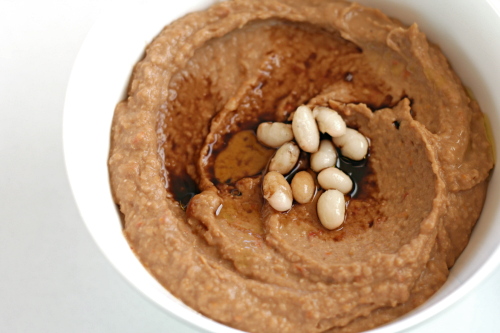
Three strong flavors help make this white bean dip interesting – roasted garlic, sun-dried tomatoes, and balsamic vinegar. The result? A bean dip worth filling up on.

One year ago: Vegetarian Chili
Two years ago: Salmon Pesto Pasta

Printer Friendly Recipe
Roasted Garlic White Bean Balsamic Dip (adapted substantially from Bon Appetit via epicurious)

1 head of garlic, outer papery skin removed
½ teaspoon extra virgin olive oil
4 sun-dried tomatoes packed in oil
¼ teaspoon kosher salt
1 (15-ounce) can white beans (cannellini, navy, great northern), drained and rinsed
pinch black pepper
1 tablespoon balsamic vinegar plus extra for drizzling
1 tablespoon oil from jar of sun-dried tomatoes

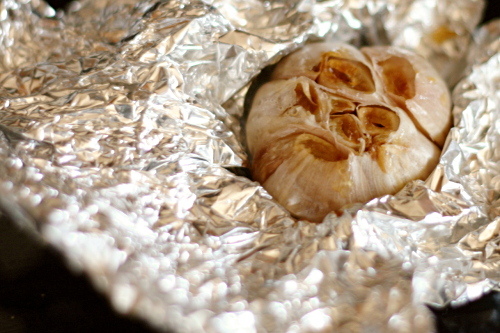
1. Adjust an oven rack to the middle position and heat the oven to 400ºF. Cut ¼-inch off of the top of the bulb of garlic. Place the bulb in an 8-inch square of foil and drizzle with ½ teaspoon of the oil. Wrap the garlic in the foil and roast until soft, about 40 minutes.

2. When the garlic is cool enough to handle, squeeze the cloves from their peels and put them in the bowl of a food processor. Add the tomatoes and salt; process until smooth. Add the beans and pepper and continue processing. With the machine running, pour in the balsamic vinegar and sun-dried tomato oil. Adjust the seasonings if necessary, and serve, drizzling with more balsamic vinegar.

pasta with baked ricotta and sweet tomato sauce

I’m all about taking water out of ingredients. Zucchini, eggplant, cabbage, tomatoes, tofu, even bread for French toast. Water doesn’t contribute flavor, so if it isn’t improving texture, I have no use for it.

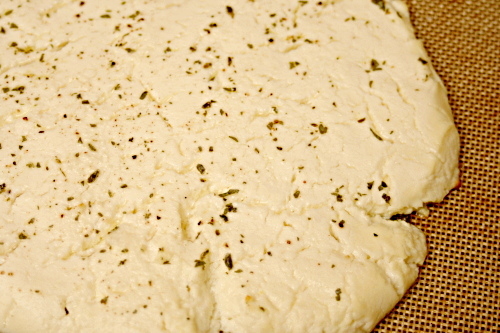
In this recipe, ricotta is drained in cheesecloth for several hours, then baked. What I thought would happen is the cheese would lose a small but significant portion of water during the draining stage, and then it would brown a little in the oven.

I was wrong. My ricotta actually gave off no liquid during straining, and I’m thinking now that the baking isn’t so much to brown the ricotta as to concentrate flavor by evaporating even more liquid.

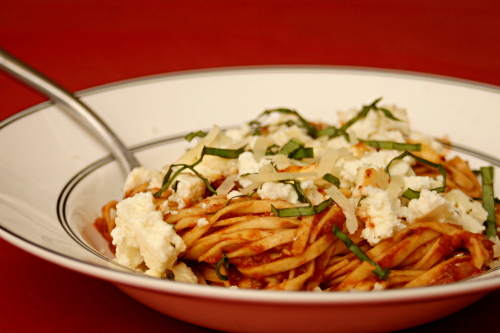
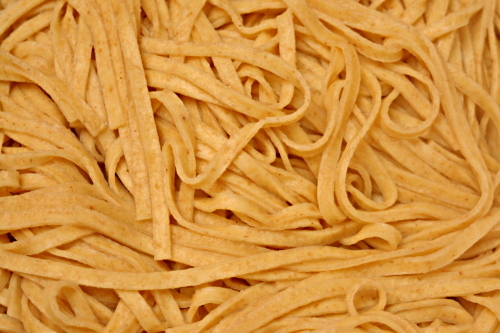
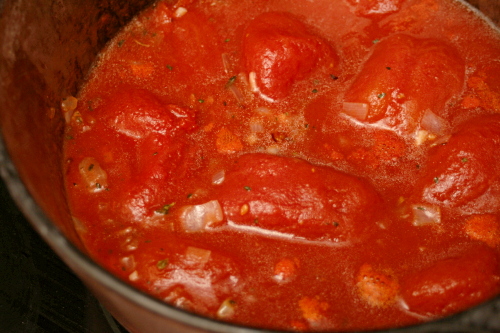
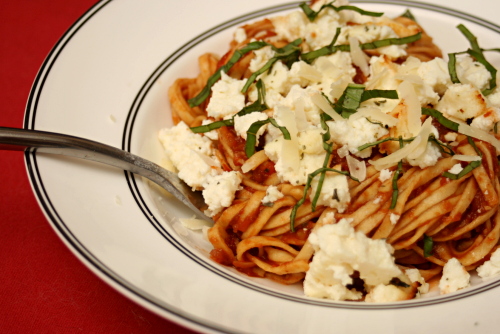
The sauce to accompany the baked ricotta is a simple tomato sauce that is sweetened with balsamic vinegar. I used fresh pasta, which when topped with the sauce, ricotta, a handful a parmesan and a sprinkling of basil, made for a great adaptation of a classic pasta and tomato sauce dish.

One year ago: Pot Roast
Two years ago: Comparison of 4 Vanilla Frosting

Printer Friendly Recipe
Pasta with Sweet Tomato Sauce and Baked Ricotta (adapted from Jamie Oliver via Cate’s World Kitchen)

I used one pound of (store-bought) fresh pasta instead of dried pasta, and it was so good that I think I’ll stick with fresh pasta for this recipe in the future as well.

Serves 4-6

1 (15-ounce) container ricotta
1 teaspoon plus 1 tablespoon olive oil, divided
salt and pepper
½ teaspoon dried oregano, divided
2 large shallots, finely chopped
2 cloves garlic, finely chopped
1 (28-ounce) can whole tomatoes in juice
3 tablespoon balsamic vinegar
1 pound wide pasta, such as pappardelle or fettucine
a handful of fresh basil, torn
½ cup (1 ounce) freshly grated parmesan

1. Line a fine-mesh strainer with several layers of cheesecloth. Spoon the ricotta into the strainer and refrigerate for several hours or overnight.

2. Adjust a rack to the upper-middle position and heat the oven to 450 degrees F. Line a baking sheet with parchment paper or a silicone baking mat. Spread the ricotta onto the baking sheet in a 1-inch layer. Season the ricotta with ¼ teaspoon dried oregano and a generous pinch of both salt and pepper. Rub 1 teaspoon of the olive oil over the seasoned ricotta. Bake for 15 minutes, until dry and slightly browned at the edges.

3. Heat the remaining tablespoon of oil in an 8 to 10-inch skillet over medium heat. Add the shallots and sauté, stirring occasionally, until the edges just start to brown, 6-8 minutes. Stir in the garlic and ¼ teaspoon oregano, and cook, stirring constantly, until fragrant, about 30 seconds. Add the tomatoes and ½ teaspoon salt; bring to a simmer, then lower the heat to medium-low and simmer, stirring occasionally, for 15 minutes. Use a spoon to crush the tomatoes, of, if you’d like a smooth sauce, transfer the mixture to a blender or use an immersion blender to puree the sauce. Stir the balsamic vinegar into the sauce.

4. Meanwhile, bring a large pot of water to a boil. Add 1 tablespoon salt and the pasta to the boiling water and cook according to the package instructions. Drain the pasta, reserving about a cup of the cooking water.

5. Combine the pasta and sauce, thinning the mixture with pasta cooking water if necessary. Fold in the basil and ricotta and top with the parmesan.

jalapeno-baked fish with roasted tomatoes and potatoes

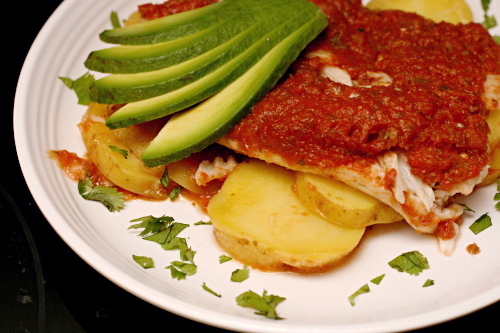
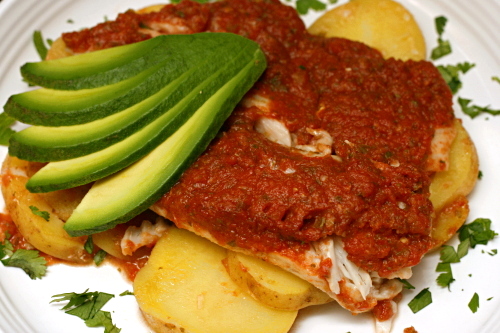
I need every weekday meal to be exactly like this one.

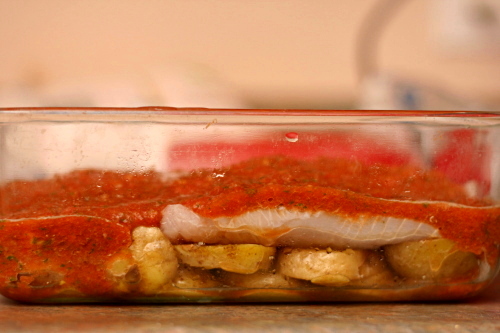
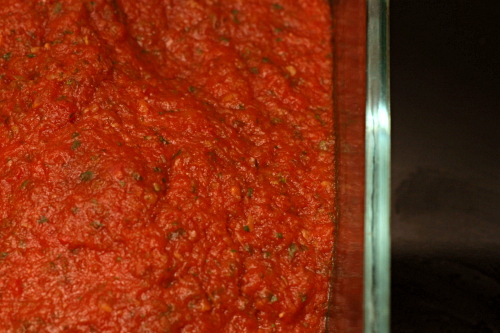
First, it took only 20 minutes of actual effort. Sliced potatoes are softened in the microwave right in the baking dish. Meanwhile, I pureed a few other ingredients, mostly straight from cans, with my immersion blender. Then I laid some fish filets over the potatoes and poured the pureed sauce on top.

Second, it only bakes for 20 minutes. This was the perfect amount of time for me to empty the dishwasher, clean up the kitchen and unpack groceries.

Third, it’s nice and light, with lean white fish, vegetables, and just a small amount of oil to help the potatoes cook.

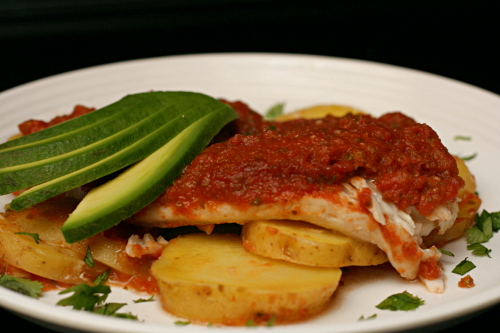
Fourth, and of course the only point that really matters, it was just so good. The fish, potatoes, and sauce were balanced nicely and the spice level was just right.

My favorite meals have all the ingredients jumbled together like this, protein and starch and vegetables. It’s especially nice on a weeknight so I don’t have to make side dishes as well. I haven’t found many fish recipes like that, so this is perfect – in every way, really.

One year ago: Red Velvet Cake comparison
Two years ago: Olive Oil Bread

Printer Friendly Recipe
Jalapeno-Baked Fish with Roasted Tomatoes and Potatoes
(from Rick Bayless’s Mexican Everyday via Dinner and Dessert)

Serves 4

4 medium (1 pound total) red-skin boiling or Yukon Gold potatoes, sliced 1/8-inch thick
1 tablespoon vegetable or olive oil
Salt
1 (15-ounce) can diced tomatoes in juice
1 large garlic clove, peeled and cut in half
⅓ cup (loosely packed) coarsely chopped cilantro, plus extra for garnish
About ¼ cup sliced canned pickled jalapenos
1 tablespoon jalapeno pickling juice
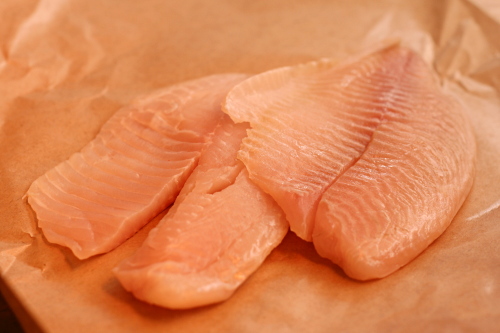
Four 4- to 5-ounce (1 to 1¼ pounds total) skinless fish fillets, preferably ¾ to 1 inch thick

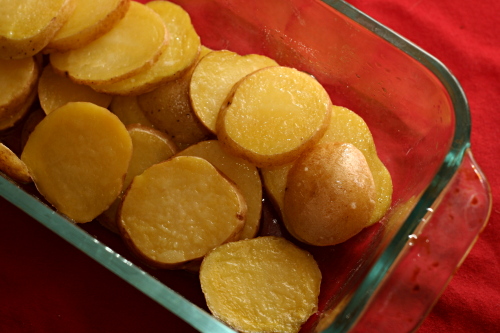
1. Turn on the oven to 400 degrees. Scoop the sliced potatoes into a microwaveable 8×8-inch baking dish. Drizzle on the oil and sprinkle with ½ teaspoon salt. Toss to coat, then spread the potatoes in an even layer. Cover with plastic wrap and poke a couple of holes in the top. Microwave on high until the potatoes are nearly tender, about 4 to 5 minutes.

2. Meanwhile, in a food processor or blender, combine the tomatoes with their juice, garlic, cilantro, jalapenos, and pickling juice. Process to a puree, leaving just a little texture.

3. Lay the fish fillets in a single layer over the potatoes. Pour the tomato mixture evenly over the fish and potatoes.

4. Slide the baking dish into the oven. Bake for 20 minutes, until the fish flakes when pressed firmly.

5. Scoop a portion of the fish-potato-sauce onto each dinner plate, sprinkle with cilantro, and serve right away.

toasted vegetable subs

I wouldn’t say that I get tired of pizza, but with nothing to break our Friday night pizza routine lately, I thought a break might be in order. I considered some of my other favorite take-out options that I could make at home and decided, mm, big cheesy toasted sandwiches.

As much as I love a bunch of different spicy meats (my god, I cannot avoid the innuendos around here lately) on a sandwich, Dave and I had a lot of meat plans (ack) for the weekend already. Plus, I was pretty sure I could make a vegetarian sandwich every bit as good as my favorite carnivorous version.

Maybe you don’t need a recipe for a veggie sandwich – just put your favorite vegetables on bread, right – but I looked around for one anyway and found several. Most were based on eggplant and zucchini, which…eh. I don’t know. Maybe that’s a little too earnest for a Friday night. I wanted a meatier vegetarian sandwich.

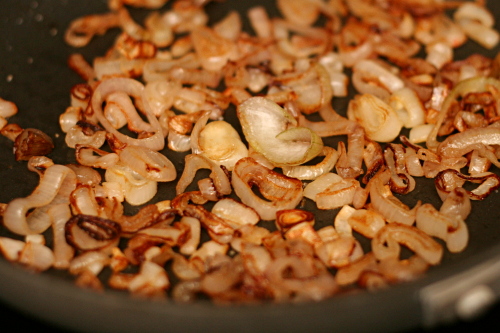
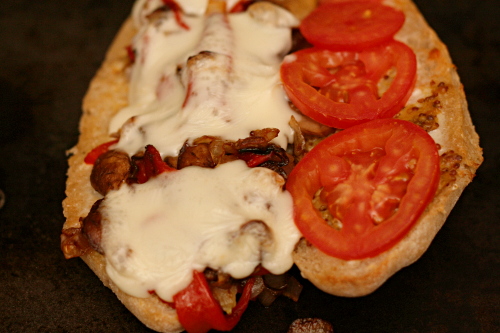
So mushrooms were in, of course, as well as caramelized shallots and roasted red peppers. I added the out-of-season mealy tomatoes simply because it seems traditional on a toasted sub, but I think chopped sun-dried tomatoes mixed with the other vegetables would be more flavorful.

Bread topped with melted cheese, tomatoes, and vegetables is the perfect way to take a break from pizza, isn’t it? But with a sandwich this good, I didn’t miss my normal Friday night pizza at all.

One year ago: Crispy Bagel Sushi Roll
Two years ago: Queso, Sun-Dried Tomato Dip

Printer Friendly Recipe
Toasted Vegetable Subs

Serves 4

2 red bell peppers
2 tablespoons olive oil
6 large shallots, peeled and sliced 1/8-inch thick
salt
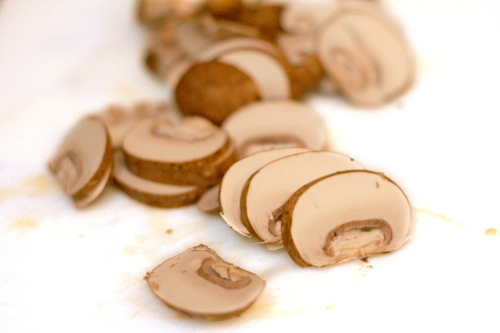
8 ounces mushrooms, sliced 1/8-inch thick
ground black pepper
4 large sub/hoagie rolls, halved lengthwise
mayonnaise
mustard
1 roma tomato, sliced then or 8 sun-dried tomatoes, diced small
4 ounces sliced provolone

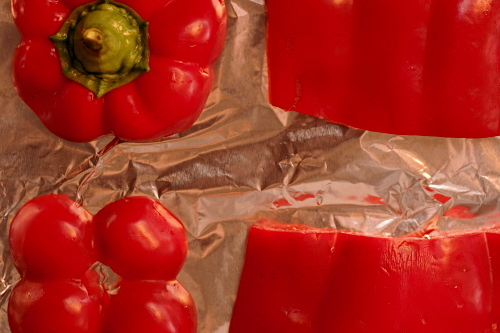
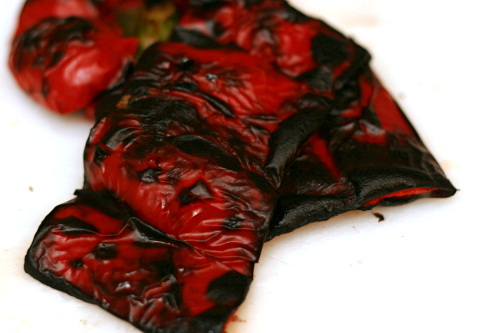
1. Adjust a rack to the upper-middle position and heat the broiler. Line a baking sheet with foil. Cut a ½-inch slice from the top and bottom of the red peppers. Remove the seeds; cut the middle section of the pepper in half from top to bottom; cut out the veins. Place the pepper skin-side up on the prepared baking sheet and broil until the skin is blistered and black, about 15 minutes. Remove the peppers from the oven and place them in a medium bowl. Cover the bowl and let the peppers steam for at least 10 minutes to loosen the skin. Leave the broiler on.

2. Meanwhile, heat 1 tablespoon oil in a medium nonstick skillet over medium-high heat. Add the shallots and ½ teaspoon salt; sauté, stirring constantly, until the shallots just start to brown. Reduce the heat to medium-low and continue to cook, stirring occasionally, until the shallots are golden to dark brown, about 15 minutes. Scrape them from the skillet to a medium bowl.

3. Heat the remaining 1 tablespoon oil in the same skillet (there’s no need to wash it) over medium-high heat. Add the mushrooms and ½ teaspoon salt and sauté, stirring constantly, until browned, about 3 minutes. Scrape them into the bowl with the shallots. Season the mixture with ground black pepper.

4. Peel the skin from the red pepper’s flesh and cut the flesh into 1/8-inch slices. Add it to the bowl with the mushrooms and shallots. If you’re using sun-dried tomatoes, add those to the bowl as well.

5. Spread a thin layer of mayonnaise, then mustard, over both sides of the rolls. Divide the vegetable mixture evenly between the bottom pieces of the rolls; top with the cheese. Arrange the slices of fresh tomato, if using, on the top piece of the sandwich bread. Place the sandwiches on a baking sheet, with the tomato and cheese facing up.

6. Broil until the cheese is melted and the bread is slightly toasted, 3-5 minutes. Let the sandwiches cool for a few minutes before serving.
butternut squash macaroni and cheese

I don’t think I do too badly with self-control. I can sit at home all day with banana cream pie in the fridge and not even think about it until it’s time for dessert and tea. I don’t drink alcohol on weekdays (those extra calories are saved for dessert), and it isn’t a struggle, even though we have plenty of it around.

But there are two foods that I have no control with – chocolate chip cookie dough and macaroni and cheese. No kidding, I can eat both until I’m feeling not so good, and even that won’t stop me from craving more as soon as I digest a bit. As a result, macaroni and cheese has been allocated to a once-in-a-blue-moon treat.

But…can I make a version of macaroni and cheese that is healthy enough to eat more often, but still worth craving?

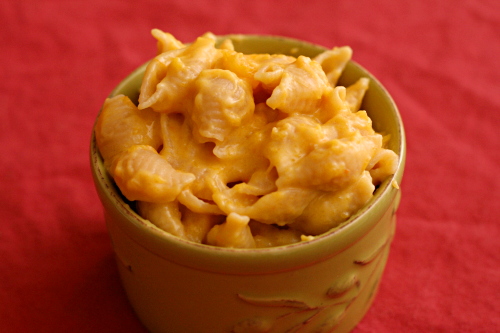
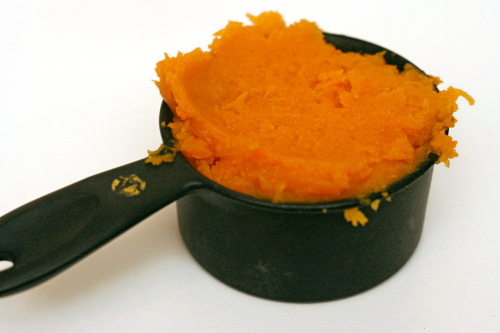
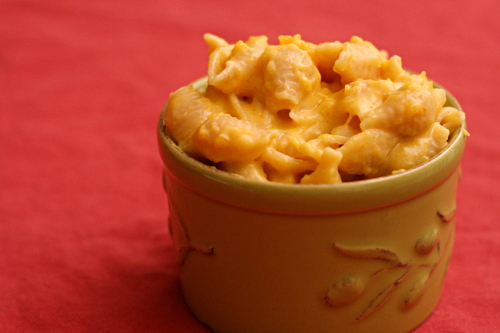
Apparently. I’m not saying that this is hardcore health food, but it’s not so bad nutrition-wise. The squash does an admirable job of replacing some of the cream sauce, and it isn’t just a “hide the vegetables” trick, because the flavor is surprisingly complementary. The final dish was sweeter than regular mac and cheese, but that wasn’t a bad thing. And it doesn’t hurt that the golden color of the squash makes the pasta look even cheesier.
I shouldn’t be shoveling this into my maw without abandon any more than I do regular macaroni and cheese, but at least it’s healthy enough to eat more than twice a year.  Tasty enough too.

One year ago: Fish Tacos

Printer Friendly Recipe
Butternut Squash Macaroni and Cheese (adapted from Branny Boils Over)

You can adapt this in a number of ways. The easiest is by changing the type of cheese, although if you can, using a combination of cheddar and a good melter will give you consistently great results. Branny adds in a couple ounces of cream cheese, which will make the sauce extra creamy, but I decided I could skip it and make this a little healthier.

Most homemade macaroni and cheese recipes call for a final baking step, which I’ve skipped here simply because I wanted to make this as easy as possible for a weeknight dinner. If you prefer your mac and cheese baked, I recommend pouring it into a broiler-safe 8-inch square pan, topping it with bread crumbs made from fresh bread, and heating it about 5 inches from the broiler for a couple of minutes.

Each serving has about 325 calories.

Serves 8

1 small butternut squash
12 ounces elbow macaroni
salt
2 tablespoons unsalted butter
2 tablespoons all-purpose flour
½ teaspoon powdered mustard
2 cups milk
4 ounces Monterey Jack cheese, shredded (1 cup)
4 ounces sharp cheddar cheese, shredded (1 cup)

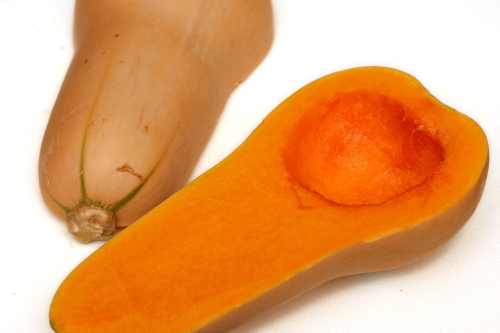
1. Adjust on oven rack to the middle position and heat the oven to 425 degrees. Cut the squash in half lengthwise, scoop out the seeds, and lay the halves cut side down on a parchment-lined baking sheet. Bake for 25-35 minutes, or until a butter knife inserted into the flesh meets no resistance. Scoop 2 cups of flesh from the squash and mash it with a fork, or, if you’re willing to put a bit more effort into it (I wasn’t), puree it in a blender or food processor.

2. Meanwhile, bring a large pot of water to a boil over high heat. Once it boils, add about a tablespoon of salt and the pasta. Cook the pasta until it’s tender. Drain and return the pasta to the pot.

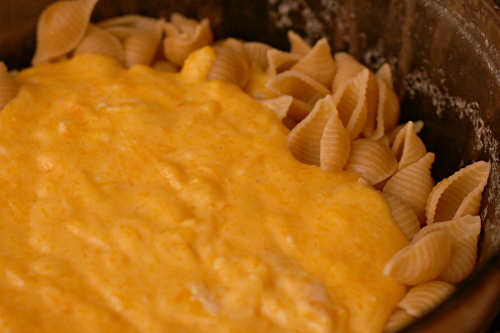
3. Melt the butter in a medium saucepan over medium heat. Once the foaming subsides, add the flour and mustard. Whisk constantly for 1 minute, then gradually whisk in the milk. Bring the mixture to a simmer over medium heat, whisking frequently, then lower the heat to medium-low and simmer for 5-6 minutes, until the mixture has the consistency of heavy cream. Add the cheeses, ½ teaspoon table salt, and the squash, stirring until the cheese melts.

4. Pour the sauce over the drained pasta and stir thoroughly. Serve immediately.

baked ziti

I am officially out of recipes to share. I am now raiding my “Probably Not” folder – the rejects that either didn’t taste good or didn’t photograph well. I’ll spare you that ones that didn’t taste good.

It seems like I could just make something new and blog about it, right? The thing is though, nothing is working quite right for me lately. My delicious banana cream pies keep coming out with a layer of candy armor over the crust; the southwestern pasta salad recipe I patched together was too similar to and probably not quite as good as this one; I never got the ratios right in my cocktail last weekend (despite many attempts), and I forgot to take final photos of my pesto.

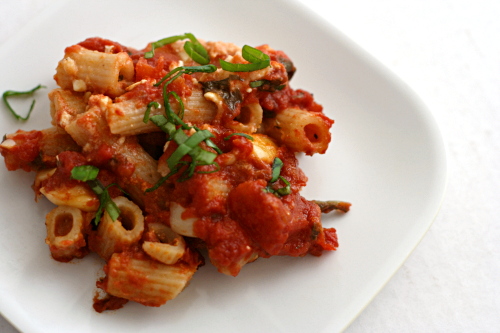
I’m just lucky that the photos of the baked ziti aren’t as ugly as I’d remembered. For this is not in the “didn’t taste good” category. With a mixture of pasta, tomatoes, cheese, and herbs, how could it not be delicious?

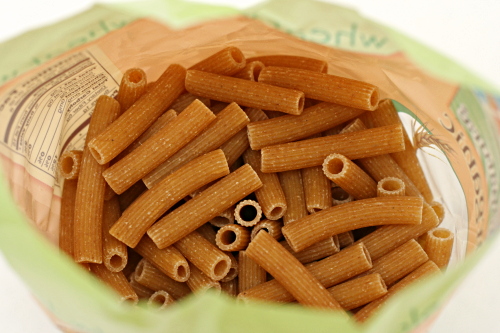
And although it’s hard to believe, you can make it halfway healthy without sacrificing much in the way of flavor or creaminess. In my experience, good whole wheat pasta (I like Bionaturae) is hardly different from refined versions. I’m perfectly happy with 1% cottage cheese and skim mozzarella. That just leaves the heavy cream to worry about, and with a slight increase in the cornstarch, you can get away with using milk instead.

And you can make it ahead, and it freezes well, and it reheats well, and heck, it isn’t half bad cold if you’re too impatient to bother heating it up. This is certainly worth pulling out of the reject file.

One year ago: Herbed Lima Bean Hummus
Two years ago: Country Crust Bread

Printer Friendly Recipe
Baked Ziti (from Cooks Illustrated)

Serves 8-10

Healthy tricks: Use 1% cottage cheese, whole wheat pasta, part-skim mozzarella, and 2 teaspoons cornstarch plus 1 cup milk instead of ¾ teaspoon cornstarch with 1 cup heavy cream.

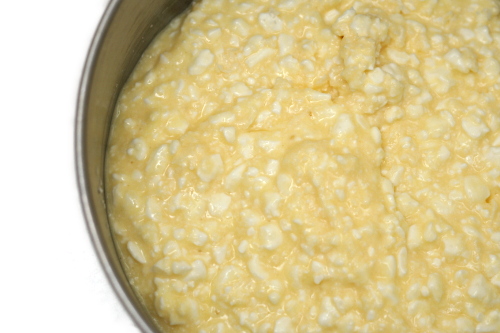
1 pound whole milk or 1% cottage cheese
2 large eggs, lightly beaten
3 ounces parmesan cheese (about 1½ cups), grated
table salt
1 pound ziti pasta
2 tablespoons extra-virgin olive oil
5 medium garlic cloves, minced (about 5 teaspoons)
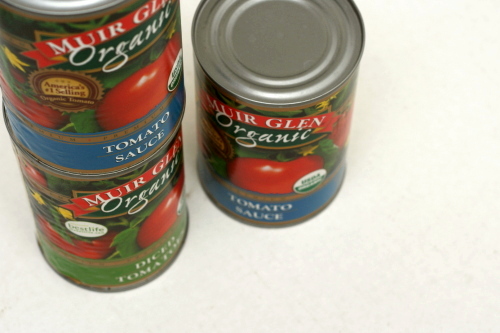
1 (28 ounce) can tomato sauce
1 (14.5 ounce) can diced tomatoes
1 teaspoon dried oregano
½ cup plus 2 tablespoons chopped fresh basil leaves
1 teaspoon sugar
black pepper
¾ teaspoon cornstarch
1 cup heavy cream
8 ounces low-moisture mozzarella cheese, cut into ¼ inch pieces (about 1½ cups)

1. Adjust oven rack to middle position and heat oven to 350°F. Whisk cottage cheese, eggs and 1 cup Parmesan together in medium bowl; set aside. Bring 4 quarts of water to boil in large Dutch oven over high heat. Stir in 1 tablespoon salt and pasta; cook, stirring occasionally, until pasta begins to soften but is not yet cooked through, 5 to 7 minutes. Drain pasta and leave in colander.

2. Meanwhile, heat oil and garlic in 12-inch skillet over medium heat until garlic is fragrant but not brown. Stir in tomato sauce, diced tomatoes, and oregano; simmer until thickened, about 10 minutes. Off heat, stir in ½ cup basil and sugar, then season with salt and pepper.

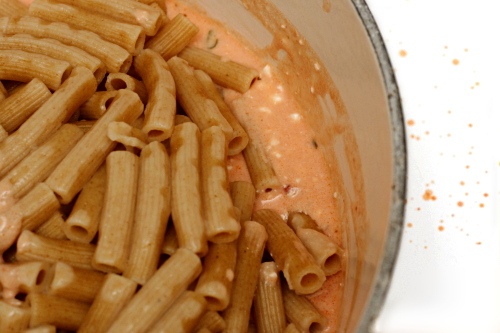
3. Stir cornstarch into heavy cream in small bowl, transfer mixture to Dutch oven set over medium heat. Bring to simmer and cook until thickened, 3 to 4 minutes. Remove pot from heat and add cottage cheese mixture, 1 cup tomato sauce and ¾ cup mozzarella, then stir to combine. Add pasta and stir to coat thoroughly with sauce.

4. Transfer pasta mixture to 13- by 9-inch baking dish and spread remaining tomato sauce evenly over pasta. Sprinkle with remaining ¾ cup mozzarella and remaining ½ cup Parmesan over top. Cover baking dish tightly with foil and bake for 30 minutes.

5. Remove foil and continue to cook until cheese is bubbling and beginning to brown, about 30 minutes longer. Cool for 20 minutes. Sprinkle with remaining 3 tablespoons basil and serve.

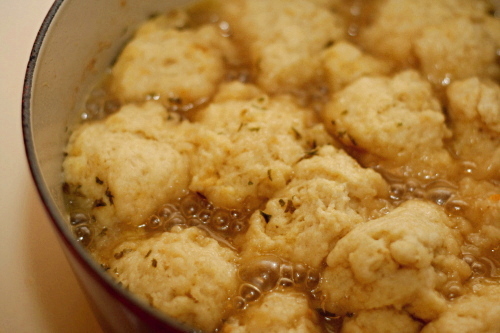
lighter chicken and dumplings

Aargh, I hate when I choose a recipe specifically because of one step that I find interesting, and then I screw up that step! In this chicken and dumplings recipe, Cooks Illustrated uses chicken wings to thicken the broth, instead of starch. I’m always fascinated by how homemade stock is gelatinous when it’s cold, so I was eager to try out the idea of thickening a broth with natural collagen.

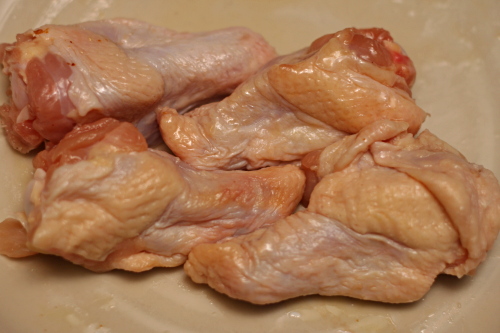
But then I didn’t quite buy chicken wings. Drummettes were more easily available, and they’re from wings, so I figured it was close enough. Too late, I read the recipe description closer and saw that they specifically refer to the joints in wings as having a lot of collagen. D’oh! My little drummettes didn’t have joints.

So much for that trick. I ended up dissolving about 2 tablespoons of cornstarch in about ¼ cup of water and stirring that into the broth near the end of cooking. That worked fine, although it wasn’t as fun.
Regardless, the resulting chicken and dumplings were really delicious. I particularly liked the idea of putting a kitchen towel under the lid of the pot while the dumplings cook, so that they’re tops don’t get soggy. I also like that it only has a bit of fat in it, so this meal is light enough to make again soon – correctly this time.

One year ago: Chopped Salad
Two years ago: Oatmeal

Printer Friendly Recipe
Lighter Chicken and Dumplings (from Cooks Illustrated)

Stew:

6 bone-in, skin-on chicken thighs (about 2½ pounds), trimmed of excess fat
table salt and ground black pepper
2 teaspoons vegetable oil
2 small onions, chopped fine (about 1½ cups)
2 medium carrots, peeled and cut into ¾-inch pieces (about 2 cups)
1 medium celery rib, chopped fine (about ½ cup)
¼ cup dry sherry
6 cups low-sodium chicken broth
1 teaspoon minced fresh thyme leaves
1 pound chicken wings
¼ chopped fresh parsley leaves

Dumplings:
2 cups (10 ounces) unbleached all-purpose flour
½ teaspoon baking soda
1 teaspoon sugar
1 teaspoon table salt
¾ cup buttermilk
4 tablespoons (½ stick) unsalted butter, melted and cooled slightly
1 large egg white

1. For the stew: Pat chicken thighs dry with paper towels and season with 1 teaspoon salt and ¼ teaspoon pepper. Heat oil in large Dutch oven over medium-high heat until shimmering. Add chicken thighs, skin-side down, and cook until skin is crisp and well browned, 5 to 7 minutes. Using tongs, turn chicken pieces and brown on second side, 5 to 7 minutes longer; transfer to large plate. Discard all but 1 teaspoon fat from pot.
2. Add onions, carrots, and celery to now-empty pot; cook, stirring occasionally, until caramelized, 7 to 9 minutes. Stir in sherry, scraping up any browned bits. Stir in broth and thyme. Return chicken thighs, with any accumulated juices, to pot and add chicken wings. Bring to simmer, cover, and cook until thigh meat offers no resistance when poked with tip of paring knife but still clings to bones, 45 to 55 minutes.

3. Remove pot from heat and transfer chicken to cutting board. Allow broth to settle 5 minutes, then skim fat from surface using wide spoon or ladle. When cool enough to handle, remove and discard skin from chicken. Using fingers or fork, pull meat from chicken thighs (and wings, if desired) and cut into 1-inch pieces. Return meat to pot.

4. For the dumplings: Whisk flour, baking soda, sugar, and salt in large bowl. Combine buttermilk and melted butter in medium bowl, stirring until butter forms small clumps; whisk in egg white. Add buttermilk mixture to dry ingredients and stir with rubber spatula until just incorporated and batter pulls away from sides of bowl.

5. Return stew to simmer; stir in parsley and season with salt and pepper to taste. Using greased tablespoon measure (or #60 portion scoop), scoop level amount of batter and drop over top of stew, spacing about ¼ inch apart (you should have about 24 dumplings). Wrap lid of Dutch oven with clean kitchen towel (keeping towel away from heat source) and cover pot. Simmer gently until dumplings have doubled in size and toothpick inserted into center comes out clean, 13 to 16 minutes. Serve immediately.