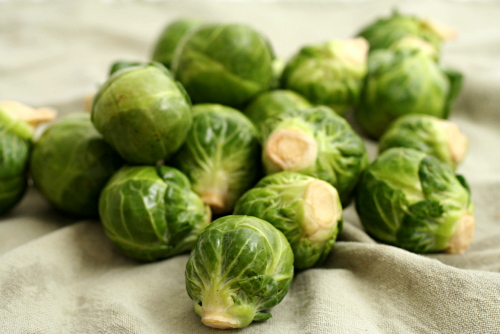
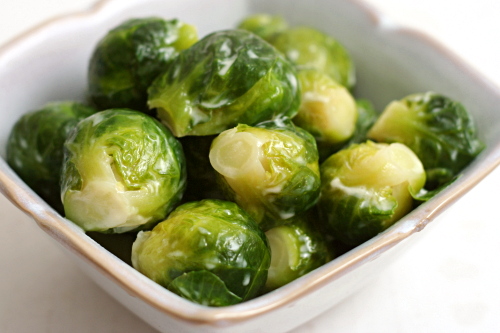
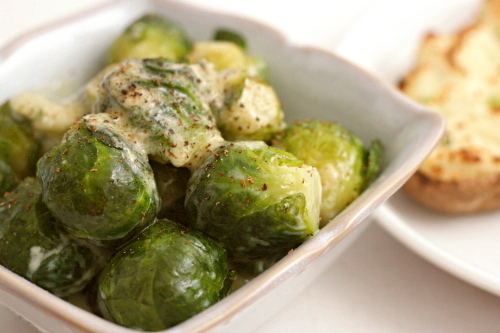
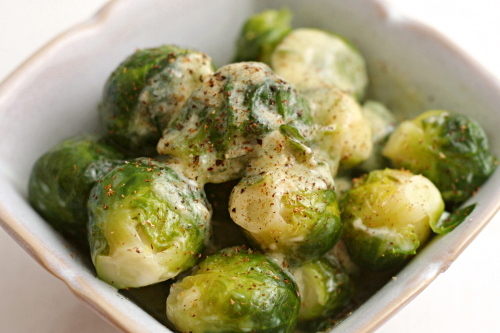
brussels sprouts braised in cream

Copy of IMG_1026

You know what I hate? Those “hide the vegetables in brownies” cookbooks. I admit that I don’t have kids, so maybe I just have no clue and that really is the only way to get them to eat something healthy. But, for now, my theory is that if you prepare vegetables well, there will be no need to hide them.

Copy of IMG_0970

By “preparing them well,” I don’t necessarily mean braising them in cream, of course, but if you can afford the caloric expense, these are certainly worth showcasing instead of hiding. Because these are absolutely just so freaking ridiculously good. Is that enough adverbs? Probably not. They’re worth more.

Copy of IMG_0988

They’re easy too, and you can clean and trim the sprouts early in the day and put them right in the saucepan with the cream and seasonings. About 15 minutes before dinner, put the pot on a hot burner and give it a quick shake every so often. If you have a few extra minutes to make these even more rich and delicious, remove the cooked sprouts from the pot and continue simmering the cream until it’s luscious and thick, then pour it over the sprouts. It’s just…I don’t even…you just can’t describe something that good.

Copy of IMG_1017

Because they’re so easy, so good, and most of the work can be done in advance, these are perfect for guests. And just a piece of advice: your guests will probably enjoy them even more if you don’t mention the whole “braised in cream” part.

Copy of IMG_1036

One year ago: Sausage Apple Hash
Two years ago: Risotto with Peas

Printer Friendly Recipe
Brussels Sprouts Braised in Cream (adapted from Cooks Illustrated)

Serves 4

1 pound small Brussels sprouts, stem ends trimmed with a knife and discolored leaves removed
1 cup heavy cream
½ teaspoon salt
pinch freshly grated nutmeg
ground black pepper

1. Bring the sprouts, cream, and salt to a boil in a 2-quart saucepan over medium-high heat. Cover and simmer, shaking the pan once of twice to redistribute the sprouts, until a knife tip inserted into the center of a sprout meets no resistance, 10-12 minutes. Season with nutmeg and pepper to taste.

2. (Optional) Heat the oven to 200ºF. With a slotted spoon, remove the sprouts from the saucepan and transfer them in a heatproof serving dish. Place the sprouts in the oven to keep warm. Meanwhile, simmer the remaining cream in the saucepan over medium-high heat until thick, about 5 minutes. Pour the cream sauce over the sprouts and serve immediately.

Copy of IMG_1024

Suggested menu: Steak au Poivre, Brussels Sprouts Braised in Cream, Twice-Baked Potatoes
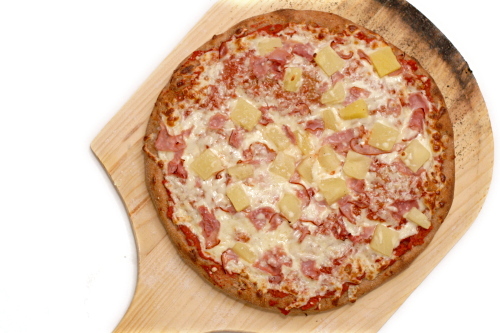
traditional pizza

Copy of IMG_0966

When it comes to cooking, I definitely have weaknesses. I’ve never cooked a perfect roast chicken. I can’t cook a steak with any sort of precision in doneness; if it’s somewhere between ‘moo’ and black, I consider it a success. And grilling? I’ve really never done it. Clearly there are holes in my culinary knowledge.

But pizza? Pizza, I know.

Copy of IMG_7570

I make pizza almost every week. I’ve tried all sorts of crusts, sauces, cheeses, and toppings. I’ve taken notes. And now, finally, I can make my perfect pizza. I’m not saying that my favorite will be your favorite; but it might give you somewhere to start and something new to try.

Copy of IMG_4671

Toppings – I’m going to attack this from top to bottom, which has the advantage of progressing from the simplest decisions to the more complicated. I’m going to focus on traditional pizza – tomato sauce, Italian cheeses, toppings. Most any topping will work here. Use whatever toppings you want in whatever quantities you prefer. I vary it quite a bit, with my favorite combinations being ham and mushroom, as well as ham and pineapple.

Copy of IMG_3544

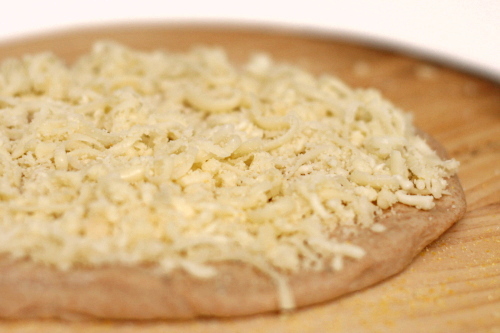
Cheeses – I like a ratio of 5 parts mozzarella to 1 part parmesan. If you have other cheeses around, cheddar or gouda or fontina, it can be fun to replace a portion of the mozzarella with those. I actually prefer part-skim mozzarella on pizza; it seems to melt more smoothly and it tastes just as good as whole milk cheese.

Copy of IMG_3676

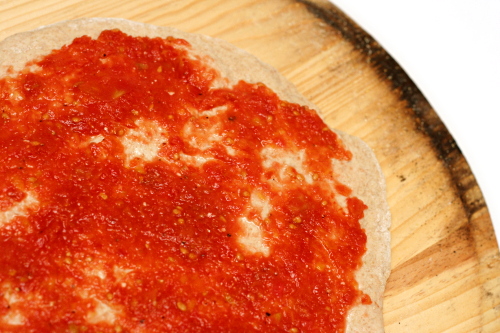
Sauce – My sauce is very (very very) simple, but you have to trust me that it’s just right. All I do is puree a drained can of diced tomatoes, strain them until they’re thick, then stir in salt and pepper. It’s easier than cooking a sauce, and I love the fresh flavor. It does complicate the addition of garlic and spices, but I get around that by adding the garlic as a topping and the herbs to the crust. (I don’t like raw garlic, so I toast the whole unpeeled cloves on the hot pizza stone for a few minutes.)

Copy of IMG_3554

Crust – I want a crust that is light and tender and flavorful, but, even more importantly, easy to work with. No one wants to fight with their pizza dough. This crust started with Cooks Illustrated’s popular pizza dough recipe, and then I started substituting white wine for a portion of the water, and after I made Peter Reinhart’s pizza dough, I became more committed to a cold overnight rise.

Copy of IMG_3550

Another important aspect of pizza crust is how you work with it. Be gentle with your dough. I need to stress that you really don’t want to use a rolling pin. Pull and stretch the dough. Pick it up, hanging the edges on your knuckles, and let gravity do the work. If it’s tearing or thinning unevenly, put it back down and just pull at the thicker parts. If it’s fighting you, walk away for five minutes to let it relax. (I use this technique when I fight with Dave too – ha!)

Copy of IMG_8407

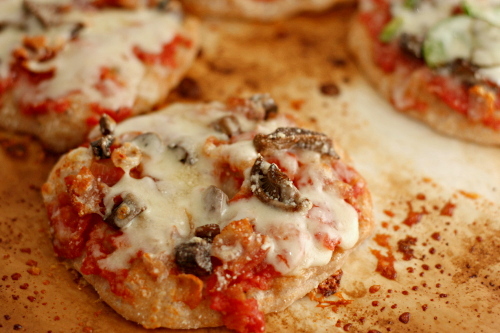
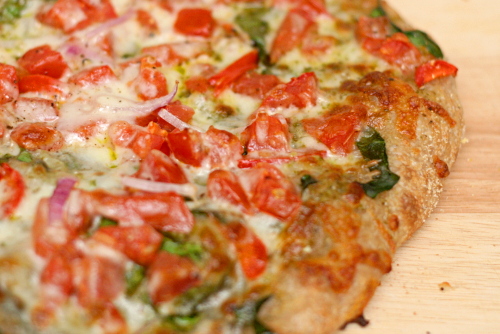
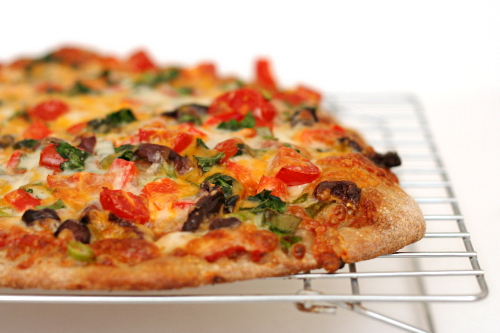
I’m sorry to be so braggy, but this pizza really is just great. Most of it comes down to the crust, which is thin, crisp, and light. I love the sauce too, because it tastes exactly like what it is – tomatoes. The combination of cheeses provides just the right amount of richness and flavor. I start out nearly every weekend by making this pizza, and I can’t think of a better way.

Copy of IMG_5293

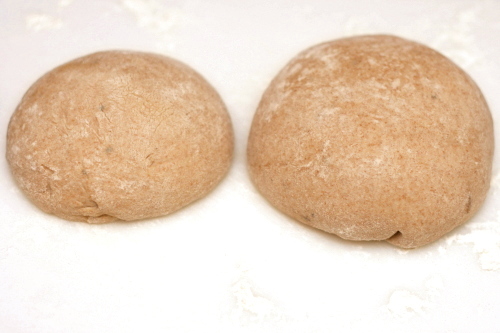
Update 3/16/10: I’ve successfully used this method to make this pizza crust whole wheat.  I made the pre-dough out of 11 ounces whole wheat flour, ¾ teaspoon salt, and 1 cup water .  After letting that sit overnight, I mixed it with the rest of the ingredients – 2 tablespoons olive oil, ½ teaspoon dried oregano, 11 ounces white bread flour, 1 teaspoon salt, 2 teaspoons instant yeast, 1 teaspoon granulated sugar, ¼ cup white wine, and ½ cup water.

Printer Friendly Recipe
Traditional Pizza

You can substitute up to 7 ounces (about 1½ cups) of whole wheat flour for the white bread flour, but expect longer rising times and a more stubborn dough. But if you’re patient during shaping, your crust will be just as light and crisp as dough made completely with white flour.

Dough:
2 tablespoons olive oil
½ teaspoon dried oregano
22 ounces (4 cups) bread flour
1¾ teaspoons salt
1 teaspoon sugar
2 teaspoons instant yeast
1/4 cup white wine
1½ cups water
cornmeal for dusting

Sauce:
1 (28-ounce) can diced tomatoes, drained
salt and pepper

Assembly:
3 cloves garlic, unpeeled
10 ounces (2½ cups) part-skim mozzarella, shredded
2 ounces (1 cup) parmesan, grated
toppings of your choice

1. For the dough: Heat the oil and oregano in a small saucepan until fragrant. Mix in the water and wine.

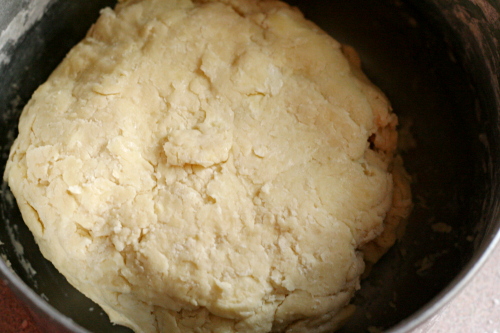
2. In the bowl of a stand mixer fitted with the dough hook, mix the flour, salt, sugar, and yeast. With the mixer on low speed, pour in the liquid mixture. Continue mixing on medium-low speed until the dough comes together, and then knead on medium-low speed for 8 minutes, until the dough is smooth and elastic. Add more flour or water as necessary to form a dough that is sticky but does not cling to the sides of the bowl. When the mixer is running on medium-low speed, the dough should not stick to the bottom of the bowl.

3. Spray a large bowl with nonstick spray. Rub your hands on the sprayed bowl to coat them with oil, then quickly form the dough into a ball. Place the ball of dough in the bowl and cover with plastic wrap.

4. Either set the dough aside to rise at room temperature, which will take 1½ to 2 hours, or refrigerate it until the next day. If it’s chilled overnight, it will take about 5 hours at room temperature to warm and finish rising. You can also reduce the yeast to ½ teaspoon and let the dough rise on the counter for about 8 hours after it has been chilled overnight.

5. For the sauce: Pulse the tomatoes in a food processor 10-12 times, until they’re pureed. Transfer them to a fine-mesh strainer set over a large bowl and let them drain, stirring occasionally for at least 10 minutes. (You can get away with less time if you actively stir and press the tomatoes through the strainer; if you wait longer, you can stir less.) Then discard the liquid in the bowl, transfer the tomatoes from the strainer to the now-empty bowl, and stir in a pinch of pepper and 1/8 teaspoon of salt.

6. Place a pizza stone on the bottom rack of the oven and preheat the oven to 500ºF. Place the garlic on the hot pizza stone for 3-4 minutes or until fragrant.

7. Divide the dough and shape each portion into a ball. You have a few options of how to divide it. It makes enough dough for three 12-inch pizzas. However, I always cut it in half and freeze half. Then I divide the remaining dough into two more parts, one twice the size of the other. I make the larger one into pizza and the smaller into cheese bread (no sauce or toppings). Let the balls of dough relax for 10-30 minutes.

8. Using tongs, remove the garlic from the oven and let it cool for a few minutes. Mince.

9. Work with one ball of dough at a time on a lightly floured surface. Flatten the dough, then pick it up and gently stretch it out, trying to keep it as circular as possible. Curl your fingers and let the dough hang on your knuckles, moving and rotating the dough so it stretches evenly. If it tears, just piece it together. If the dough stretches too much, put it down and gently tug on the thick spots.

10. Dust a pizza peel lightly with cornmeal and transfer the round of dough to the peel. Rearrange the dough to something reasonably circular; stab it several times with a fork. Add 1/3 of each of the garlic, sauce, and cheese, followed by toppings of your preference, then transfer the pizza to a hot pizza stone. Bake for 8-10 minutes, until the cheese is bubbling and the crust is spotty brown. Let the pizza cool on the peel for about 5 minutes before slicing and serving. Repeat with the remaining ingredients.

Copy of Copy of IMG_0960

chicken empanadas

Copy of IMG_1318

Dave got yelled at over these empanadas. I’m not much of a yeller normally; I’m more of a silent treatment and glower type of person. But there was no time for that; action needed to be taken immediately.

Copy of IMG_9781

It’s all because I made the filling a couple of days before I planned to form and bake the empanadas. The filling isn’t the most simple thing to make. There’s all kinds of chopping, browning, simmering, and meat shredding. And I was a little short on chicken, so I didn’t end up with as much filling as I’d hoped.

Copy of IMG_9780

That night, Dave needed to heat something up for himself for dinner, so I told him there was some extra brown rice with black beans in the fridge. I walked away for a few minutes, and when I came back, he had dumped my precious empanada filling onto a plate, microwaved it, and was scooping it up with a fork.

Copy of IMG_9973

Hey, guess what there is none of in this filling? 1) Brown rice. 2) Black beans.

“Damn!” he exclaimed. “This is good!”  That’s when I yelled, because I just needed him to stop eating it right away.

And then he was so apologetic and I felt like a jerk. He kept saying, “It really was tasty!” as if that was supposed to make me feel better about it.  Yes. I know it’s tasty.  I spent some good time making sure it was.

Copy of IMG_9987

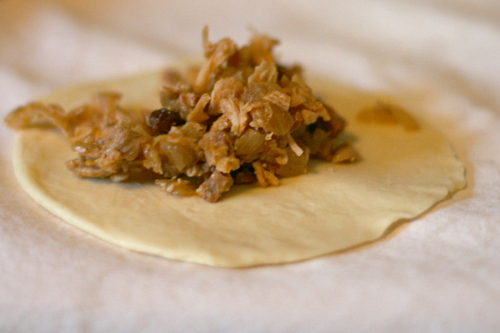
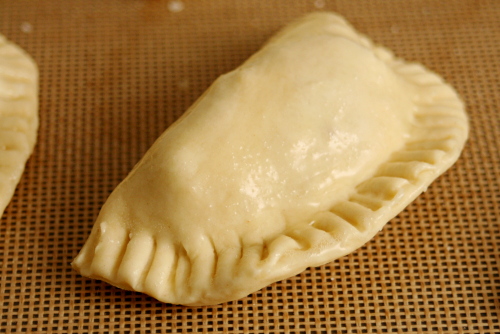
And what can you do to make something so delicious even better? Wrap it in pastry and bake it until it’s browned and flaky and crisp. Oh wow, these are good. And apparently that’s true whether they’re wrapped in pastry and baked or just dumped onto a plate and microwaved.

Copy of IMG_1331

One year ago: Comparison of 2 chocolate cake recipes
Two years ago: Cream cheese chocolate chip cookies (and my very first blog entry)

Printer Friendly Recipe
Chicken Empanadas (adapted from Smitten Kitchen and epicurious)

Makes about 18 empanadas

I didn’t actually measure anything in the filling. I had to leave the olives out because Dave hates them.

As I formed each empanada, I put it in the freezer while I worked with the rest. That way the dough didn’t get too soft and it baked up flaky.

After forming the empanadas, I baked about half of them immediately. I froze the rest for a couple of months, then baked them straight from the freezer. They were perfect.

Dough:
4½ cups (21.6 ounces) unbleached all-purpose flour
3 teaspoons salt
16 tablespoons (2 sticks) cold unsalted butter, cut into ½-inch cubes
2 large eggs
⅔ cup ice water
2 tablespoons distilled white vinegar

Filling:
3 whole chicken legs, including thighs (2 to 2¼ pounds total)
1 teaspoon salt
¼ teaspoon black pepper
1 tablespoon extra-virgin olive oil
2 large onions, halved lengthwise, diced
2 large garlic cloves, minced
2 Turkish bay leaves or 1 California
⅓ cup (1½ ounces) finely diced Spanish chorizo
½ teaspoon Spanish smoked paprika (not hot)
¼ cup chopped pitted green olives
¼ cup golden raisins
½ cup dry white wine
½ cup reduced-sodium chicken broth

Egg wash:
1 egg
water
salt

1. For the dough: Mix the flour and salt in a large bowl; blend in the butter with your fingertips or a pastry blender until the mixture resembles coarse meal with some roughly pea-sized butter lumps. Beat together the egg, water, and vinegar in a small bowl. Add it to the flour mixture, stirring until just incorporated. The mixture will look shaggy. Turn out the mixture onto a lightly floured surface and gather it together, kneading gently with heel of your hand once or twice, just enough to bring the dough together. Form the dough into two flat rectangles and chill them, each wrapped in plastic wrap, at least 1 hour or overnight.

2. For the filling: Pat the chicken dry and season it with salt and pepper. Heat 1 tablespoon oil in a 12-inch heavy skillet over medium-high heat until hot but not smoking, then add the chicken, skin-side down. Cook it without moving for about 3 minutes, until dark golden brown, then turn it and continue cooking for another 3 minutes. Remove the chicken from the pan and set it aside.

3. Add the onions, garlic, and bay leaves to the skillet and sauté, stirring frequently, until the onions are softened, 4 to 5 minutes. Add the chorizo and paprika and cook, stirring, for 1 minute. Add the olives, raisins, wine, and broth and bring the mixture to a boil, stirring and scraping up any brown bits. Return the chicken to the skillet along with any juices accumulated on the plate, then reduce the heat to medium-low and simmer, covered, turning the chicken once, until the chicken is tender, 25 to 30 minutes total.

4. Transfer the chicken to a clean plate. The sauce remaining in the skillet should be the consistency of heavy cream; if it isn’t, briskly simmer until it’s slightly thickened, about 5 minutes. When the chicken is cool enough to handle, discard the skin and bones and coarsely chop the meat. Stir the chicken back into the sauce. Discard the bay leaves and season the filling with salt and pepper. Let the filling cool for 30 minutes, uncovered.

5. To form and bake the empanadas: Adjust an oven rack to the middle position and preheat the oven to 400°F. Line a baking pan with a parchment paper or a silicone mat. Divide the dough into 24 equal pieces and from each into a disc. Keeping remaining pieces covered, roll out 1 piece on a lightly floured surface with a lightly floured rolling pin into a 5-inch round (about 1/8 inch thick).

6. Spoon about 2 tablespoons filling onto the center of each round of dough and fold the dough in half, enclosing the filling. Press the edges together to seal, then crimp decoratively with your fingers or the tines of a fork. Transfer the empanada to the prepared pan. Repeat with the remaining dough. You might have extra dough.

7. Beat the egg with 1 tablespoon of water and a pinch of salt. Brush the empanadas with the egg wash, then bake one sheet at a time until the empanadas are golden brown, about 25 minutes. Transfer them to a cooling rack and let them cool for at least 10 minutes. Serve warm.

Copy of IMG_1320

mashed potatoes with root vegetables

Copy of IMG_8247

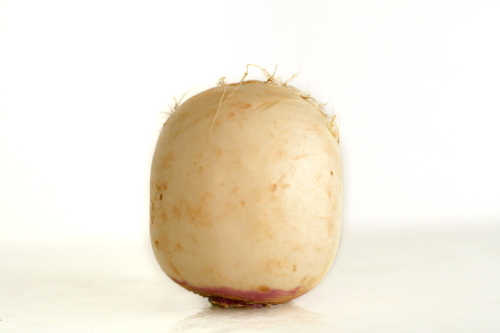
Isn’t that turnip the cutest little thing? Like an old crazed bald man, with just a few errant hairs.

Copy of IMG_8259

In truth, when I was planning this dish, I had to call a friend to give me some root vegetable knowledge. Which is the one that looks like a white carrot? (A parsnip, it turns out.) Which one should I try first? She recommended turnips, and thus dictated my first ever turnip purchase.

Copy of IMG_8262

Of course I took the wussy way out and mixed them with potatoes. Still, I enjoyed the extra dimension of flavor they provided – kind of licoricey and fennel-like. Now I’m looking forward to introducing myself to other root vegetables with this recipe – celery root in particular sounds interesting.

Copy of IMG_8280

One year ago: Chanterelle Salad with Speck and Poached Eggs

Printer Friendly Recipe
Mashed Potatoes and Root Vegetables (from Cooks Illustrated)
4 tablespoons unsalted butter
8 ounces carrots, parsnips, turnips, or celery root; carrots or parsnips cut into ¼-inch-thick half-moons; turnips or celery root cut into ½-inch dice (about 1½ inch cups)
1½ pounds Yukon Gold potatoes, peeled, quartered lengthwise, and cut crosswise into ¼-inch-thick slices; rinsed well in 3 to 4 changes of cold water and drained well
⅓ cup low-sodium chicken broth
table salt
¾ cup half-and-half, warmed
3 tablespoons minced fresh chives
ground black pepper

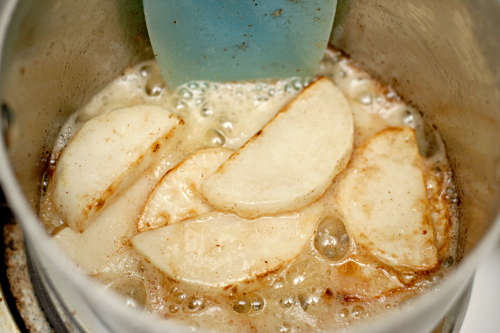
1. Melt butter in large saucepan over medium heat. When foaming subsides, add root vegetables and cook, stirring occasionally, until butter is browned and vegetables are dark brown and caramelized, 10 to 12 minutes. (If after 4 minutes, vegetables have not started to brown, increase heat to medium-high.)

2. Add potatoes, broth, and ¾ teaspoon salt and stir to combine. Cook, covered, over low heat (broth should simmer gently; do not boil), stirring occasionally, until potatoes fall apart easily when poked with a fork and liquid has been absorbed, 25 to 30 minutes. (If liquid does not gently simmer after a few minutes, increase heat to medium-low.) Remove pan from heat; remove lid and allow steam to escape for 2 minutes.
3. Gently mash potatoes and root vegetables in saucepan with potato masher (do not mash vigorously). Gently fold in warm half-and-half and chives. Season with salt and pepper to taste; serve immediately.
Copy of IMG_8289

african pineapple peanut stew

Copy of IMG_0562

I sort of hate when I find great recipes from blogs that come from a cookbook I already own. I guess it makes sense – now it isn’t just words on a page because someone (in this case, a number of people) is actually recommending it. But man, I sure wish that I could be the person to pick out the oddball recipe from the cookbook and spread the word about how great it is! You can tell I’m not one of those people who finds good stuff at thrift shops, can’t you?

Copy of IMG_0555

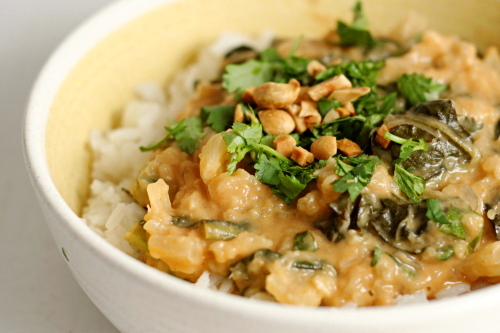
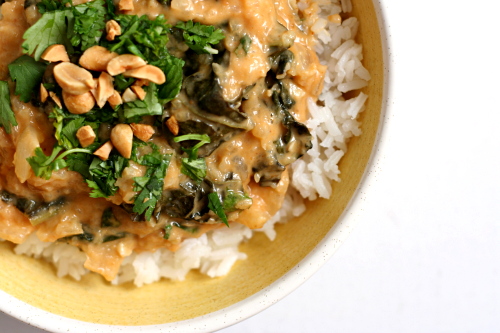
But can you really blame me; I mean, come on, pineapple, peanut butter, onions, and kale? Who would have expected that to come together into something delicious?

Copy of IMG_0546

It did though. No one of the flavors dominated; it wasn’t like I took a bite of stew and thought, “mm, pineappley.” Everything was in balance, coming together to create a meal that was earthy and comforting. I was surprised by how tasty it was, and I’m surprised that I’m already thinking that it would be the perfect way to use up the rest of the jar of peanut butter before we move. Who knew I’d ever crave pineapple stew?

Copy of IMG_0553

One year ago: Pumpkin Ravioli

Printer Friendly Recipe
African Pineapple Peanut Stew
(adapted from Moosewood Restaurant Cooks at Home)

4 servings

I used natural peanut butter, which worked great. Also, I only had Frank’s hot sauce, which isn’t as spicy as some, and I would have loved a little more heat. I think a pinch of cayenne added with the garlic would be great too.

1 tablespoon vegetable oil
1 small onion, diced
salt
2 garlic cloves, minced
1 bunch kale or Swiss chard, large stems discarded, leaves chopped coarse
1 (20-ounce) can crushed pineapple, undrained
½ cup peanut butter
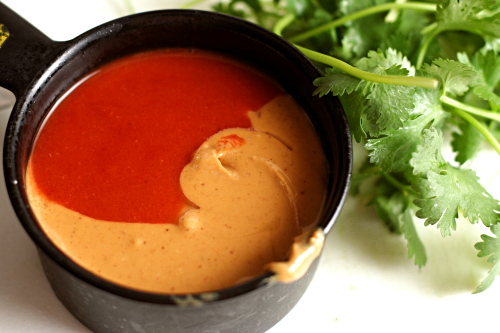
1 tablespoon Tabasco or other hot pepper sauce
½ cup chopped fresh cilantro
¼ cup peanuts, chopped
1 scallion, sliced

1. Heat the oil in a 5-quart Dutch oven over medium heat. Add the onion and a pinch of salt and sauté, stirring occasionally, until just browned at the edges, about 8 minutes. Add the garlic and cook, stirring constantly, until fragrant, about 30 seconds.

2. Add pineapple to the pot and bring to a simmer; add the greens, cover, and simmer for about 5 minutes, stirring occasionally, until just tender. Stir in the peanut butter and hot sauce and simmer for another 5 minutes, until the flavors are blended. Stir in the cilantro just before serving and add salt if necessary. Serve over rice or couscous, garnishing each serving with the peanuts and scallions.

Copy of IMG_0564

wheat berries with caramelized onions, feta, and lentils

Copy of IMG_0628

I’m really looking forward to moving to New Mexico. There’s absolutely nothing wrong with Philadelphia; any unhappiness I had here was my own deal and not a result of the location. But I am excited about having a fresh start somewhere.

Copy of IMG_0597

I am a little concerned about the grocery store situation. I have been majorly spoiled the last few years by always living near a Wegman’s. If you’re not familiar, suffice to say that it’s a great store, with a huge selection and high quality. When a recipe says that an ingredient can be found in “any well-stocked grocery store”, I’ve never had to worry about how I’d get a hold of it.

Copy of IMG_0613

The town we’re moving to, though, is small and isolated. It has just one grocery store. My initial explorations during our visit there over the summer indicated that it isn’t terrible but it isn’t great. I should be able to find, say, goat cheese, but only one type.

Copy of IMG_0606

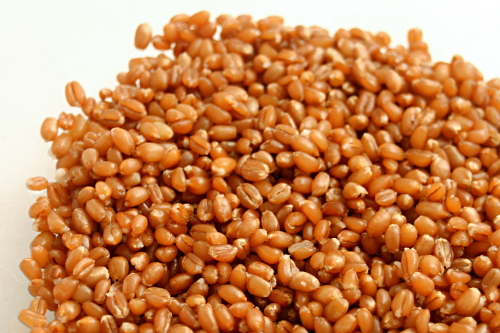
So I’ve been trying to take advantage of the wide selection of my current store while I can, by buying random unusual ingredients that I’m pretty sure I won’t be able to find after the move. My plan was actually to buy farro, but I guess even Wegman’s has its limits because they didn’t have it. I almost went with quinoa, since it’s familiar and safe, but I managed to talk myself into trying wheat berries instead.

Copy of IMG_0618

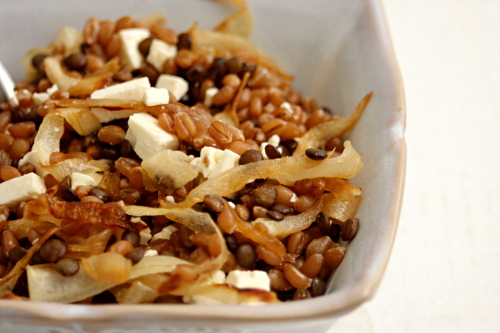
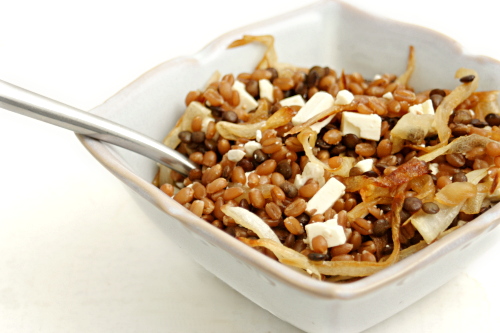
Well, I don’t know about farro, but wheat berries are certainly delicious. They’re nutty, and the texture was chewy, not unpleasantly crunchy or mushy. The sweet caramelized onions were a great compliment, and then the salty feta was perfect on top of all of that. The whole thing was just so good, and I couldn’t believe how healthy it was to boot. I sure hope I can find wheat berries and feta after we move because I want to be making this meal a lot!

Copy of IMG_0621

One year ago: Bacon-Wrapped Pork Tenderloin Medallions

Printer Friendly Recipe
Wheat Berries with Caramelized Onions, Lentils, and Feta (adapted a bit from Orangette; wheat berry cooking method from Deborah Madison’s Vegetarian Cooking for Everyone)

2-3 servings

You might not need a recipe here, because you’re just combining grains and lentils with caramelized onions and feta. If you already have favorite ways to cook grains, lentils, and onions, you should absolutely feel free to use those. In case you don’t, I’ll provide my preferred methods here.

You can probably skip the lentils if you don’t want to deal with an extra ingredient. Also, I haven’t tried it myself, but I don’t see why you couldn’t just add them to the wheat berries at the point when the wheat has 25 minutes of cooking left. Just make sure there’s enough water in the pot.  (Update 6/14/11: You can definitely cook the lentils in the same pot as the wheat berries. I’ve also used farro in this recipe now, which is convenient because it cooks in the same amount of time as lentils.)

I think you could use almost any grain here, as long as you adjust the cooking time. Quinoa would definitely be good (and would make this meal gluten-free).

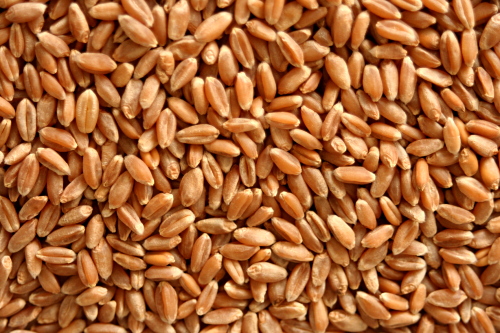
¾ cup wheat berries
salt
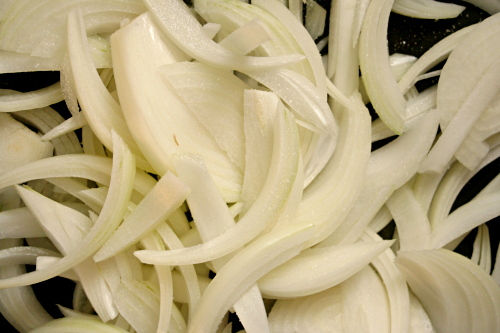
2 onions, sliced
1 tablespoon olive oil
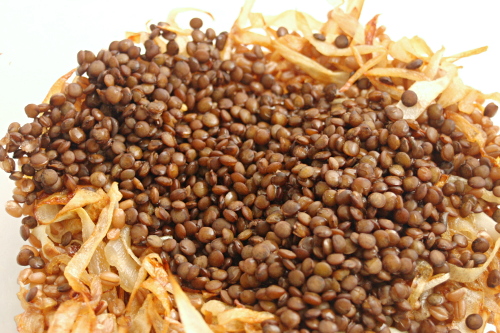
½ cup lentils, preferably lentils de puy, picked over and rinsed
4 ounces feta cheese, crumbled
hot sauce (optional)
lemon wedges (optional)

1. Soak the wheat berries in water for at least an hour and up to overnight. Put them in a pot with enough water to cover by a few inches. Bring to a boil, then lower the heat, cover the pot, and simmer until they’re tender, 1 to 2 hours. Add ½ teaspoon salt once they’ve started to soften.

2. Heat the oil in a large nonstick skillet over medium-high heat. Add the onions and ¼ teaspoon salt, reduce the heat to medium, and cook, stirring somewhat frequently, until they just start to brown, about 8 minutes. Reduce to heat to medium-low and continue to cook and stir until the onions are evenly golden brown, about 20 minutes longer.

3. Put the lentils into a small saucepan. Add 3 cups of cold water and ¼ teaspoon salt. Bring to a boil over medium-high heat, then reduce the heat and simmer until tender but not falling apart, about 20 to 25 minutes. Drain.

4. Combine the wheat berries, caramelized onions, lentils, and feta. Adjust the seasonings if necessary and serve with either hot sauce or lemon wedges, if desired.

Copy of IMG_0625

buffalo chicken pizza

Copy of IMG_0390

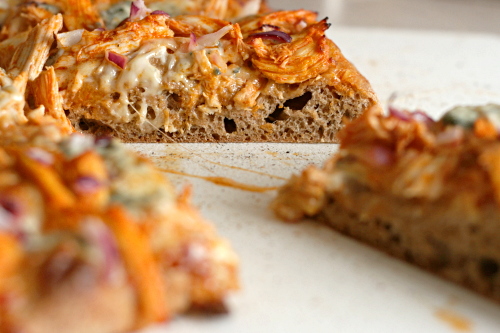
I’m not experienced in the ways of the buffalo wing. I generally find them…well, let’s just say that the ratio of meat to gross animal parts isn’t high enough for my liking, what with the skin and bones and weird tendony whatever bits. The sauce is good though!

IMG_0365

A quick internet search indicated that there are several directions you can go with buffalo chicken pizza. Options for the pizza’s sauce include regular tomato sauce, blue cheese (or ranch) dressing, buffalo sauce, and skipping a sauce altogether. Some recipes use mozzarella and some skip it or use cheddar. I didn’t know what to do. I’ve never even eaten buffalo chicken pizza before.

Copy of IMG_0368

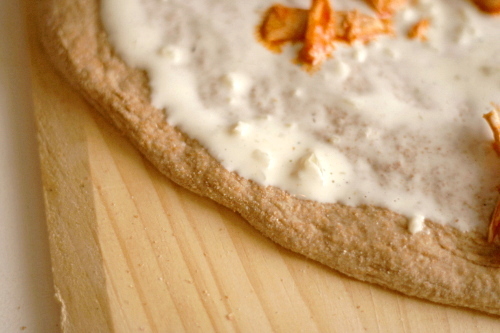
I eventually decided to use ranch dressing as the sauce, but I made my own and kept it pretty light. I just mixed up a bit of buttermilk (or plain yogurt) with mayonnaise and added some basic seasonings. It added a welcome tartness, plus the soothing dairy balances the spicy chicken.

Copy of IMG_0377

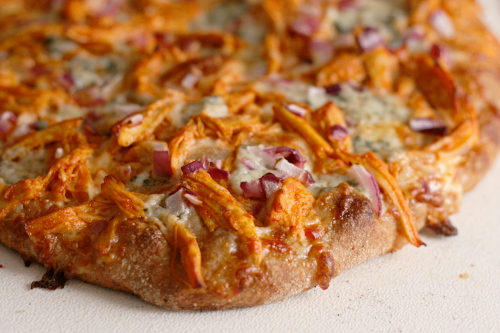
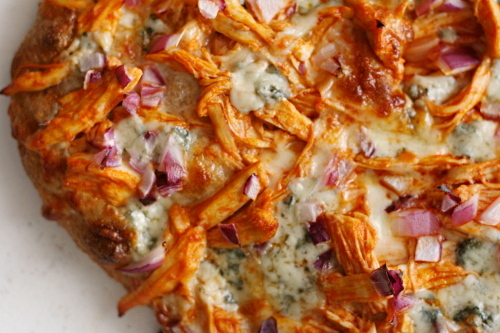
On top of the sauce, I layered the buffalo sauce-coated shredded chicken, a skimpy amount of mozzarella, enough blue cheese to taste without it being overpowering, and some red onions, which caramelized in the oven and contributed sweetness.

Copy of IMG_0384

This is most definitely the best buffalo chicken pizza I’ve ever had! And I’m pretty sure that isn’t just because it’s the only one I’ve had. Everything is in such a nice balance – the spice heat, sweet onions, tangy dressing, stinky blue cheese. And you know what’s thankfully missing? Bones and skin and weird tendony whatever bits. Score!

Copy of IMG_0394

One year ago: Gallitos (Costa Rican Breakfast Tacos)

Printer Friendly Recipe
Buffalo Chicken Pizza

Serves 3-4

You can really make the shredded chicken however you want. If you just want to poach a boneless skinless chicken breast, that’s probably easier, and if you have leftover rotisserie chicken or something, that will work too. This is just how I like it. Also feel free to skip the brining; I don’t think it makes a huge difference here since there are so many other flavors, but it was easy and I had time, so I did it.

If you’d like more spice, stir some hot sauce (hotter than Frank’s, like Tabasco) or a small pinch of cayenne into the buffalo sauce.

1 large bone-in skin-on chicken breast (about 12 ounces)
salt
1 teaspoon oil
1 tablespoon butter
¼ cup Frank’s hot sauce
½ teaspoon packed brown sugar
1 teaspoon apple cider vinegar
1 tablespoon buttermilk or plain yogurt
1 tablespoon mayonnaise
pinch of sugar
pinch of garlic powder
2 ounces (½ cup) mozzarella, shredded
1 ounce (¼ cup) blue cheese, crumbled
¼ cup red onion or scallions, diced very fine
12-16 ounces pizza dough (one third of a recipe calling for about 4 cups of flour), stretched out to 9-12 inches

1. For the chicken: Stir 2 tablespoons salt into 2 cups cold water until it dissolves. Add the chicken; refrigerate for 30 minutes, then remove the chicken from the brine and pat it dry. Adjust an oven rack to the middle-low position and heat the oven to 450ºF. Heat a small oven-safe skillet over medium-high heat. Add the oil and swirl to coat the bottom of the pan; place the chicken breast in the pan skin-side down. Cook without moving until well-browned, about 5 minutes. Turn the chicken over and move the pan to the oven. Roast until an instant-read thermometer inserted into the thickest part of the chicken measures 160ºF or the juices run clear when small cut is made in the chicken. Remove the pan from the oven and set aside. When the chicken has cooled enough to handle, remove and discard the skin (or eat it, because it’s crisp and delicious!) and shred the meat with your fingers or two forks. (If you’ve used good chicken, brined it, and pan-roasted it like this, I dare you not to resist stealing bites of the shredded chicken. It’s delicious.) Increase the oven temperature to 500ºF.

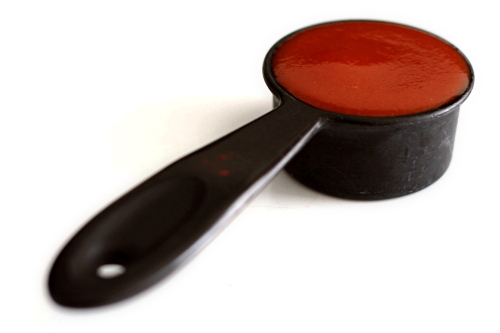
2. For the buffalo sauce: Melt the butter in a small saucepan. Add the brown sugar, hot sauce, and vinegar. Mix the sauce with the shredded chicken.

3. For the white sauce: In a small bowl, stir together the buttermilk or yogurt, mayonnaise, sugar, garlic powder, and a pinch each of salt and pepper.

4. Assemble the pizza: Place the pizza dough on a wooden paddle that’s been liberally coated with cornmeal. (Or use parchment paper instead of the cornmeal, or the back of a baking sheet instead of the paddle.) Spread the white sauce evenly on the pizza dough; top with the chicken, then the cheeses, and finally the onions.

5. Bake the pizza for 8-10 minutes, until the cheese is melted and bubbling and the crust is browned. Let the pizza rest about 5 minutes before cutting and serving.

Copy of IMG_0389

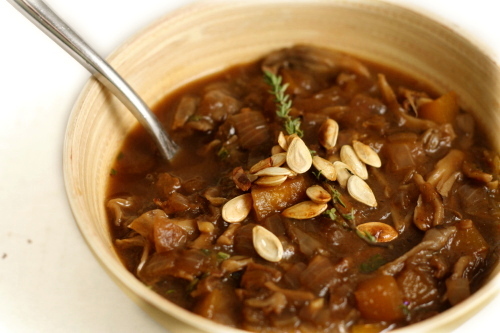
pumpkin and mushroom soup

Copy of IMG_0331

Cooking déjà vu: When you start to make a recipe and then think, “Wait a minute…this seems familiar…have I made this before?!” Generally not a great sign because if you don’t remember it, perhaps it wasn’t worth remembering.

Copy of IMG_1266

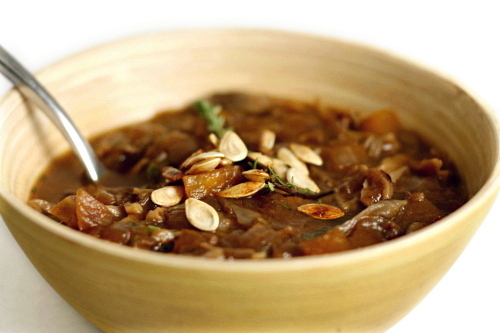
I actually found pictures of this soup from last year, when I’d apparently made it and decided it wasn’t worth sharing. But I didn’t understand how a recipe like this could be anything but good – mushrooms and squash seem like a great match that can only get better with the addition of fall herbs and spices.

Copy of IMG_0315

I don’t think I did too much differently this time – cooked the vegetables longer until they were nice and browned maybe, and this time I stirred in some pureed pumpkin at the end, whereas before I’d just used diced squash at the beginning.

Copy of IMG_0318

The pureed squash made a huge difference in texture, thickening the soup so much it resembled stew. It was so hearty and delicious, and you’d never guess that there’s no meat in it, especially with that deep brown color. I was right to try this recipe again, because the woodsy mushrooms and the earthy squash are an unbeatable combination.

Copy of IMG_0328

One year ago: Sugar Cookies (for decorating)

Printer Friendly Recipe
Pumpkin and Mushroom Soup (adapted quite a bit from Moosewood Restaurant Cooks at Home)

Serves 4

I kind of feel like this should be called “Squash and Mushroom Soup” because it seems like other types of squash are used more in savory recipes than pumpkin is. You can really use any type of squash you want, as long as it has a similar texture. The same goes for the fresh mushrooms – I used maitake, but cremini, shiitake, button, whatever, they all work.

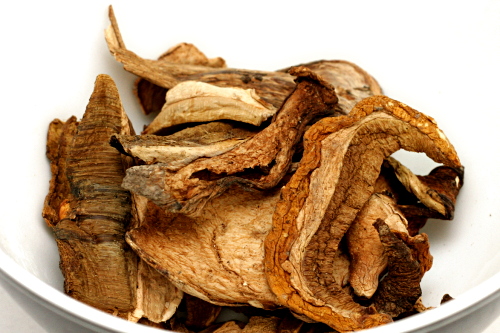
½ ounce dried porcini mushrooms, rinsed
water
2 tablespoons olive oil
1 medium onion, diced
salt and ground black pepper
1 small pie pumpkin, peeled and diced
12 ounces mushrooms, cut into bite-sized pieces
2 cloves garlic, minced
1/2 teaspoon thyme leaves
1 teaspoon sage leaves, minced
pinch nutmeg
¼ cup Marsala or dry sherry
2 cups chicken or vegetable broth
½ cup cooked pureed pumpkin (like the stuff from a can)

1. Place the dried mushrooms in a small saucepan and add enough water to cover. Bring to a boil over medium-high heat, then immediately turn off the heat. Set aside.

2. Heat the oil in a large saucepan or Dutch oven (not nonstick) over medium heat. Add the onions and a pinch of salt and cook, stirring occasionally, until just beginning to brown at the edges, about 8 minutes. Add the squash, mushrooms, ½ teaspoon salt and ¼ teaspoon ground black pepper and continue cooking and occasionally stirring until the mushrooms release their liquid, it evaporates, and the vegetables brown, about 15 minutes.

3. Meanwhile, use a fork to lift the rehydrated porcini mushrooms from the liquid and finely chop them. Save the liquid.

4. Add the porcini, garlic, herbs, and nutmeg and cook, stirring constantly, until fragrant, about 30 seconds. Pour in the wine and cook until it nearly evaporates, scraping the bottom of the pan to release the browned bits.

5. Add the broth, pumpkin, and mushroom soaking liquid (either strain it through a coffee filter or just be careful to leave the grit behind with a bit of liquid) and bring the soup to a simmer over medium heat. Adjust the seasonings and serve.

Copy of IMG_0335

pork chops loco moco

Copy of IMG_9853

I feel a little guilty when Dave and I spend most of the weekend sleeping in, watching football, reading books, and, in my case, cooking. We are booooring.

Copy of IMG_9835

But then I figure that someday, if everything goes as planned, we’ll have kids and then we won’t be able to spend all weekend being lazy. I don’t think I’ll be cooking from Cooks Illustrated’s Restaurant Favorites at Home very often when we have kids, which is a shame, because it’s a fun cookbook and I haven’t used it as much as I should. I better take advantage while I can.

Copy of IMG_9837

Although really, this meal didn’t take nearly as long to prepare as I thought it would based on the length of the recipe. It’s true that there are five parts – rice, pork chops, scrambled eggs, mushroom gravy, and fried onions. Fortunately, the rice, meat and eggs are as simple as they could get, and the sauce is pretty quick as well. That means that only the onions take some time.

Copy of IMG_9846

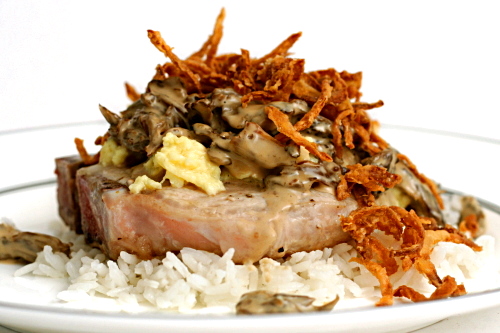
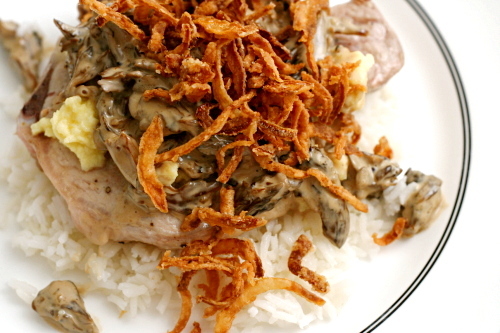
Loco moco is a Hawaiian dish that, as its most basic, is rice, a hamburger patty, gravy, and a fried egg. For their cookbook, Cooks Illustrated adapted the recipe from Sam Choy’s, who replace the hamburger with a pork chop, the fried egg with scrambled, and the brown gravy with a mushroom cream sauce, in addition to adding the fried onions.

Copy of IMG_9841

Hoo boy, I like this kind of meal anyway, where a bunch of different stuff all meshes together, but this in particular was fantastic. So many textures – the meat, the rice, soft eggs, crunchy onions. So many flavors – nutty white rice, sweet fried onions, savory pork, all coated in a rich mushroom sauce. Even if it had taken most of a day to make, which it didn’t, it would have been worth it. Especially since I would have just been lounging around in my pajamas anyway.

Copy of IMG_9854

One year ago: Pumpkin Pancakes

Printer Friendly Recipe
Pork Chops with Rice, Eggs, Onions, and Gravy
(from Cooks Illustrated’s Restaurant Favorites at Home)

This is the recipe straight from the cookbook. However, next time I plan to use a boneless pork chop. I think it will brown better in the pan, plus it was a little hard to see where the bone was versus the meat once the pork was covered in sauce and other goodies.

Also, I think it makes more sense to cook the pork chop before the eggs. And, in step 3, I don’t see why you’d want to dirty an extra dish by transferring the sauce to a measuring cup; just cover the pan you cooked it in. Finally, the recipe calls for both the eggs and the pork chops to be cooked on high heat, but I’ve had better luck with medium-high heat for both.

Fried Onions:
3 cups vegetable oil
½ cup all-purpose flour
1 teaspoon salt
½ tablespoon ground black pepper
1 small yellow onion, halved and sliced thin

Rice:
2 teaspoons vegetable oil
1 cup long-grain white rice
½ teaspoon salt

Sauce:
1 teaspoon cornstarch
1 tablespoon vegetable oil
4 ounces fresh shiitake mushrooms, stemmed and sliced thin
1 cup heavy cream
2 teaspoons soy sauce
1 teaspoon oyster sauce
salt and ground black pepper

Eggs:
4 large eggs
¼ cup whole milk
pinch ground black pepper
1 tablespoon unsalted butter

Pork chops:
1 tablespoon vegetable oil
4 thin bone-in center-cut loin pork chops, about ½ inch thick
salt and ground black pepper

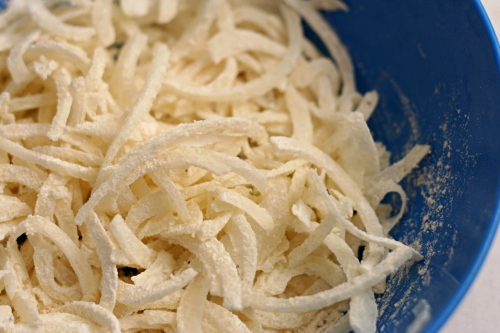
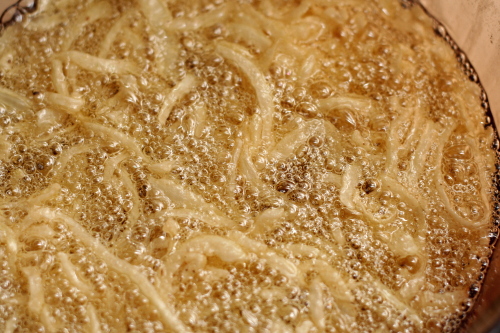
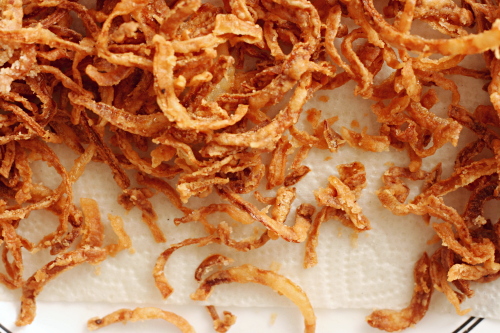
1. For the fried onions: Heat the vegetable oil in a Dutch oven over medium-high heat until it reached 350 degrees. (Use an instant-read thermometer that registers high temperatures or clip a candy/deep-fat thermometer onto the side of the pan before turning on the heat.) Meanwhile, mix the flour, salt, and pepper together in a large bowl. Add the onion to the flour mixture and toss thoroughly to coat. Transfer the floured onion to a large strainer (or colander) set over another bowl (or the sink) and shake vigorously to remove the excess flour. Add the onion to the oil and fry until golden brown, 2 to 2½ minutes, adjusting the heat as necessary to maintain the cooking temperature. Remove the onion from the oil using a spider or slotted spoon, tapping the handle several times on the rim of the pot to drain any excess oil, then transfer to a large plate lined with several layers of paper towels. Set aside.

2. For the rice: Heat the vegetable oil in a small saucepan over medium heat until shimmering. Add the rice and cook, stirring constantly, until transparent, 2 to 3 minutes. Add 1½ cups water and the salt. Bring to a boil, swirling the pan to blend the ingredients. Reduce the heat to low, cover tightly, and cook until the liquid is absorbed, about 15 minutes. Remove from the heat and cover the pan with a clean dish towel and then the lid. Let the rice stand, covered, to finish cooking, about 15 minutes longer. Fluff with a fork and set aside.

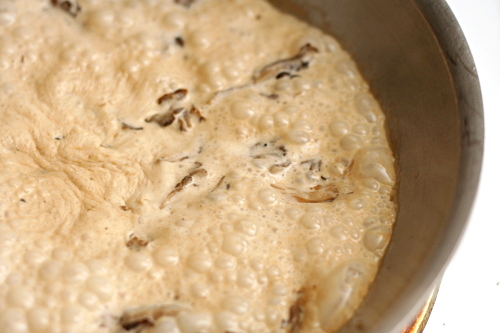
3. For the sauce: Mix the cornstarch and 1 teaspoon water together in a small bowl and set aside. Heat the vegetable oil in a large saucepan over medium-high heat until shimmering. Stir in the shiitakes, cover, and reduce the heat to low. Cook until the mushrooms release their moisture and begin to brown, about 5 minutes. Stir in the cream, soy sauce, and oyster sauce, increase the heat to medium-high, and bring to a boil. Whisk in the cornstarch mixture and return to a boil, whisking constantly. Cook, whisking constantly, until the sauce is slightly thickened, about 30 seconds. Remove the sauce from the heat and season with salt and pepper to taste. Transfer the sauce to a liquid measuring cup, cover tightly with plastic wrap, and set aside.

4. For the eggs: Crack the eggs into a medium bowl and add the milk, salt and pepper. Beat with a fork until the streaks are gone and the color is pure yellow; stop beating while the bubbles are still large. Melt the butter in a 12-inch nonstick skillet over high heat until foaming, swirling it around and up the sides of the pan. Before the form completely subsides, pour in the beaten eggs. Using a heatproof spatula, push the eggs from one side of the pan to the other, slowly but deliberately lifting and folding the eggs as they form curds, until the eggs are nicely clumped into a single mound but remain shiny and set, about 2 minutes. Transfer to a medium bowl and cover to keep warm.

5. For the pork chops: Wipe the nonstick skillet clean with a wad of paper towels. Add the vegetable oil and heat over high heat until smoking. Season the pork chops generously with salt and pepper. Lay the pork chops in a single layer in the skillet and cook until golden brown, 2 to 3 minutes. Turn and cook on the second side until lightly brown and cooked through, 1 to 2 minutes longer.

6. To serve: Divide the rice among 4 individual plates. Lay a pork chop on top of the rice and top with equal portions of scrambled eggs. Pour about 3 tablespoons of the sauce over the egg and pork on each plate, and sprinkle with the fried onions. Serve immediately.

sweet potato hash

Copy of IMG_0431

While I can be, shall we say, particular about preparation, I think keeping an open mind is so important when it comes to both ingredients and certain dishes.

Copy of IMG_0397

For example, stuffing. There’s nothing unpleasant about bread, seasonings, aromatics, and broth baked until the flavors are blended and the top is crispy. When people say they don’t like stuffing, I really think they just didn’t like the stuffing they had when they were young. They just need to try a different recipe (add bacon!) to enjoy it more.

Copy of IMG_0399

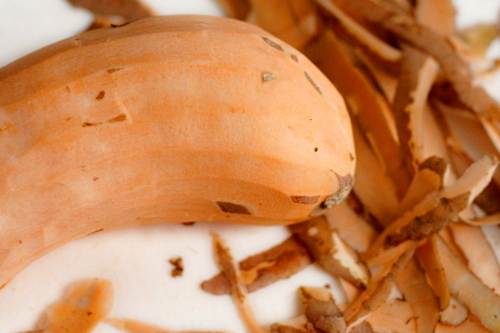
As far as ingredients that often inspire pickiness, sweet potatoes have a bad name. For a lot of people, one of the only ways they’ve seen sweet potatoes prepared is in that sugary, marshmallow-topped weirdness at Thanksgiving. Hey! Let’s take something already sweet, cook it in sugar, top it with more sugar, and serve it with dinner! Blech.
Copy of IMG_0413

Because I don’t like those sweet potatoes and wasn’t exposed to them prepared other ways, I always assumed I didn’t like sweet potatoes at all. But now I know better! I like them quite a bit in more savory preparations.
Copy of IMG_0416

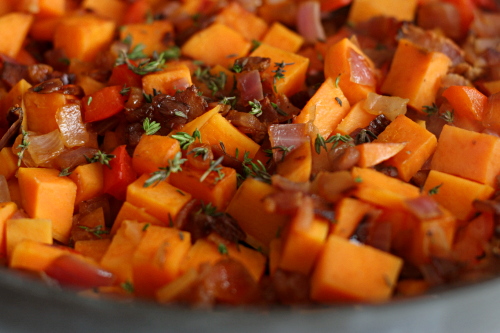
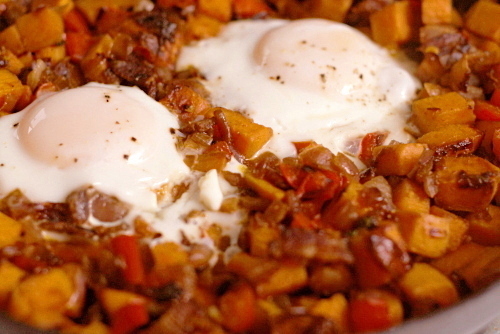
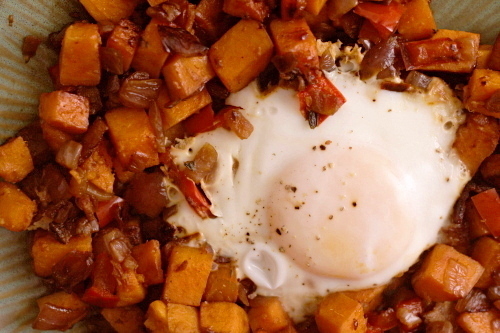
Take this dish. Salty bacon, flavorful slightly caramelized vegetables, and browned sweet potatoes. What is there not to like, especially when the whole thing is topped with an egg? It goes to prove that I could miss out on some great meals if I don’t remember that just because I don’t like an ingredient prepared one way doesn’t mean I won’t like it in other dishes.
Copy of IMG_0422

One year ago: Peter Reinhart’s Pizza Dough

Printer Friendly Recipe
Sweet-Potato Hash with Bacon (adapted from epicurious/Gourmet)

Serves 4

These are the same ingredients in the same proportions as the original recipe, but I’ve tweaked the preparation a bit because a number of reviewers complained that the original was too greasy. Adding eggs on top is also my addition, but Dave and I tried it with and without the eggs, and while it was good without, it was even better with.

½ pound sliced bacon, cut into ¼-inch strips
2 medium onions, chopped
1 large red bell pepper, cut into thin strips
salt and pepper
2 pound sweet potatoes, peeled and cut into ½-inch cubes
1 teaspoon chopped fresh thyme
4 eggs (optional)

1. Cook the bacon in a 12-inch nonstick skillet over medium heat until it renders some fat and begins to brown. Drain off all of the fat except for a thin coating on the pan, then add the onions, red pepper, ½ teaspoon salt, and ½ teaspoon pepper. Cook uncovered, stirring occasionally, until the vegetables are softened, 7-8 minutes.

2. Stir in the potatoes and ½ teaspoon salt. Cover the pan and cook, stirring occasionally, until the potatoes are tender and starting to brown, 10 to 14 minutes. Stir in the thyme and season to taste.

3. If you’re adding the eggs, create four indentions in the hash and break an egg into each. Season the eggs and cover the pan. Lower the heat to medium-low and cook without removing the lid for at least 6 minutes, when you can start testing for doneness. I like my eggs without any runniness at all in the white but with gooey yolks, and it takes around 8 minutes.

Copy of IMG_0432