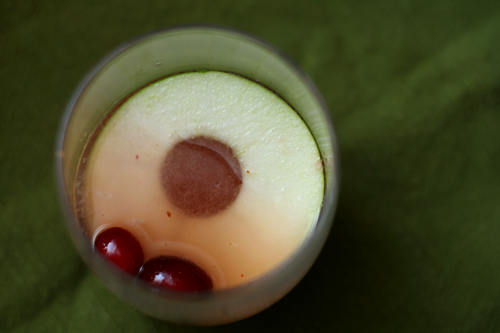
salted chocolate caramels

chocolate salted caramels 5

It might be silly, but one of the things I was the most upset about when my house got flooded was that I wouldn’t be able to do all of the Christmas baking I’d planned. I didn’t enjoy sharing a hotel room with two cats who take out their anxiety by playing in the litter box in the middle of the night, I don’t like the concrete floors in my house, and I wish my favorite black boots hadn’t been among the many casualties, but it was the baking that I kept coming back to. I started planning my holiday baking in October; I remember trying to order packaging and not being able to find anything but Halloween themes. (I did order packaging in early November, but it unfortunately was another casualty and had to be reordered.)

chocolate salted caramels 1

But a little flood damage can’t hold me back. The weekend we were stuck in a hotel while contractors tore out our carpet and cut the bottom two feet from all the walls, a friend of ours was going out of town and was generous enough to give us the keys to his house. His kitchen didn’t give me much to work with – I was able to carve out just a few square feet of workspace – but when there’s a will, there’s a way. In that tiny kitchen, I baked cranberry-orange bread, mocha biscotti, and lemon spritz wreaths, which actually put me ahead of the schedule I’d originally planned for the month.

chocolate salted caramels 2

We’ve now spent two weeks at home in our torn up house before construction starts, and I was able to make almost everything else I’d planned, including a tiered Christmas tree cake for the office holiday party, which I got the idea for all the way back in the summer. (Fortunately, the cakes were already baked and in the freezer, but decorating it was not trivial.) These caramels were the last treat I needed to make, and I had the recipe picked before I read the very mixed reviews – about half of the reviewers raved, but the other half had massive failures. I had neither the time nor the mental fortitude for a failure.

chocolate salted caramels 3

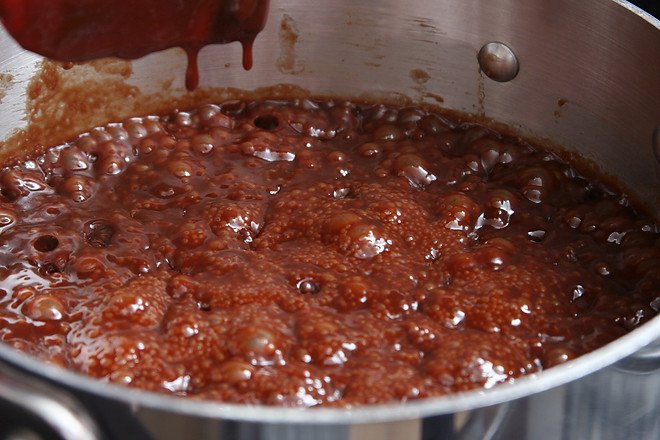
Fortunately, the recipe came together perfectly. I wasn’t expecting it to take quite so long for the chocolate-caramel mixture to reach the right temperature, but I knew how important that was, since most of the problems people had were with the consistency of the final caramels, which is based on that temperature. Another problem I read about was butter separating from the caramel mixture after it had hardened. I remembered all of the pan sauce recipes that specifically call for cold butter because it emulsifies better and was sure to keep my butter, cut into tiny cubes, in the fridge until I was ready for it. I don’t know if it was that, or if the universe is just cutting me a break after a rough month, but I’m grateful for a recipe that came together easily and flawlessly, so I was able to finish my holiday baking and enjoy the part of the season I was looking forward to the most.

chocolate salted caramels 4

Printer Friendly Recipe
Chocolate Salted Caramels (adapted from Gourmet via Smitten Kitchen)

64-96 candies, depending on how you cut them

Here’s what I’ve changed: reducing the final temperature to 246 degrees, based on many reviews that said their candies were too hard at 255 degrees; keeping the butter cold before adding it; and putting more salt into the mixture and less salt on top.

2 cups heavy cream
10½ ounces bittersweet chocolate, chopped
1¾ cups (12.25 ounces) granulated sugar
½ cup light corn syrup
¼ cup water
1 teaspoon flaky salt, plus more for garnish
2 tablespoons unsalted butter, cut into ¼-inch diced, cold

1. Line the bottom and sides of an 8-by-8-inch square pan with two sheets of crisscrossed parchment paper.

2. In a 1- or 2-quart saucepan over medium-high heat, bring the heavy cream to a simmer. Remove from the heat and add the chocolate. Let set for 1 minute, then stir the cream and chocolate together until evenly mixed.

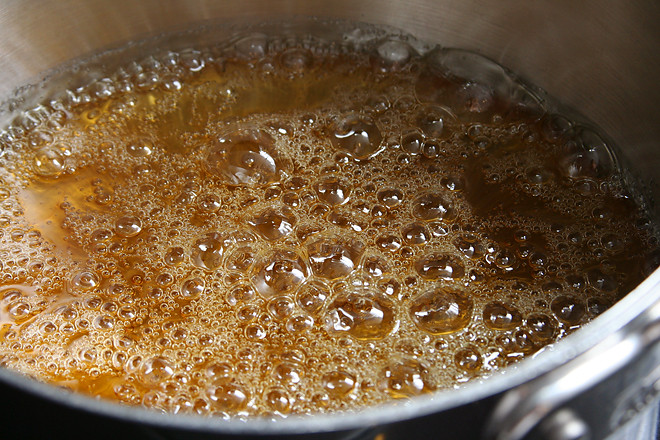
3. In a 3-quart saucepan over medium-high heat, combine the sugar, corn syrup, water, and 1 teaspoon salt. Bring to a simmer, then reduce the heat the medium. Simmer, occasionally swirling the pan or stirring with a metal spoon, until the mixture is reddish-amber in color. Immediately add the chocolate mixture; the caramel with bubble vigorously. Continue to cook over medium heat, stirring very frequently, until the mixture reads 146-148 degrees on an instant-read thermometer, 10 to 15 minutes. Remove from the heat and stir in the butter.

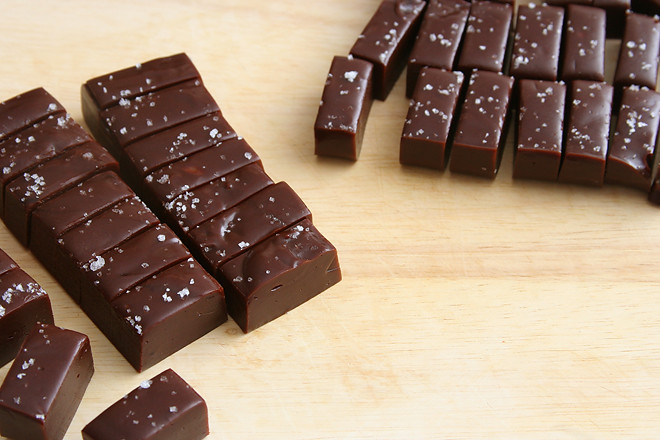
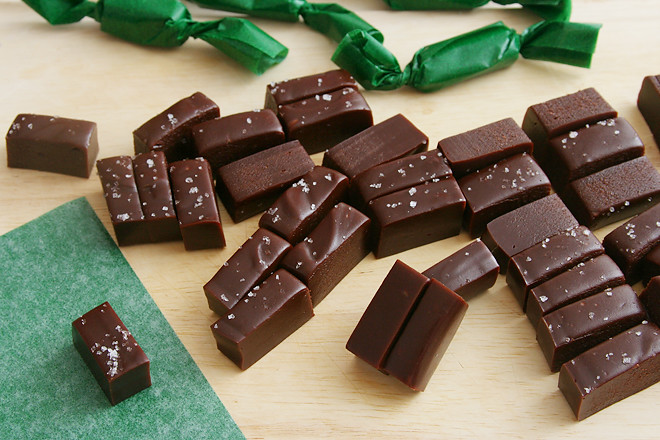
4. Immediately pour the mixture into the prepared pan. Let set for 10 minutes, then sprinkle with flaky salt. Let cool on a wire rack for at least 2 hours before cutting and serving. Wrapped tightly, the caramels with keep for about 2 weeks.
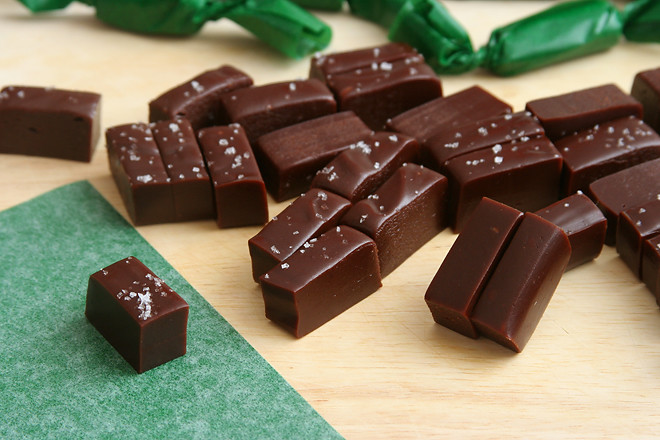
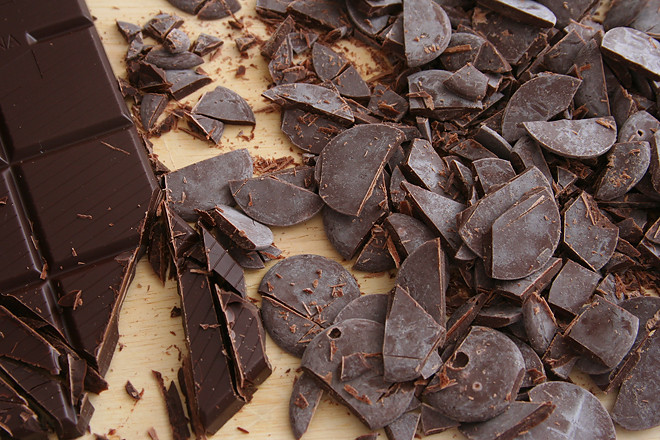
chocolate salted caramels 6

maple nutmeg cookies

maple nutmeg cookies 3

There are more practical things I could be doing with my time, but none of them are as fun as baking cookies. This is why I have three types of Christmas cookie dough and a Christmas cake in my freezer. Plus I’ll be 8 months pregnant at Christmas, and I never know when my body is going to cry uncle and let me know that I can’t keep up my normal level of activity indefinitely.

maple nutmeg cookies 1

I have five more holiday treats planned (plus decorating that cake in the freezer), which seemed ambitious until I talked to someone who makes at least twenty types of cookies every December. Still, the only way I can get it all done and still enjoy my life is by spacing it out, and I have so many plans this year that my holiday baking spilled over into November. This is not a hardship, as I’m not sad about having more excuses to play with butter and sugar, even if it does mean using red and green food coloring before Thanksgiving.

maple nutmeg cookies 2

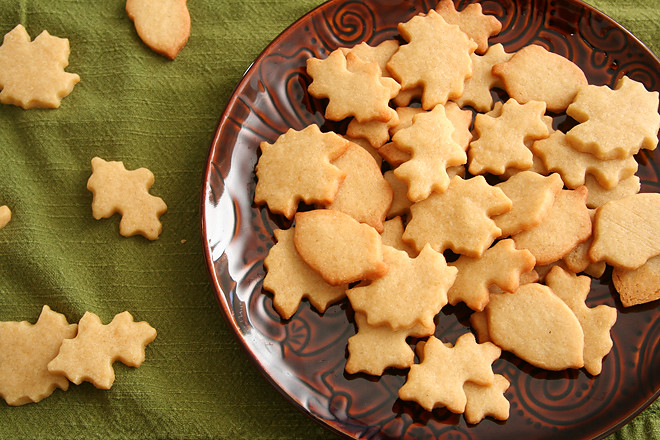
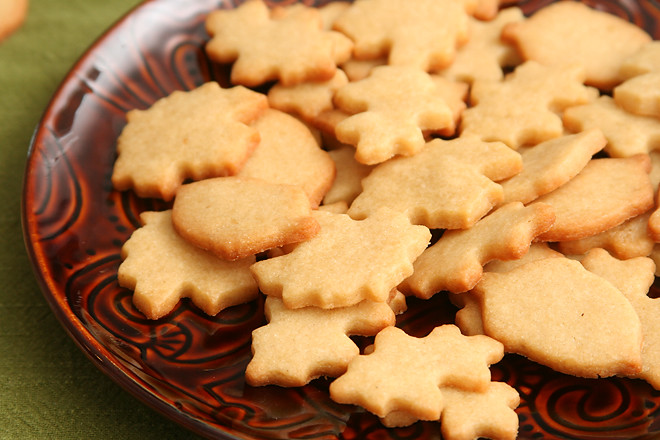
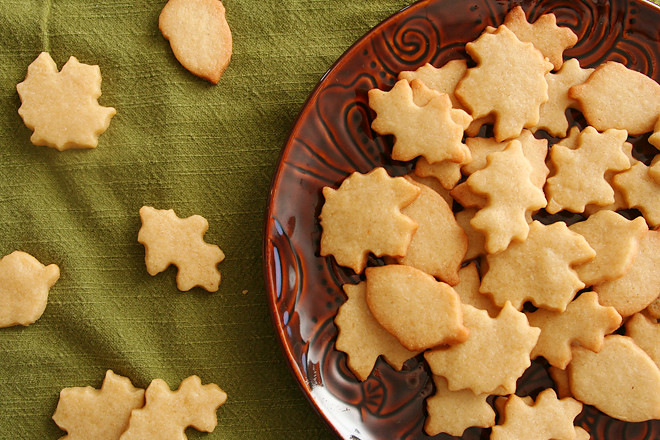
With no food coloring here, these cookies work for either holiday. They’re simple but not plain, as the maple flavor really is evident. Cutting them into fall leaves makes them seem more appropriate for Thanksgiving, but they’re going in my Christmas care packages anyway – along with at least five other treats.

maple nutmeg cookies 5

Printer Friendly Recipe
Nutmeg Maple Cookies (adapted from Gourmet via Smitten Kitchen)

Yield depends on size of cutters used; I made at least a hundred 1-inch cookies (which took forever)

I can’t find Grade B maple syrup where I live, but I do have maple sugar in the pantry, so I substituted 2 tablespoons of that for an equal amount of granulated sugar. The original recipe suggests adding a few drops of maple extract, if you’re more likely to have that around than maple sugar. I also considered starting with a couple extra tablespoons of Grade A maple syrup and simmering it down to ½ cup; if you do this, be sure to let it cool to room temperature before adding it to the dough.

I substituted some brown sugar for white sugar and added vanilla to the original recipe, because I thought both would help bring out the maple flavor.

I know it’s annoying to chill the dough and then have to wait for it to soften up again after chilling, but it’s so soft at room temperature that there’s no way you’d be able to transfer the cut shapes to a baking sheet. You could, however, roll it out immediately after mixing (you’d need a pretty big area) and refrigerate it until it hardens enough to cut and transfer, which would only take 15 minutes or so. I often do this with the scraps.

I tried baking the cookies for 8 minutes and for 10 minutes. The cookies baked for 8 minutes were just a bit chewy. The cookies baked for 10 minutes were crunchy, which isn’t usually my preference but was nice here. If you want your cookies softer, increase the brown sugar to ½ cup and decrease the granulated sugar to ½ cup and bake for 8-10 minutes, until the tops looks dry but the edges aren’t browned.

3 cups (14.4 ounces) all-purpose flour
½ teaspoon freshly grated nutmeg or ¼ teaspoon ground nutmeg
2 sticks (16 tablespoons) unsalted butter, at room temperature
1 teaspoon table salt
¾ cup (5.25 ounces) granulated sugar
¼ cup (1.75 ounces) light brown sugar
1 large egg yolk
½ cup Grade B maple syrup
½ teaspoon vanilla extract

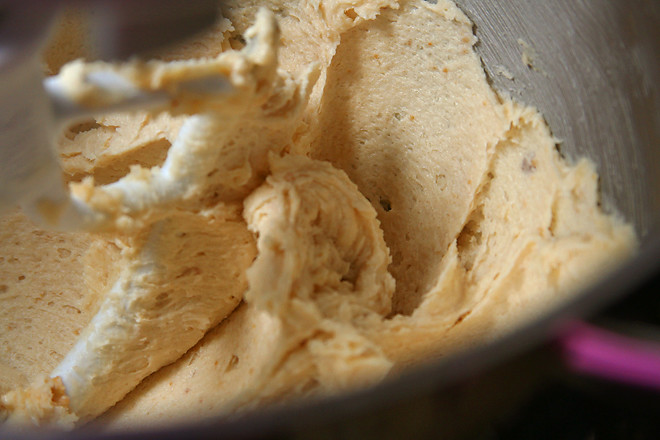
1. In a small bowl, combine the flour and nutmeg. Place the butter in the bowl of a stand mixer fitted with the paddle attachment (or a large mixing bowl if you’re using a hand-held mixer) and beat on medium-low speed until it’s smooth. Add the salt and both sugars and continue beating on medium-low until the mixture is light and fluffy, about 2 minutes, scraping the sides of the bowl as needed. Add the egg yolk and mix until fully incorporated, then, with the mixer running, gradually add the maple syrup and vanilla extract. Reduce the mixer speed to low and gradually add the flour mixture, mixing just until evenly combined. Wrap the dough in plastic wrap and chill for 2 hours or up to two days.

2. Adjust a rack to the middle position and heat the oven to 350 degrees. Line two baking sheets with parchment paper or silicone mats.

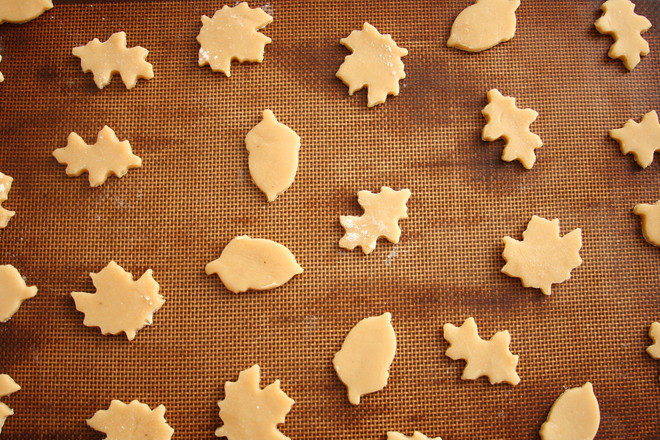
3. If chilled for longer than 2 hours, let the dough sit at room temperature until it’s just soft enough to roll out. On a lightly floured surface, roll the dough to a thickness of ⅛-inch. Use floured cookie cutters to cut shapes; transfer the shapes to the prepared pans. Re-roll and cut shapes from the scraps, using as little flour as possible.

4. Bake the cookies until the just golden around the edges, 10 to 12 minutes. Let the cookies cool on the pan for about 2 minutes, then transfer to a wire rack cool completely.

maple nutmeg cookies 6

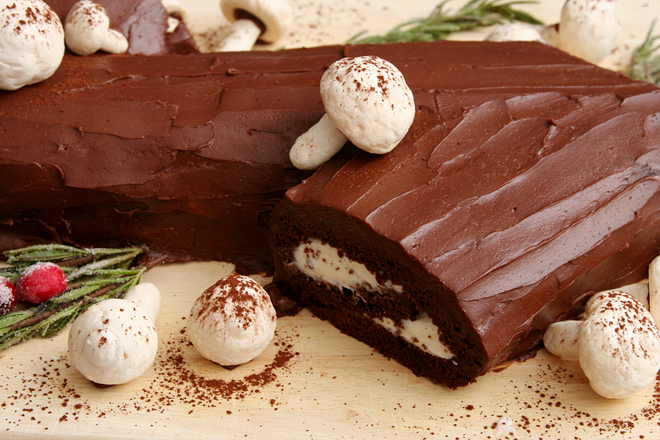
buche de noel

buche de noel 12

I was tense for the entire 2½ hours I spent making this cake. I’d signed up to bring it to the office holiday party potluck, and I wasn’t sure which title was more commonly known, yule log or buche de noel, so I wrote down both. This was a mistake; several hours later, Big Boss came barreling down the hall blustering about using fancy French words and/or bringing a piece of wood to the party.

buche de noel 1

He was mollified when I told him it was a cake. “Chocolate”, he asked? “Um, yes, chocolate”, even though I hadn’t really planned on chocolate.

buche de noel 6

So I felt like the stakes were high. And considering that I hadn’t made a rolled cake in seven years, the risk was high as well. This is why I spent all afternoon nervous, waiting to make a mistake that would result in a cake disaster.

buche de noel 8

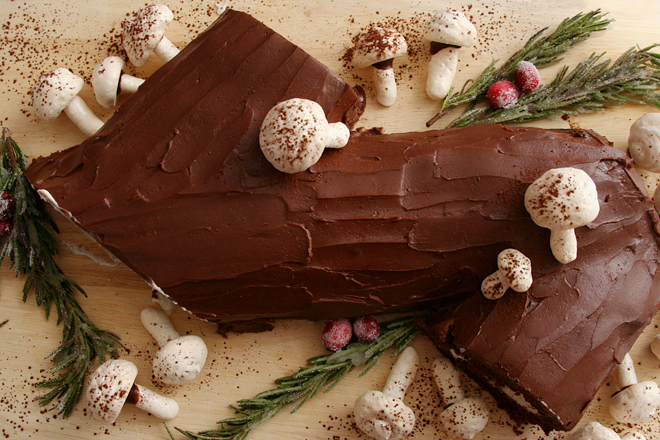
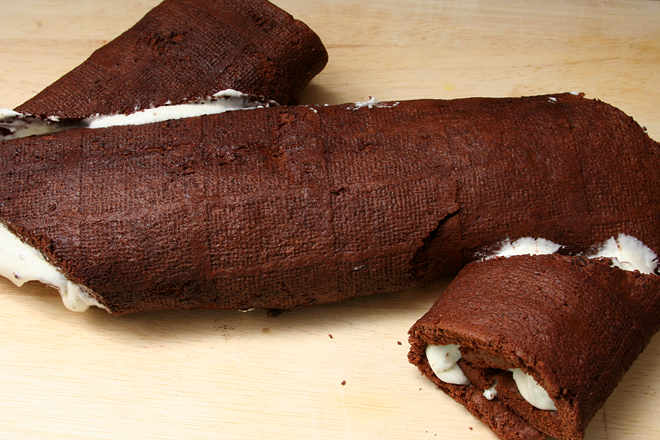
There were no cake disasters. It wasn’t a perfectly smooth process – the grocery store ran out of mascarpone, the cake cracked when I rolled it, my baking pan is too small so the spiral was loose, the ganache didn’t set up, the cake cracked again when I tried to move it, and the last minute sugared rosemary and cranberries I made for decorations weren’t dry so the sugar dissolved instead of sparkled – but there was nothing that a little ganache couldn’t cover up. Once the ganache was frantically put in the freezer so it would set, that is.

buche de noel 11

Substituting cream cheese for mascarpone worked in my favor in the end, because when Big Boss asked me what the filling was made of, I told him cream cheese and didn’t mention the mascarpone. I’ve learned my lesson about fancy European words. Fortunately, the cream cheese/mascarpone filling really was delicious, just like the chocolate cake, and the ganache. Even the mushrooms were all gone by the time we left the party. It was an unqualified success; still, next year I’m bringing all-American cheesecake.

buche de noel 13

Printer Friendly Recipe
Bittersweet Chocolate Yule Log (slightly adapted from Cook’s Illustrated)

Serves 8 to 10

The ganache didn’t firm up for me in an hour at room temperature, so I put it in the refrigerator for a 10 minutes or so before icing the cake.

I was afraid to move the cake after it was formed and frosted, so I put it together directly on the serving plate. I slipped thin strips of wax paper under the edges of the cake to catch extra ganache, then discarded the strips before serving.

My grocery store ran out of mascarpone, so I used half mascarpone and half cream cheese in the filling, which worked very well.

The original recipe calls for an espresso-flavored filling instead of vanilla, but I didn’t think espresso would be as popular with the crowd I served this to. If you’d rather have the espresso, replace the vanilla flavorings in the mascarpone cream with 2 teaspoons espresso powder.

Dark Chocolate Ganache:
¾ cup heavy cream
2 tablespoons unsalted butter
6 ounces semisweet chocolate (high-quality), chopped
1 tablespoon Cognac or brandy

Vanilla Bean-Mascarpone Cream:
½ cup heavy cream
seeds from 1 vanilla bean
1 teaspoon vanilla extract
6 tablespoons confectioners’ sugar (1½ ounces)
16 ounces mascarpone cheese (about 2 cups)

Roulade:
¼ cup unbleached all-purpose flour (about 1¼ ounces), plus more for dusting baking sheet
6 ounces bittersweet chocolate or semisweet chocolate, chopped fine
2 tablespoons cold unsalted butter, cut into two pieces
2 tablespoons cold water
¼ cup cocoa (¾ ounce), Dutch-processed, sifted, plus more for unmolding and garnish
⅛ teaspoon table salt
6 large eggs, separated, room temperature
⅓ cup granulated sugar (2⅓ ounces)
1 teaspoon vanilla extract
⅛ teaspoon cream of tartar

1. For the Dark Chocolate Ganache: Bring the cream and butter to a simmer in a small saucepan over medium-high heat. Place the chocolate in the bowl of a food processor fitted with the steel blade. With the machine running, gradually add the hot cream and brandy through the feed tube and process until smooth and thickened, about 3 minutes. Transfer the ganache to a medium bowl and let stand at room temperature 1 hour, until spreadable (ganache should have consistency of soft icing).

2. For the Vanilla Bean-Mascarpone Cream: Bring the cream to a simmer in a small saucepan over high heat. Remove from the heat and stir in the vanilla seeds, extract, and confectioners’ sugar; cool slightly. With a rubber spatula, beat the mascarpone in a medium bowl until softened. Gently whisk in the cooled cream mixture until combined. Cover with plastic wrap and refrigerate until ready to use.

3. For the Roulade: Adjust an oven rack to the upper-middle position and heat the oven to 400 degrees. Spray an 18 by 12-inch rimmed baking sheet with nonstick cooking spray, cover the pan bottom with parchment paper, and spray the parchment with nonstick cooking spray; dust baking sheet with flour, tapping out excess.

4. Bring 2 inches of water to a simmer in a small saucepan over medium heat. Combine the chocolate, butter, and water in a small heatproof bowl and cover tightly with plastic wrap. Set the bowl over the saucepan, reduce the heat to medium-low, and heat until the butter is almost completely melted and the chocolate pieces are glossy, have lost definition, and are fully melted around edges, about 15 minutes. (Do not stir or let water in saucepan come to boil.) Remove the bowl from heat, unwrap, and stir until smooth and glossy. While the chocolate is melting, sift the cocoa, flour, and salt together into a small bowl and set aside.

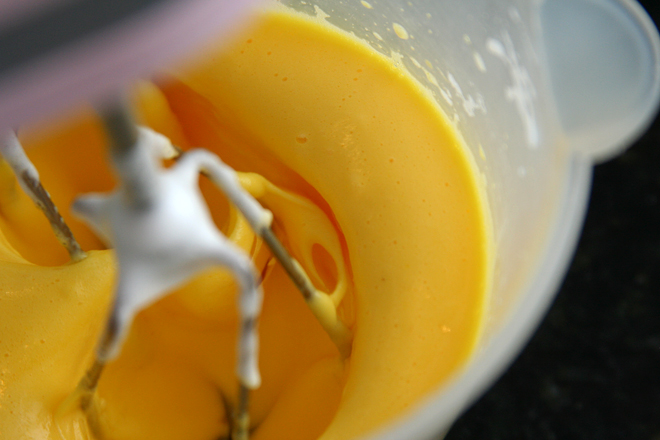
5. In the bowl of a standing mixer, beat the egg yolks at medium-high speed until just combined, about 15 seconds. With the mixer running, add half of the sugar. Continue to beat, scraping down the sides of the bowl as necessary until the yolks are pale yellow and the mixture falls in a thick ribbon when the beaters are lifted, about 8 minutes. Add the vanilla and beat to combine, scraping down the bowl once, about 30 seconds. Turn the mixture into a medium bowl; wash the mixer bowl and beaters and dry with a kitchen towel. (If you have 2 mixer bowls, leave the yolk mixture in the mixer bowl; wash and dry the beaters and use second bowl in step 6.)

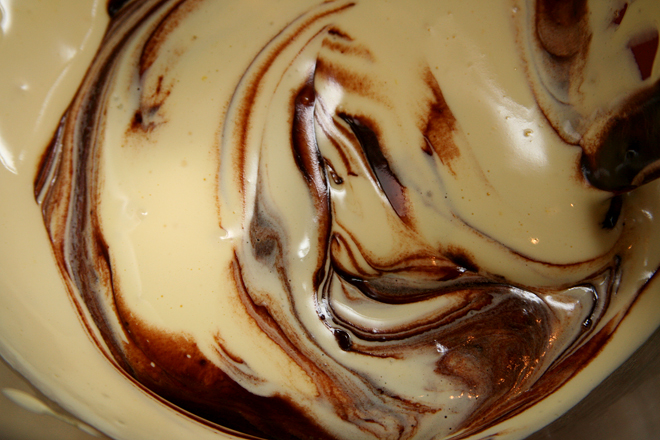
6. In a clean bowl with clean beaters, beat the egg whites and cream of tartar at medium speed until foamy, about 30 seconds. With the mixer running, add about 1 teaspoon of the remaining sugar; continue beating until soft peaks form, about 40 seconds. Gradually add the remaining sugar and beat until the egg whites are glossy and supple and hold stiff peaks when the whisk is lifted, about 1 minute longer. Do not overbeat (if the whites look dry and granular, they are overbeaten). While the whites are beating, stir the chocolate mixture into the yolks. With a rubber spatula, stir a quarter of the whites into the chocolate mixture to lighten it. Fold in the remaining whites until almost no streaks remain. Sprinkle the dry ingredients over the egg and chocolate mixture and fold in quickly but gently.
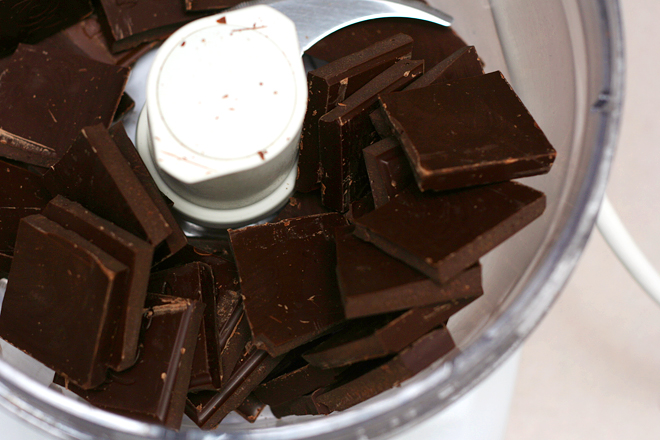
7. Pour the batter into the prepared pan; using an offset icing spatula and working quickly, smooth the surface and spread the batter into the pan corners. Bake until the center of the cake springs back when touched with a finger, 8 to 10 minutes, rotating the pan halfway through the baking time. Cool the cake in the pan on a wire rack for 5 minutes.
8. While the cake is cooling, lay a clean kitchen towel over a work surface and sift 1 tablespoon cocoa over the towel; with your hands, rub the cocoa into the towel. Run a paring knife around the perimeter of the baking sheet to loosen the cake. Invert the cake onto the towel and peel off the parchment.

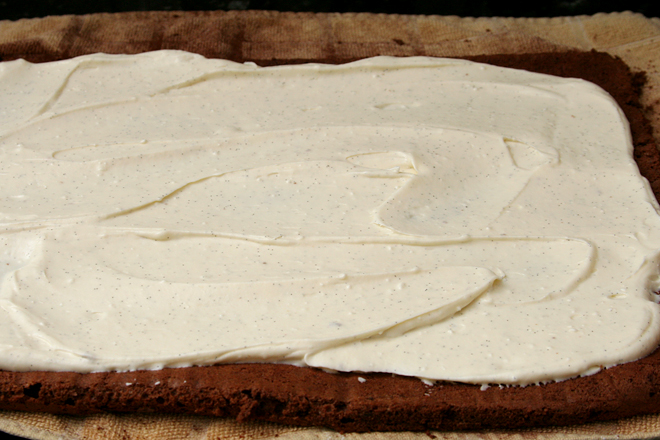
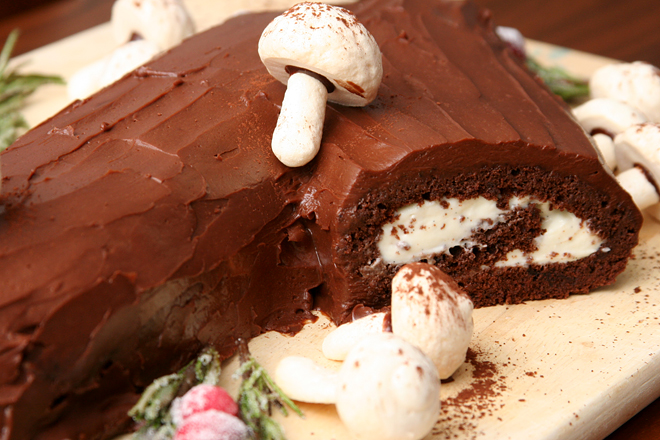
9. For the finished cake: Starting at a long side, roll the cake and towel together into a jelly roll shape. Cool for 15 minutes, then unroll the cake and towel. Using an offset spatula, immediately spread the mascarpone cream filling evenly over the surface of the cake, almost to the edges. Reroll the cake gently but snugly around the filling. Set a large sheet of parchment paper on an overturned rimmed baking sheet and set the cake seam-side down on top. Trim both ends of the cake on a diagonal. Reserve ¼ cup of ganache for attaching meringue mushrooms. Spread the remaining ganache over the roulade with a small icing spatula. Use a fork to make wood-grain striations on the surface of the ganache before it has set. Refrigerate the cake, uncovered, on a baking sheet to slightly set the icing, about 20 minutes.

10. When ready to serve, carefully slide two wide metal spatulas under the cake and transfer the cake to a serving platter. Arrange the meringue mushrooms around the cake, attaching them with dabs of reserved ganache. Sift a light dusting of cocoa over the mushrooms. Sift the yule log with confectioners’ sugar. Serve within 2 hours.

buche de noel 3

Meringue Mushrooms (from Cook’s Illustrated)

Makes about 30

I didn’t need 30 mushrooms, so I cut the recipe in half, using a hand mixer and a small mixing bowl. Although maybe 30 mushrooms wouldn’t have been so bad, considering how smooth and airy and delicious these were.

CI note: If the caps and stems become soggy during storage, crisp them in a 200-degree oven for 30 minutes before assembling the mushrooms.

¼ cup water
½ cup (3.5 ounces) granulated sugar
2 large egg whites, room temperature
Pinch table salt
⅛ teaspoon cream of tartar
½ teaspoon vanilla extract

1. Adjust oven racks to the middle and lowest positions and heat the oven to 200 degrees. Line 2 rimmed baking sheets with parchment paper.

2. Combine the water and sugar in heavy saucepan. Cover and bring to a boil over medium-high heat. Boil, swirling the pan once or twice, until the sugar has dissolved, 1 to 2 minutes. If necessary, wipe down any sugar crystals on the side of the pan with a damp pastry brush. Cook, uncovered, until the temperature registers 238 degrees on a candy thermometer, about 10 minutes.

3. While the sugar is cooking, place the egg white in the bowl of a standing mixer fitted with the whisk. Beat at medium-low speed until frothy, about 1 minute. Add the salt and cream of tartar and beat, gradually increasing speed to high, until the whites hold soft peaks, about 1 minute.

4. With the mixer at medium speed, slowly pour the hot syrup into the egg whites, avoiding the whisk. Increase the speed to medium-high and continue to beat until the meringue cooks to room temperature and becomes very thick and shiny, 5 to 10 minutes. Using a rubber spatula, fold in the vanilla.

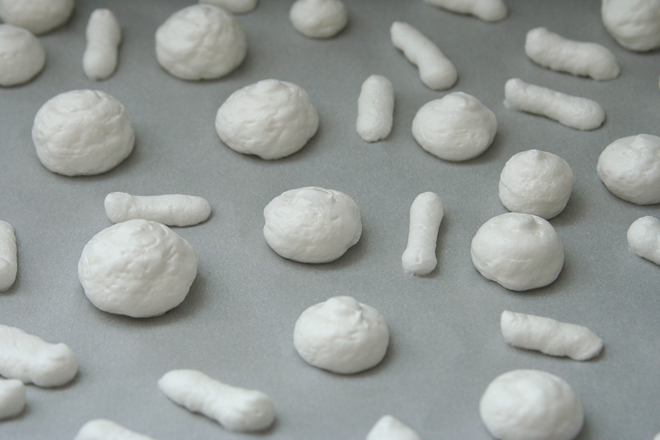
5. Fit a pastry bag with a ¼-inch pastry tip and fill with the meringue. Pipe about 30 caps and an equal number of stems onto the prepared pans.

6. Bake the meringues for 2 hours, then turn off the oven, leaving the meringues in the oven until very dry and crisp, about 30 minutes longer. Cool the mushroom caps and stems on the baking sheets. (Caps and stems may be stored in an airtight container for up to 1 week.) To assemble the mushrooms, use ganache to glue the caps and stems together.

buche de noel 14

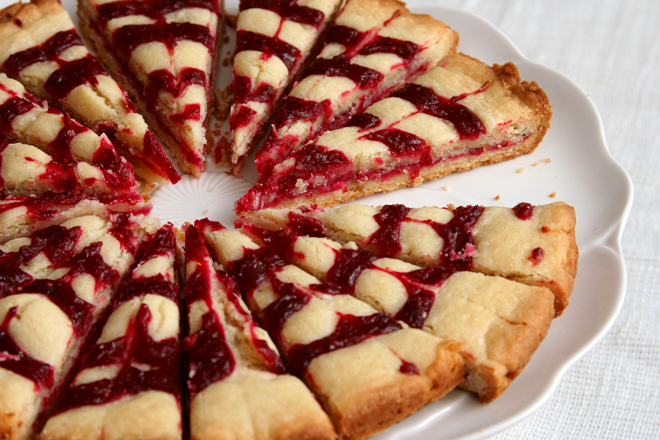
cranberry swirl shortbread

cranberry shortbread 5

I was not feeling it the Monday night I made this shortbread. I was, however, feeling it the day before, when I had a relatively chore-free Sunday, and went ahead and made the cranberry filling, a double batch. In fact, I was so in the mood to bake that afternoon that I made a batch of my favorite Christmas cookies, just for the heck of it. But I forgot how long it takes to shape those cookies into their spirals and stripes and by the time that was over, I’d pretty much had my fill of baking.

cranberry shortbread 1

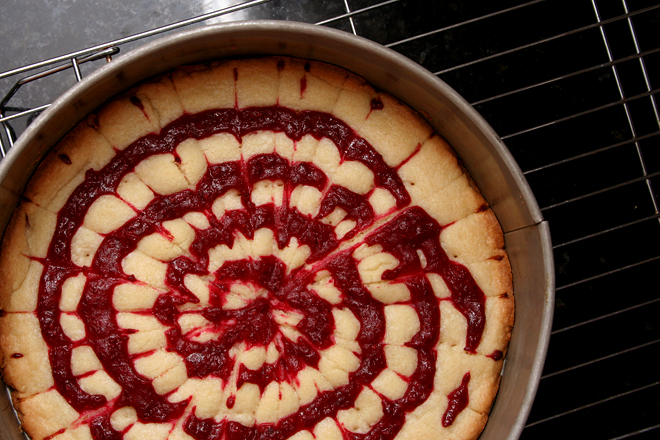
Which left me with a weeknight to make the shortbread dough, roll out four circles, chill the circles, partially bake two of the circles, layer them with cranberries, add more dough, pipe on more cranberry filling, score the dough, and add designs in the filling. All when I just wasn’t feeling it.

cranberry shortbread 2

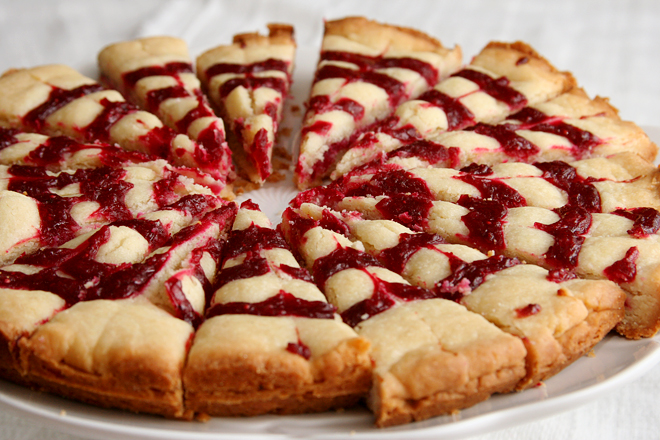
My coworkers, however, were definitely feeling it the next day when a double batch disappeared in no time. Not only are these bright and attractive – even when you rush through making the design – but they’re tender and sweet with refreshingly tart filling. I will definitely make these again, but next time I’ll make sure I’m in the mood.

cranberry shortbread 3

Printer Friendly Recipe
Cranberry Swirl Shortbread (from Cook’s Illustrated)

Makes 16 wedges

4 ounces (1 cup) fresh or frozen cranberries
½ cup (3½ ounces) granulated sugar
½ teaspoon grated orange zest plus 2 tablespoons juice
¼ teaspoon ground cinnamon
2 cups (10 ounces) all-purpose flour
½ cup (2 ounces) confectioners’ sugar
½ teaspoon salt
14 tablespoons unsalted butter, cut into ½-inch pieces and chilled

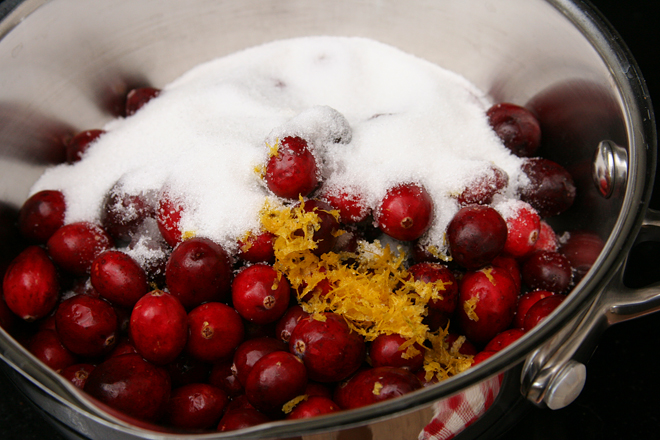
1. Bring the cranberries, ¼ cup granulated sugar, orange zest and juice, and cinnamon to a boil in a medium saucepan over medium-high heat. Cook, stirring frequently, until the cranberries have burst and the juice has just started to thicken, 2 to 4 minutes; let cool for 1 hour.

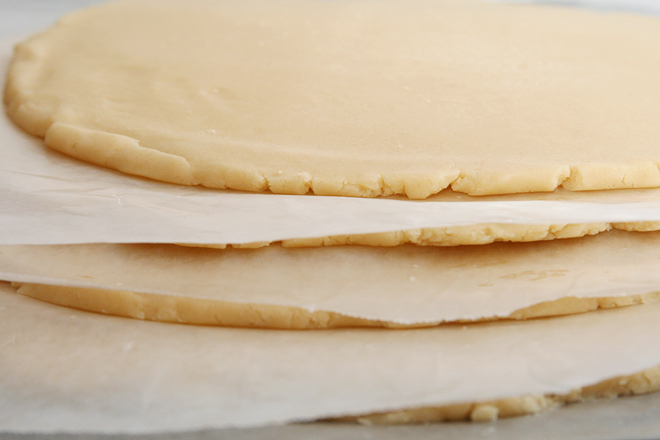
2. Adjust an oven rack to the middle position and heat the oven to 375 degrees. Process the flour, confectioners’ sugar, salt, and remaining ¼ cup granulated sugar in a food processor until combined, about 5 seconds. Scatter the butter over the top and process until the dough starts to come together, about 1 minute. Gently knead the dough by hand until no floury bits remain. (Do not wash the food processor bowl.) Divide the dough in half and roll each half into a 9-inch circle on parchment paper; refrigerate for 20 minutes. Process the cooled cranberry mixture in the food processor until smooth, about 20 seconds.

3. Press one dough circle into a 9-inch tart pan with a removable bottom and poke all over with fork. Bake on a baking sheet until the edges are light golden brown, 15 to 17 minutes, rotating the tart pan halfway through baking. Spread the dough with ¼ cup cranberry puree, the top with second dough circle, and poke all over with fork. Pipe the remaining cranberry puree over the dough in a spiral shape. Score the dough into 16 wedges. Between the score marks, lightly run a knife in the opposite direction of the cranberry spiral. Bake until the top is pale golden, 25 to 30 minutes, rotating the tart pan halfway through baking. Let the shortbread cool for 10 minutes, then remove the outer ring of the tart pan. Cut through the score marks, transfer the wedges to a wire rack, and let cool completely before serving.

cranberry shortbread 4

cranberry almond crostata

cranberry crostata 6

I’ve got nothing against pie – buttery, flaky crust, fruit filling, what’s not to like? – but I’m mostly a cake girl. Soft, spongy, tender, doughy cake. Brownies are good too. Or cookies. Pie is great, but it isn’t as good as doughy baked things, either to eat or to make.

cranberry crostata 1

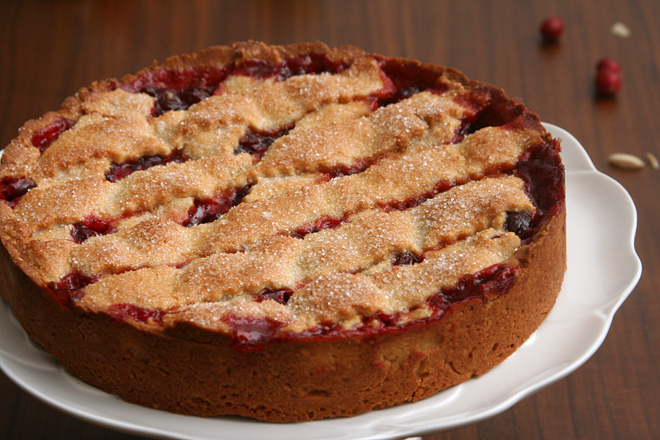
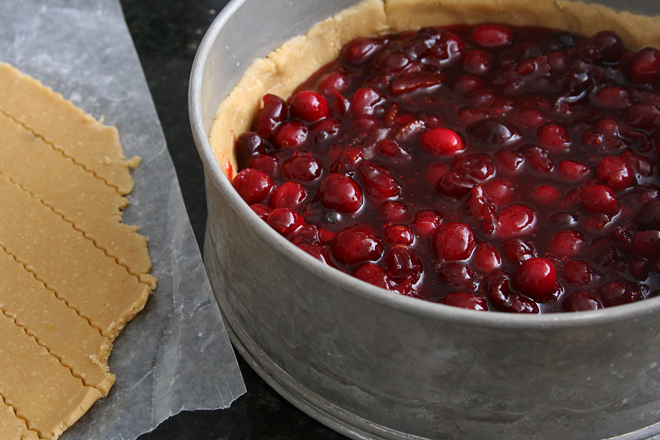
This crostata, however, is the perfect compromise, because the crust is made from cookie dough, not pie dough. The filling, on the other hand, is classic pie – thickened, fruity, juicy. It looked just like cherry pie as it baked.

cranberry crostata 3

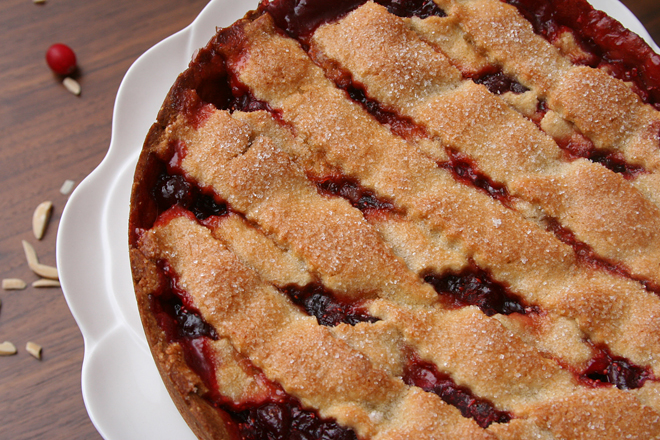
When I made this for my big Italian-themed turkey feast last year, I mixed and cut the dough the day before the meal, storing it in the freezer. I also cooked and chilled the filling overnight. The next day, I spent 15 minutes assembling the tart in the morning before anything else needed to go in the oven. After transferring the beautifully browned and sugar sparkly tart to a cake stand, I didn’t have to think about it again until it was time for dessert. This sweet and tart and buttery dessert was the perfect end to the meal – and it was just as good the next morning for breakfast, just like pie.

cranberry crostata 4

Printer Friendly Recipe
Cranberry Almond Crostata (from Gourmet via epicurious)

For pastry dough:
⅛ cup whole raw almonds (¼ pound), toasted and cooled
2 cups all-purpose flour, divided
1¼ sticks unsalted butter, softened
½ cup packed light brown sugar
1 large egg, lightly beaten, divided
½ teaspoon pure vanilla extract
⅛ teaspoon pure almond extract
2 teaspoons grated lemon zest
½ teaspoon salt

For filling and assembly:
2½ cups fresh or frozen cranberries (10 ounces)
¼ cup fresh orange juice
½ cup sweet orange marmalade
½ cup packed light brown sugar
¼ teaspoon salt
1 tablespoon granulated sugar

1. Make the dough: Pulse the almonds with ¼ cup flour until finely ground (be careful not to grind to a paste). Beat together the butter and brown sugar with an electric mixer at medium speed until pale and fluffy, about 3 minutes. Reserve 1 tablespoon of the beaten egg, chilled, for egg wash and beat the remaining egg into the butter mixture, then add the vanilla and almond extracts, beating well. At low speed, mix in the almond mixture, zest, salt, and remaining 1¾ cups flour until mixture just forms a dough. Halve the dough and form each half into a 5- to 6-inch disk. Wrap the disks separately in plastic wrap and chill until firm, at least 30 minutes.

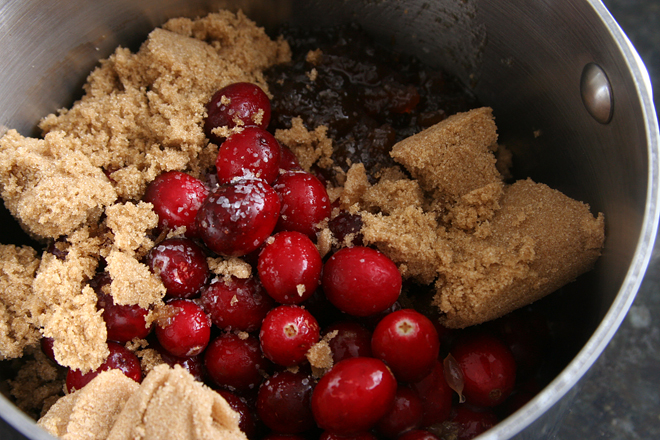
2. Make the filling: Bring the cranberries, orange juice, marmalade, brown sugar, and salt to a boil in a heavy medium pot, stirring, then simmer, uncovered, until some of the cranberries burst and the mixture is slightly thickened, about 5 minutes. Cool the filling quickly by spreading it in a shallow baking pan and chilling until lukewarm, about 15 minutes.

3. Preheat the oven to 375 degrees with a foil-lined large baking sheet on the middle rack. Generously grease a springform pan.

4. Roll out 1 piece of dough between sheets of wax or parchment paper into a 12-inch round (dough will be very tender). Remove the top sheet of paper and invert the dough into the springform pan. (Dough will tear easily but can be patched together with your fingers.) Press the dough over the bottom and up the side of the pan, trimming the dough to reach ½ inch up the side of the pan. Chill.

5. Roll out the remaining dough into a 12-inch round in same manner. Remove the top sheet of paper, then cut the dough into 10 (⅓-inch-wide) strips with a pastry wheel and slide (still on the wax paper) onto a tray. Freeze strips until firm, about 10 minutes.

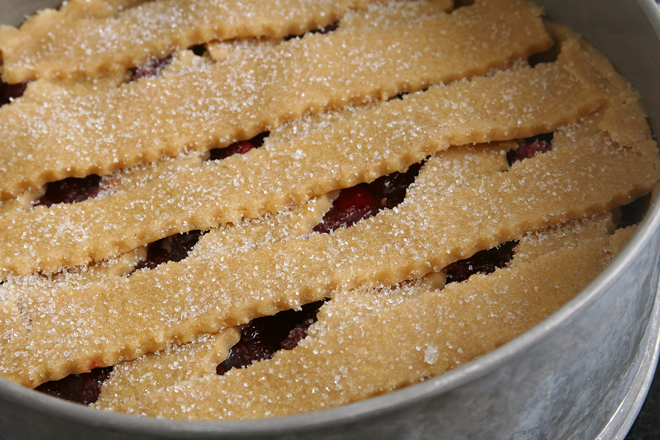
6. Spread the filling in the chilled shell and arrange 5 strips 1 inch apart on filling. Arrange the remaining 5 strips 1 inch apart diagonally across first strips to form a lattice with diamond-shaped spaces. Trim the edges of all the strips flush with the edge of the shell. Brush the lattice top with the reserved beaten egg and sprinkle the crostata with the 1 tablespoon granulated sugar.

7. Bake the crostata in the pan on the hot baking sheet until the pastry is golden and the filling is bubbling, 50 to 60 minutes. (If the pastry is too brown after 30 minutes, loosely cover the crostata with foil.) Cool the crostata completely in the pan on a rack, 1½ to 2 hours.

cranberry crostata 5

christmas star wars cookies

christmas all 1

I’m exceptionally proud of these cookies. Not necessarily for how they came out in the end, although I’m pleased with that too. But mostly for coming up with the idea completely on my own.

christmas vader

This is rare for me – I’m a good idea copier, and a proficient idea alterer, but a poor idea generator. I don’t even remember how I came up with the idea of Star Wars Christmas cookies, except that I wanted to send my in-laws cookies for Christmas and didn’t know how I could possibly live up to the original Star Wars cookies I sent them last spring. And, okay, maybe the picture of Darth Maul in a Santa suit on the front of the Star Wars Lego advent calendar we got our nephews for an early Christmas present helped.

christmas stormtrooper

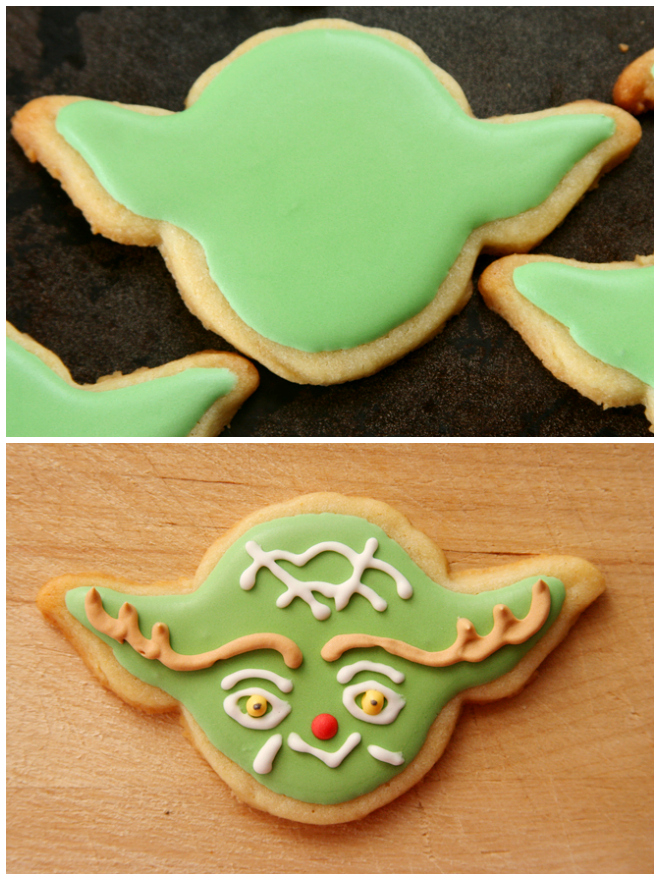
But my creativity didn’t end with just coming up with the idea. Googling “Christmas Darth Vader”, “Christmas Yoda”, and “Christmas Stormtrooper” just showed me a few pictures of each character wearing a Santa hat. That wasn’t going to cut it, because I wanted the characters to be different.

christmas yoda

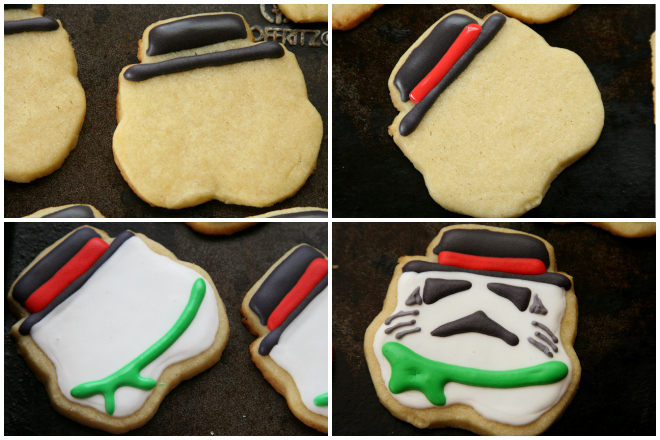
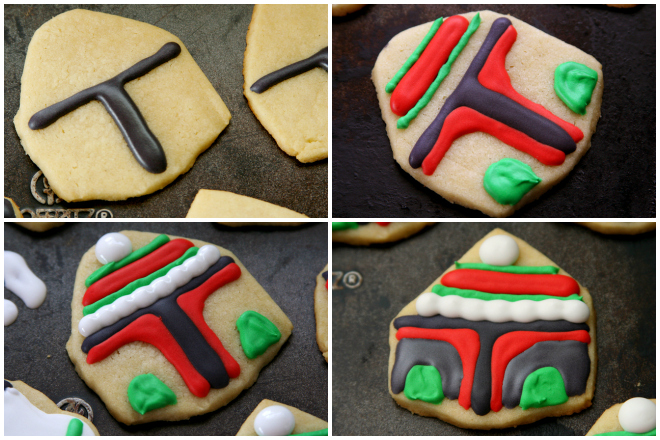
Combining the ultimate Star Wars bad guy and the ultimate Christmas good guy to make Vader Santas was a given, and the white stormtroopers would work well for snowmen. Yoda’s wide earspan would make good antlers, and hopefully the red nose would make the Rudolph idea obvious. That left Boba Fett…my least favorite of the character shapes got left with the leftover idea, and he just ended up with an elf hat.

christmas boba

It seems to have worked out, because we gave the cookies to a 4-year-old, and he identified the Star Wars/Christmas connection of each cookie immediately…except for Boba, and that’s no surprise. He’s got a red and green hat, that’s Christmassy enough. And hey, if that’s the best I can come up with, at least it was my own idea. And Rudolph Yoda’s red nose makes up for any weaknesses in the vaguely elf-like Boba.

One year ago: Herb-Roasted Pork Loin
Two years ago: Pumpkin Cinnamon Rolls
Three years ago: Twice-Baked Potatoes
Four years ago: Pumpkin Seed Brittle

christmas all 2

hot chocolate mix

hot chocolate mix 2

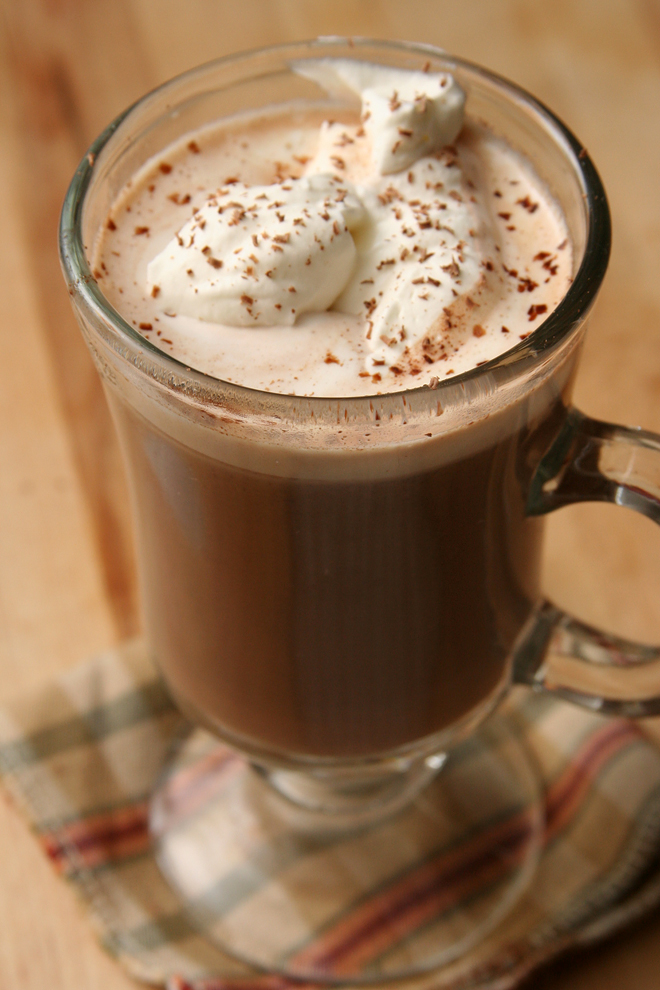
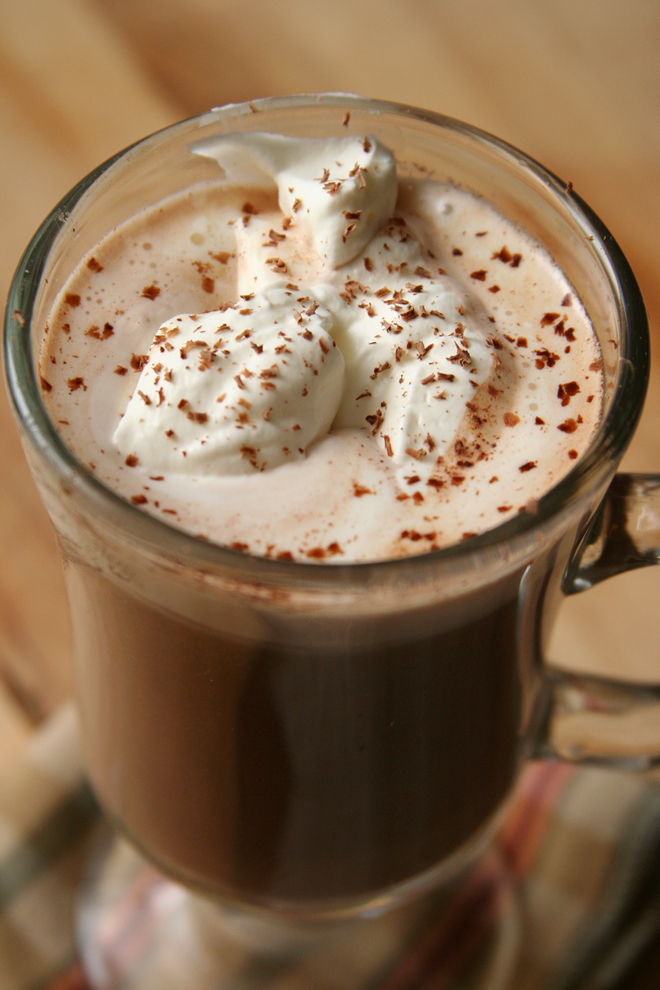
I’m not usually much of a Christmas baker, but I got this grand idea last month that I should send my in-laws packages of cookies for Christmas. I sort of had a bad feeling about it, like it was probably going to end up stressing me out, but once I get a hold of an idea that sounds fun, I have a hard time letting go. And so it was that a week and a half before Thanksgiving, I was mixing, forming, and freezing dough for Christmas cookies.

hot chocolate mix 5

I didn’t have much of a plan from the beginning. I love this bourbon pound cake recipe and thought it would ship well. I knew I wanted something fruity and something chocolately. Hazelnut dried cherry biscotti covered the fruit requirement, but the decorated sugar cookies I couldn’t resist adding wouldn’t help with the chocolate. And then I remembered this hot chocolate mix recipe, which I first made several years ago.

hot chocolate mix 6

It’s the perfect thing to ship off to northeastern Ohio in December, sure to be appreciated through the upcoming snowy months. There’s no worry about breaking in transit, a relief after individually wrapping 28 treat bags containing sugar cookies in bubble wrap. And it’s easy, a relief after spending the greater part of a weekend decorating elaborate sugar cookies (that had better not break in transit). I think it’s safe to say that my cookie packages were a great success – assuming those 28 bubble-wrapped sugar cookies arrive safely, at least.

hot chocolate mix 4

One year ago: Mushroom Farro Soup
Two years ago: Gingerbread Cake
Three years ago: Brussels Sprouts Braised in Cream
Four years ago: Candied Orange Peel

Printer Friendly Recipe
Hot Chocolate Mix

Makes about 36 servings

To make vanilla sugar, mix a vanilla bean into the sugar and let it set for a few days.

I used 2 cups of sugar, but the mix was two sweet for me, so I’ve reduced it in the recipe.  It might depend on how sweet your chocolate is too; mine was 72% cocao.

The amount of espresso powder you add might depend on who you plan to serve the hot chocolate to: more adds complexity and cuts the sweetness, but less is more appropriate for kids.

20 ounces bittersweet chocolate, coarsely chopped
1½ cups (10.5 ounces) vanilla sugar
2¼ cups unsweetened Dutch-processed cocoa powder
½ teaspoon salt
1-3 teaspoons instant espresso powder

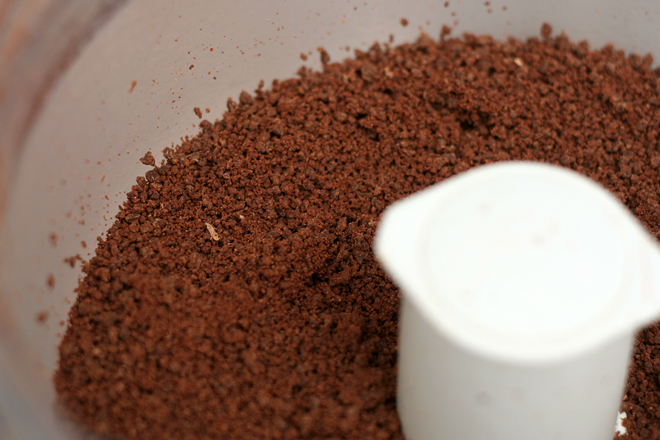
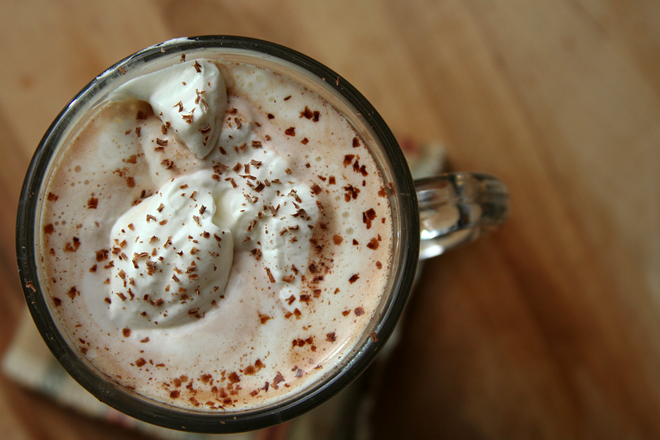
Grind chocolate in a food processor until finely chopped. Add the remaining ingredients and process until mixed. Transfer to an airtight container. To serve, mix 3-4 tablespoons into 8 ounces of hot milk.

hot chocolate mix 3

gingerbread cookies

gingerbread cookies 1

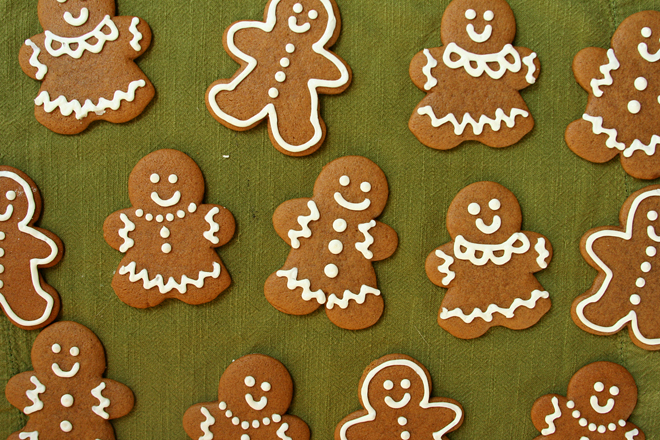
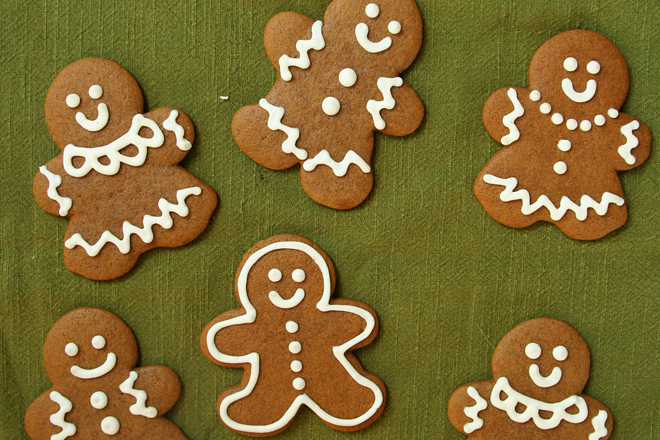
I have what I admit is a random prejudice against crisp, crunchy cookies. I want soft, I want tender, I want chewy. I think most people, or at least most people of my generation, agree with me, but I doubt it was always this way. Surely there was a time when crisp cookies were at least as popular as soft ones. How else would we have gingersnaps?

gingerbread cookies 8

Obviously when I went looking for a gingerbread cookie recipe, “snap” wasn’t going to be part of the title. I wanted chewy and sweet but not too sweet and spicy but not too spicy.

gingerbread cookies 6

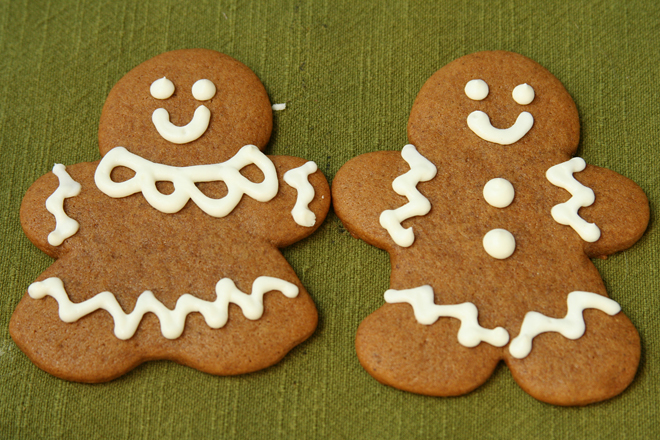
What I got was just about the perfect cookie – by my soft cookie standards. It puffed quite a bit in the oven, but not enough to lose its shape. It could use some more spice, but that’s easy to fix next time. More importantly, it was just the right level of sweetness, and even better, perfectly chewy. At least I thought so; Dave said he prefers his ginger cookies crunchier. Unfortunately for him, the only way he’ll get snappier gingerbread cookies is to make them himself, because this recipe was too perfect for me to try another.

gingerbread cookies 2

One year ago: Pizza with Butternut Squash and Kale
Two years ago: Red Pepper Risotto
Three years ago: Steak au Poivre
Four years ago: Sausage Apple Hash

Printer Friendly Recipe
Gingerbread Cookies
(slightly adapted from Gourmet via epicurious)

Makes about 3 dozen, depending on the size of your cookie cutters

I chilled my cut cookies on the baking sheets, before baking, for about 10 minutes before transferring to the oven. This tends to help cut-out cookie retain their shape during baking, but these still puffed quite a bit.

I didn’t use the icing recipe linked here. I decorated my cookies with cream cheese frosting because it seemed easier and tastier. It was, but the cookies had to be stored in a single layer to avoid messing up the frosting.

The spices in the original recipe here were pretty mild; next time I’ll double them.

⅔ cup molasses (not robust)
⅔ cup (4.67 ounces) packed dark brown sugar
1 tablespoon ground ginger
1½ teaspoons ground cinnamon
½ teaspoon ground allspice
½ teaspoon ground cloves
2 teaspoons baking soda
16 tablespoons (2 sticks) unsalted butter, cut into tablespoon pieces
1 large egg, lightly beaten
3¾ cups (18 ounces) all-purpose flour, plus more for kneading and dusting
½ teaspoon salt

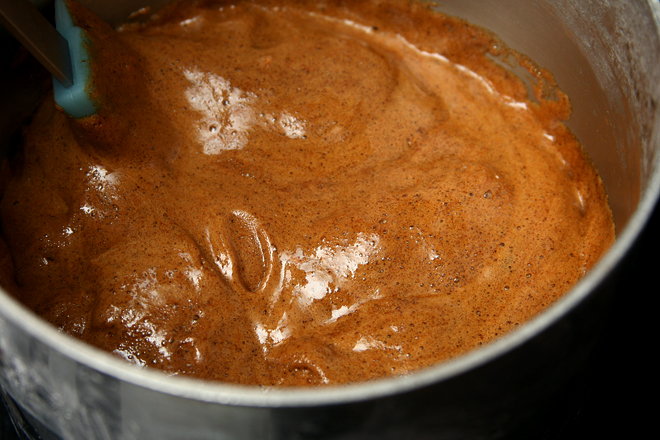
1. Bring the molasses, brown sugar, and spices to a boil in a 4- to 5-quart heavy saucepan over moderate heat, stirring occasionally; remove from heat. Stir in the baking soda (mixture will foam up), then stir in the butter 3 pieces at a time, letting each addition melt before adding next, until all of the butter is melted. Add the egg and stir until combined, then stir in the flour and salt.

2. Arrange a rack in the middle position and heat oven to 350°F. Line baking sheets with parchment paper or a silicone mat.

3. Transfer the dough to a lightly floured surface and knead, dusting with flour as needed to prevent sticking, until soft and easy to handle, 30 seconds to 1 minute. Halve the dough, wrapping one half in plastic wrap; keep at room temperature.

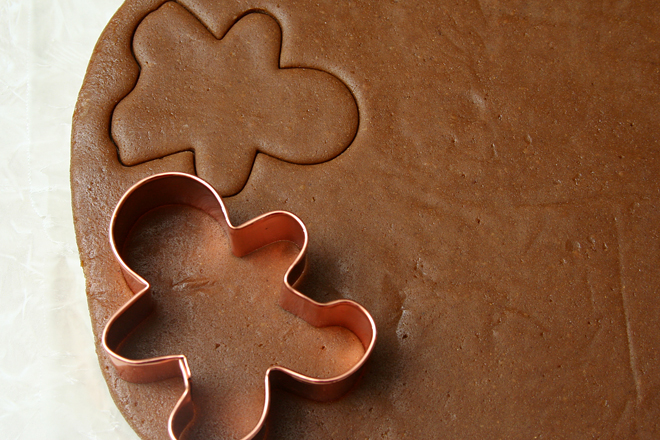
4. Roll out the remaining dough into a 14-inch round (⅛-inch thick) on a lightly floured surface. Cut out as many cookies as possible with cutters and carefully transfer them to the prepared baking sheets, arranging them about 1 inch apart.

5. Bake the cookies, one sheet a time, until edges are slightly darker, 8 to 10 minutes. Let the cookies cool for a couple minutes on the pan before transferring them to racks to cool completely. Make more cookies with remaining dough and scraps. Decorate cooled cookies as desired with decorating icing.

gingerbread cookies 3

eggnog cupcakes

eggnog cupcakes 5

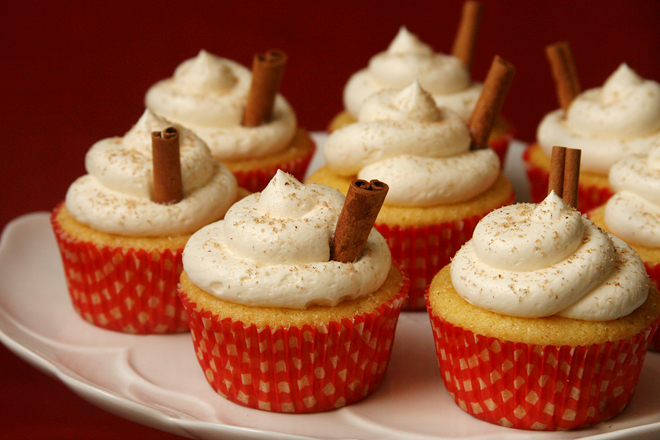
Eggnog is sort of ridiculously bad for you. I think of it as a Christmasy milkshake. I enjoy it, but moderation is key. Dave, on the other hand, learned a hard lesson about moderation recently, as he poured himself a big glass of the nog and topped it off with a generous pour of Bailey’s Irish Cream. Declaring it delicious, he went ahead and poured himself another big glass, while I attempted to point out without being too terribly annoying that that there is a whole lot of eggnog. An hour later, lying on the floor clutching his stomach, he agreed.

eggnog cupcakes 1

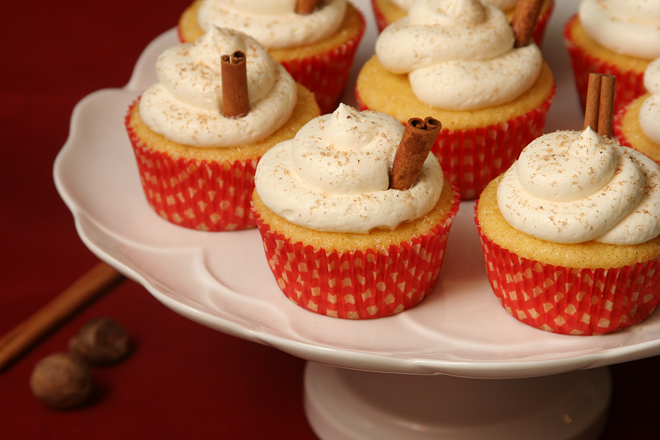
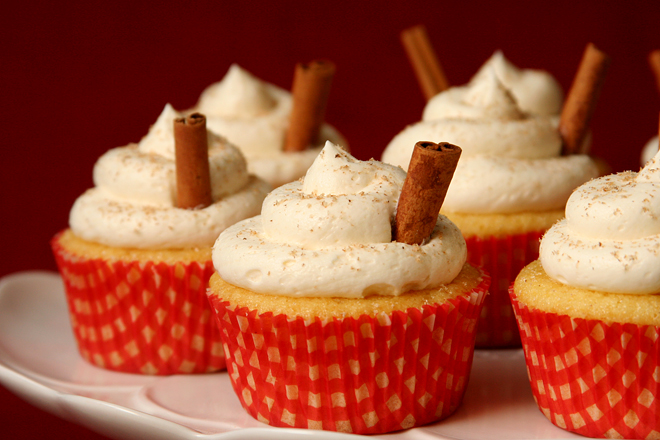
Perhaps iced tea glasses are not the best way to enjoy eggnog, and cupcakes, instead, are. The ingredients are similar anyway – eggs, sugar, dairy – and because eggnog is so thick, you can add a decent amount to cake batter without hurting the texture of the cake. I started with this recipe, but it’s clearly based on a vegan source, with its lack of eggs and butter. That’s fine, but I like the structure eggs give to batters, and I thought butter would be a good match with the dairy-flavored cake. I’ve always had good results with this vanilla bean cupcake recipe, which is a pretty standard cake batter, so I combined the two. For the frosting, I used an easy American-style buttercream, with just a couple ounces of cream cheese added to enhance the pudding flavor of the eggnog.

eggnog cupcakes 2

The batter, with just 2 tablespoons of bourbon, was like a sweet cocktail, with alcohol fumes dominating the flavor. Of course most of that burns off in the oven, resulting in tender, moist cupcakes with just a hint of bourbon. The frosting was particularly dangerous, and I had to be careful that I didn’t eat so much that I had to join Dave in stomach-clutching. Powdered sugar-based American buttercream can be one-dimensionally sweet, but the cream cheese, eggnog, and bourbon give this one plenty of extra flavor. A generous grating of nutmeg brings home the Christmasy overtones. This is definitely the right way to enjoy eggnog, although I wouldn’t be opposed to a small glass of the stuff with a shot of Bailey’s either. I’m not sure Dave is recovered enough to join me.

eggnog cupcakes 4

One year ago: Spelt Crackers
Two years ago: Bolognese Sauce (comparison of 3 recipes)
Three years ago: Thai-Style Chicken Soup (Tom Kha Gai)
Four years ago: Cranberry Orange Muffins

Printer Friendly Recipe
Eggnog Cupcakes (adapted from Annie’s Eats and these Vanilla Bean Cupcakes)

Makes about 15 cupcakes

I included butter for flavor and a couple tablespoons of oil because it does a better job making cakes tender and moist than butter does.

1¼ cups (5 ounces) cake flour
2 teaspoons baking powder
½ cup eggnog, at room temperature
2 tablespoons vegetable oil
2 teaspoons vanilla extract
2 tablespoons bourbon or dark rum
5 tablespoons unsalted butter, at room temperature
½ teaspoon salt
¾ cup (5.75 ounces) sugar
3 large eggs, at room temperature

For the frosting:
16 tablespoons unsalted butter, at room temperature
2 ounces cream cheese, softened
Pinch of salt
2½ cups (10 ounces) confectioners’ sugar, sifted
Pinch of freshly grated nutmeg
2 tablespoons eggnog
1 teaspoon vanilla
2 teaspoons bourbon

1. Heat the oven to 350°F. Line two cupcake pans with paper liners. In a medium bowl, combine the cake flour and baking powder. In a 2-cup measuring cup, whisk together the eggnog, oil, vanilla, and bourbon.

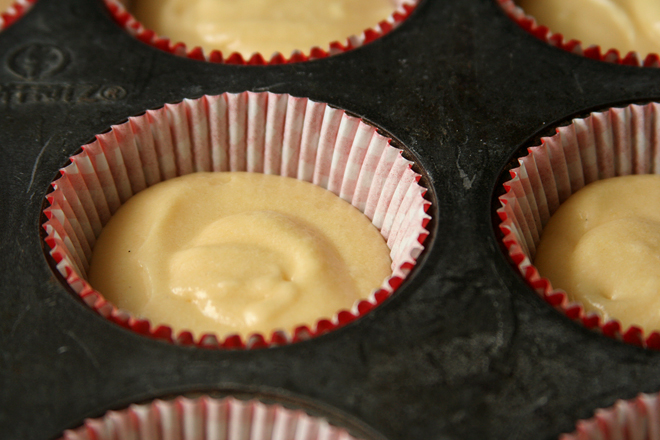
2. Place the butter and salt in the bowl of an electric mixer fitted with the paddle attachment. Beat on medium-high speed for 3 minutes, until light and creamy in color. Gradually add the sugar to the butter mixture. Mix in the eggs one at a time, until incorporated. With the mixer on low speed, add one-third of the flour mixture, followed immediately by half of the eggnog mixture, mixing just until incorporated. Repeat with another third of the flour and the rest of the eggnog, then the last of the flour. Scrape down the sides of the bowl and mix for 15 seconds longer.

3. Divide the batter between the prepared paper liners, filling each about ⅔ of the way full. Bake for 18-22 minutes, or until a toothpick inserted in the center comes out clean. Allow to cool in the pans for 5-10 minutes, then transfer to a cooling rack to cool completely.

4. To make the frosting: Place the butter, cream cheese, and a pinch of salt in the bowl of an electric mixer fitted with the whisk attachment. Beat on medium-high speed until creamy, about 1 minute. Gradually add the powdered sugar and nutmeg, and mix on medium-high speed until smooth, about 2 minutes, scraping the sides of the bowl as necessary. Add the eggnog and whip on medium-high speed until light and fluffy, 4 minutes. With the mixer on medium-low speed, blend in the bourbon and vanilla. Frost the cupcakes as desired.

eggnog cupcakes 3

cranberry apple brandy

cranberry apple brandy 3

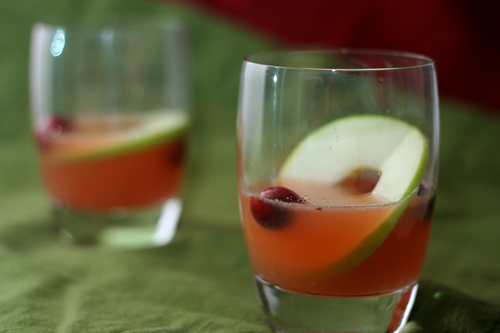
When I was simmering sugar syrup, smashing fruit, and measuring alcohol for these cocktails, my mom made the excellent point that opening a bottle of wine is a heck of a lot easier. And while I appreciate how wine compliments food and how beer signals relaxation, I love cocktails too. Cocktails are special. They mean fun and celebration. You can’t help but be happy when enjoying a cocktail with friends and family. And that’s why they’re worth the trouble.

cranberry apple brandy 1

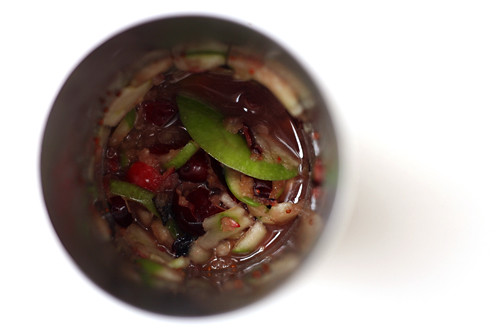
This one takes more work than the citrus squeezing, liquor measuring, and syrup simmering of my favorite vodka gimlets and magaritas, as apples need to be sliced, then crushed along with cranberries before the liquor and syrup are stirred in – and that’s in addition to the squeezing, measuring, and mixing of citrus, liquor, and syrup, respectively.

cranberry apple brandy 2

It’s a strong drink, undoubtedly, as it is mostly brandy.  But it has all of the ingredients in a good apple dessert – sugar, a touch of citrus to brighten the flavors, cranberries in case you needed another reminder that it’s the end of fall and the beginning of winter.  Fortunately, that’s just the time for celebrations worthy of the trouble involved with mixing up a seasonal cocktail.

cranberry apple brandy 4

One year ago: Cranberry Apple Galette
Two years ago: Carne Adovada
Three years ago: Baked Eggs with Spinach and Mushrooms

Printer Friendly Recipe
The Normandy
(from The Essential New York Times Cookbook by Amanda Hesser)

Serves 1

9 cranberries
2 thin slices green apple
1 teaspoon dark brown sugar
1 tablespoon fresh lemon juice
1 tablespoon simple syrup
2 ounces Calvados or other good-quality apple brandy

Combine 6 cranberries, 1 apple slice, the brown sugar, and lemon juice in a cocktail shaker and muddle (crush with a muddler or the back of a wooden spoon). Add the simple syrup, Calvados, and a few ice cubes, cover, and shake well. Strain into a rocks glass filled with ice and garnish with the remaining 3 cranberries and apple slice.