roll-out sugar cookie comparison

You know those people who decorate sugar cookies so beautifully it’s hard to believe those works are art are edible? Yeah, I am not one of them. I haven’t made sugar cookies in months, and you know why? It’s a pain in the butt, and the results of my decorating are never up to my standards.

You know what’s even more of a pain in the butt? Making five different recipes! On the other hand, if I’m going to go through the trouble of mixing, rolling, baking, and decorating cookies, I want to be sure I’m using the best recipe I can, and it’s hard to know that without making a bunch and comparing. So that’s what I did.

I asked around to see what recipes people recommended and settled on this one from Annie’s Eats, this one from Ashlee’s Year in the Kitchen, this one from Martha Stewart, and the version I’ve been using for the last year or so, an adaptation of this one. (That’s only four recipes and I said I made five – I messed one up and had to remake it.) Because it’s easy to adapt the flavorings to personal preference, I used the same amount of vanilla, almond extract, and lemon zest in each recipe.

What I’m looking for in a sugar cookie is full flavor – some are bland – and tenderness without being too delicate. It needs to hold its shape of course, although I’m not opposed to a slight puff in the oven. I think a few flecks of lemon zest give sugar cookies a more balanced flavor without making them noticeably lemony. I am not particularly interested in recipes that do not require an overnight rest, as they tend to require too much flour, resulting in a bland, tough cookie. This actually makes sugar cookies a convenient comparison post because I could divide the tasks into separate days – making the dough, rolling it out, baking it, and decorating the cookies.

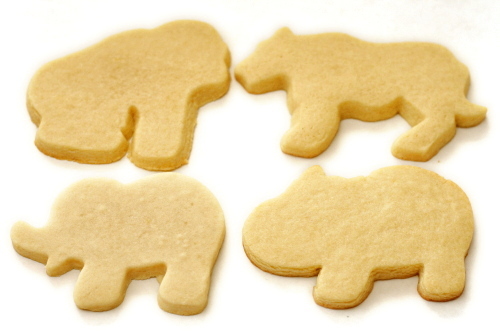
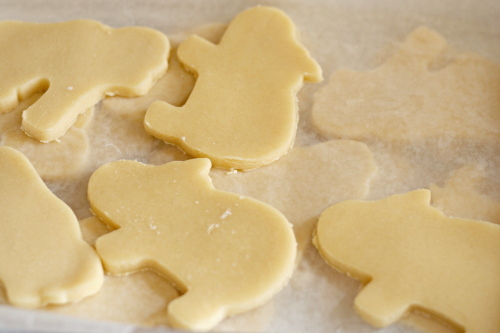
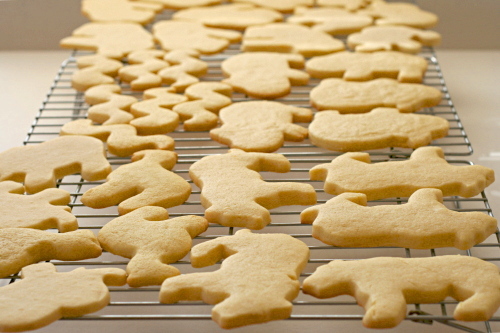
I thought all of the recipes were equally easy to mix up and roll out. I thought they all held their shape adequately during baking, although Ashlee’s cookies puffed a bit more than the others, while Annie’s were on the other extreme, retaining perfectly straight sides in the oven.

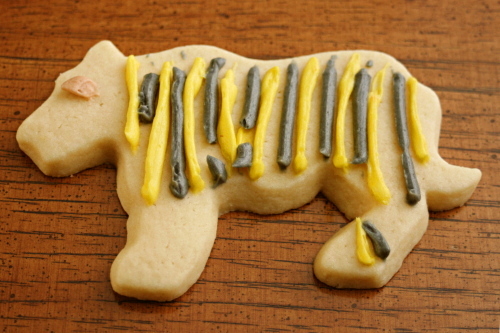
After tasting, the two favorite recipes were mine and Ashlee’s. The cookies from my recipe (the gorillas) were described as soft, chewy and flavorful. Ashlee’s (the tigers) were puffy, fluffy, and soft – tasters like the texture better but there was a slight preference for the flavor of my recipe.

Annie’s cookies (the elephants) were soft, although not chewy, but they were powdery and not as flavorful. Because this recipe uses only powdered sugar with no granulated sugar, the powdery texture is not a surprise. I’m sure this all relates to how well they hold their shape during baking as well, in addition to the lack of any chemical leavener. The universal least favorite was Martha Stewart’s recipe (the hippos), which was too hard, too chewy, and too dense, perhaps because it uses less butter than any of the others.


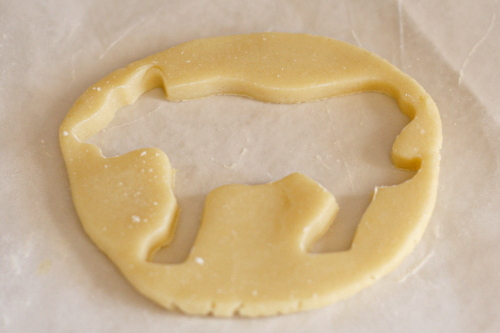
(I would just like to clarify that Dave outlined the hippo and gorilla. I was happy for his help, and I think he might even have had a little bit of fun.)

Which will I choose in the future? Oh, who knows. Probably my recipe, because it’s a classic sugar cookie recipe. There are no tricks up its sleeve; it just happens to have just the right ratio of ingredients. And for the record, the one thing that all of my tasters agreed on after I made them compare the cookies pre-frosting was that buttercream makes sugar cookies that much better.

One year ago: Lemon Cream Cheese Bars
Two years ago: Raspberry Bars (these are wonderful)

Printer Friendly Recipe
Roll-out Sugar Cookies

2½ cups (12 ounces) all-purpose flour
1 teaspoon baking powder
1 egg
½ teaspoon vanilla extract
¼ teaspoon almond extract
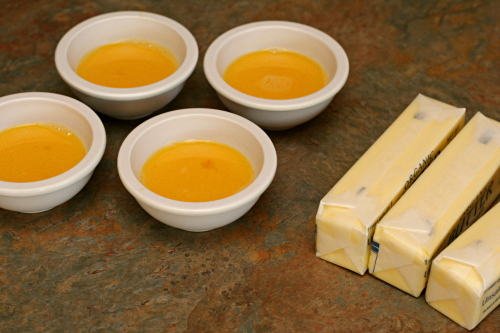
16 tablespoons (2 sticks) unsalted butter, room temperature
½ teaspoon salt
1 cup (7 ounces) granulated sugar
¼ teaspoon lemon zest

1. In a medium bowl, mix the flour and baking powder. In a one-cup measuring cup, lightly beat the egg with the extracts.

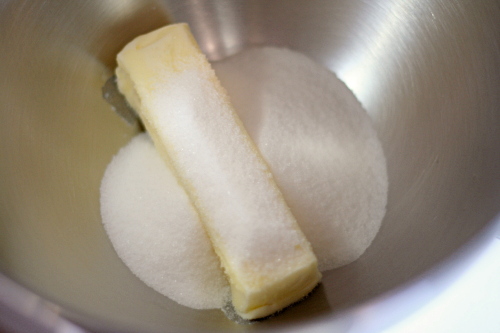
2. In the bowl of a standing mixer (or in a large bowl with a handheld mixer), beat the butter and salt on medium speed until smooth. With the mixer running, gradually pour in the sugar; add the lemon zest. Beat on medium until fluffy, about 1 minute. With the mixer running, pour in the egg mixture and continue beating until incorporated. Scrape down the sides of the mixer bowl. With the mixer on low, gradually add the flour and mix just until evenly blended.

3. Lightly knead the dough to form a ball, press it into a disk 1-inch thick, and wrap tightly in plastic wrap. Refrigerate for 2 hours or overnight.

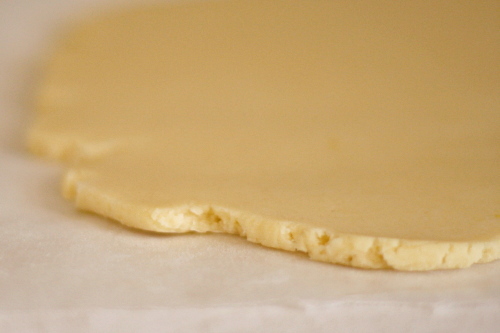
4. Line a baking sheet with parchment paper or a silicone baking mat. Adjust a rack to the middle position and heat the oven to 375F. If you’ve chilled the dough overnight, it’ll need to sit at room temperature for half an hour or so to soften slightly. On a very lightly floured sheet of wax paper with a sheet of plastic wrap on top of the dough, roll the dough out to ¼-inch thick. Cut cookies using a floured cookie cutter. Re-roll scraps, always using as little flour as necessary.

5. Bake the cookies, one sheet at a time, for 5-9 minutes, until they no longer look wet on top. The baking time will depend on the size of the cookies you’ve cut. You don’t want the bottoms to be browned, except for maybe just a bit on the edges. Let the cookies rest for a couple minutes on the sheets before transferring them to cooling racks to finish cooling. Decorate as desired.


(The snakes are a mixture of the last dough scraps from all five recipes.)

Printer Friendly Recipe
Ashlee’s Famous Sugar Cookies (rewritten from Ashlee’s Year in the Kitchen)

For my comparison, I used the same amount of vanilla, almond extract, and lemon zest for each recipe. This was significantly less lemon zest than Ashlee’s recipe calls for. A full tablespoon will give the cookies a distinct lemon flavor.

Ashlee indicates that the dough can be rolled and cut right after mixing, but I have my doubts. I chilled overnight just for convenience, but it was a very soft dough, and I think it would be difficult to cut and transfer cookies while the dough is room temperature.

24 tablespoons (3 sticks) unsalted butter, room temperature
1½ cups (10.5 ounces) granulated sugar
½ cup (2 ounces) powdered sugar
4 eggs
1 teaspoon vanilla
½ teaspoon almond extract
1 tablespoon lemon zest
5 cups (24 ounces) all-purpose flour
2 teaspoons baking powder
1 teaspoon salt

1. Adjust a rack to the middle position and heat the oven to 400F. Line a baking sheet with parchment paper or a silicone baking mat.

2. In the bowl of a standing mixer (or in a large bowl with a handheld mixer), beat the butter and sugars on medium speed for 5 minutes. Add the eggs one at a time, mixing until each is incorporated before adding the next. Add the extracts and lemon zest and beat for 10 seconds. Add the baking powder and salt and beat until combined. With the mixer on low, add the flour 1 cup at a time, mixing for 15 seconds between each addition.

3. Wrapped tightly in plastic wrap, the dough can be refrigerated for up to a week, or it can be rolled and cut right away (see note). Roll out to a thickness of ¼-inch and use a floured cookie cutter to cut desired shapes.

4. Bake on the prepared sheet for about 7 minutes, until light golden brown on the bottom edges.

Printer Friendly Recipe
Ella’s White Sugar Cookies (rewritten from Annie’s Eats)

16 tablespoons (2 sticks) unsalted butter, room temperature
1 cup (4 ounces) powdered sugar
1 egg, beaten
1½ teaspoon almond extract
1 teaspoon vanilla
1 teaspoon salt
2½ cups (12 ounces) all-purpose flour

1. In the bowl of a standing mixer (or in a large bowl with a handheld mixer), beat the butter on medium speed until smooth. Add the powdered sugar and continue mixing until evenly blended. With the mixer running, pour in the egg, extracts, and salt and continue beating until incorporated. Scrape down the sides of the mixer bowl. With the mixer on low, gradually at the flour and mix just until evenly blended.

2. Refrigerate for 2 hours or overnight.

3. Line a baking sheet with parchment paper or a silicone baking mat. Adjust a rack to the middle position and heat the oven to 375F.

4. Roll to ¼-inch thickness on a well-floured surface. Cut with floured cookie cutters. Place on prepared cookie sheets. Bake at 375°F for 8-10 minutes. Cookies should not brown. Transfer to wire racks to cool completely.

Printer Friendly Recipe
Sugar Cookie Cutouts (from Martha Stewart)

4 cups sifted all-purpose flour
1 teaspoon baking powder
½ teaspoon salt
1 cup (2 sticks) unsalted butter, room temperature
2 cups granulated sugar
2 large eggs
2 teaspoons pure vanilla extract

1. Sift flour, baking powder, and salt into a bowl.

2. Put butter and sugar in the bowl of an electric mixer fitted with the paddle attachment. Mix on medium speed until pale and fluffy. Mix in eggs and vanilla. Reduce speed to low. Gradually mix in flour mixture. Divide dough into quarters; flatten each quarter into a disk. Wrap each in plastic. Refrigerate until firm, at least 1 hour or overnight.

3. Preheat oven to 325 degrees with racks in upper and lower thirds. Let one disk of dough stand at room temperature just until soft enough to roll, about 10 minutes. Roll out dough between two pieces of plastic wrap to ¼-inch thickness. Remove top layer of plastic wrap. Cut out cookies with a 4-to-5-inch cookie cutter. Transfer cookie dough on plastic wrap to a baking sheet. Transfer baking sheet to freezer, and freeze until very firm, about 15 minutes. Remove baking sheet from freezer, and transfer shapes to baking sheets lined with nonstick baking mats. Roll out scraps, and repeat. Repeat with remaining disk of dough.

4. Bake, switching positions of sheets and rotating halfway through, until edges turn golden, 15 to 18 minutes. Let cool on sheets on wire racks.

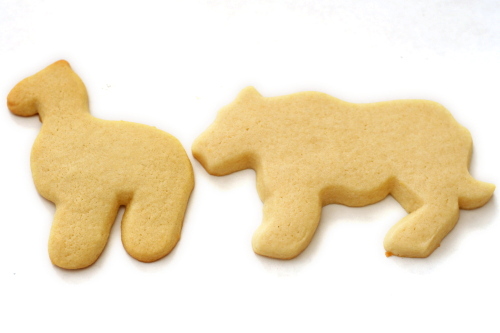
And – this is what happens when you add baking soda to your sugar cookies instead of baking powder.  They puff and turn yellow.   The tiger is the recipe made correctly, with baking powder; the giraffe has baking soda.
apple muffins

I don’t know why I feel the need to state this every year, but, again, for the record: I am pro New Year’s Resolution. Yes, we all know that you can resolve to make changes any day of the year. So what? New Year’s Day is the official last day of holiday craziness. It’s the perfect day to start thinking about new routines.

Besides, this year, I also moved from the East Coast to the Southwest; from a suburb of one of the country’s largest cities to a very small, very isolated town; from an apartment to a house; from the subtropics to the desert. Dave is starting a new job; I’ll be starting one new job this week, plus interviewing for two others. I didn’t just make a New Year’s resolution; I made a resolution for this new life.

My goal is, in a nutshell, to be perfect. That sounds obtainable, right? More realistically, it’s to be a person I can be proud of. And, yes, part of that, the easier part actually, involves fitness.

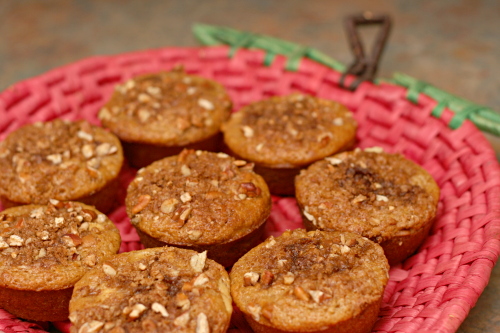
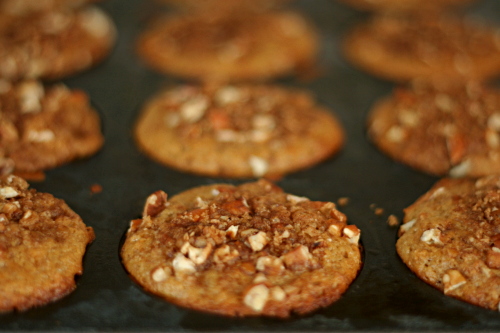
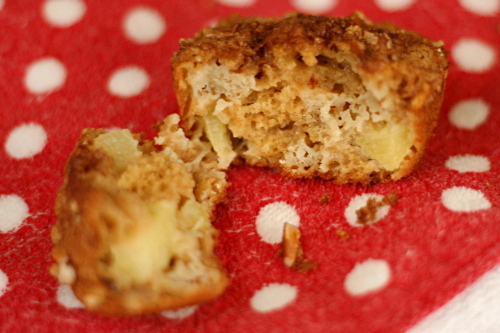
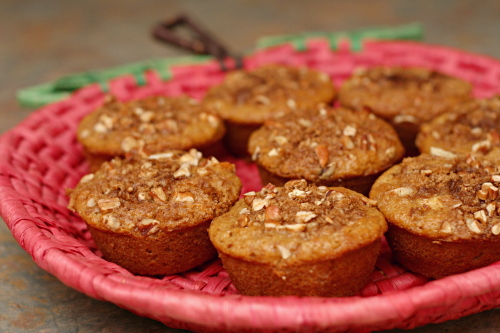
Fortunately, eating healthy isn’t a bit challenging when there are recipes like this one. Nothing about these indicates that they’re better for you than most muffins. But with whole wheat pastry flour substituting for half of the flour and applesauce taking the place of some of the fat, they’re downright wholesome. They’re also fluffy and light and delicious.

Muffins = one small step toward a more perfect me! Now I just need to keep it up for ever or so, plus be more productive, creative, organized, active, outgoing, focused, positive, motivated…

Two years ago: Macaroni and Cheese, Banana Cream Pie

Printer Friendly Recipe
Apple Muffins (from Ellie Krieger)

12-16 muffins

My batter seemed a little too liquidy. Next time I’ll reduce the buttermilk to ½ cup.

The original recipe says it makes 12 muffins, but I had extra batter.

cooking spray
¾ cup (5.25 ounces) plus 2 tablespoons packed brown sugar
¼ cup chopped pecans
½ teaspoon ground cinnamon
1 cup (4.8 ounces) all-purpose flour
1 cup whole-wheat pastry flour
1 teaspoon baking soda
½ teaspoon salt
¼ cup canola oil
2 large eggs
1 cup natural applesauce
1 teaspoon vanilla extract
¾ cup lowfat buttermilk
1 Golden Delicious apple, peeled, cored and cut into ¼-inch pieces

Preheat oven to 400 degrees. Coat a 12-capacity muffin pan with cooking spray.

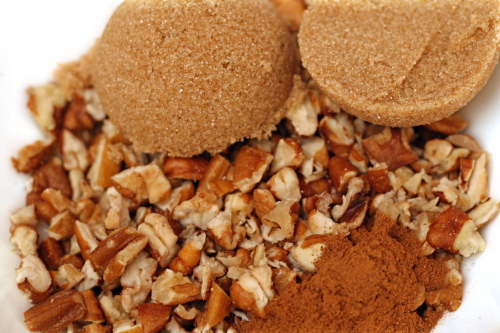
In a small bowl, mix together 2 tablespoons of the brown sugar, the pecans and cinnamon.

In a medium bowl, whisk together the all-purpose and whole-wheat flour, baking soda and salt.

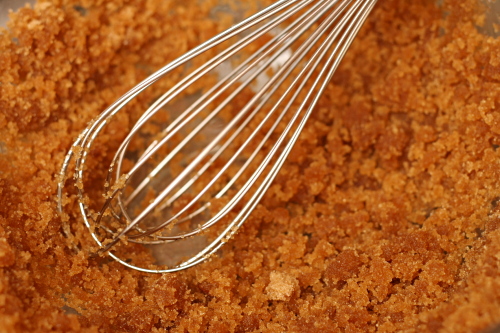
In a large bowl, whisk the remaining ¾ cup sugar and oil until combined. Add the eggs, one at a time, whisking well after each addition. Whisk in the applesauce and vanilla.

Whisk in the flour mixture in two batches, alternating with the buttermilk. Whisk just until combined. Gently stir in the apple chunks.

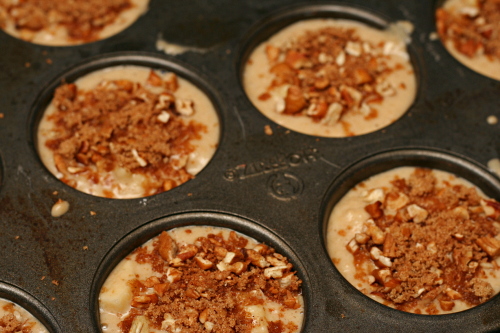
Pour the batter into the prepared muffin pan and sprinkle with the pecan mixture. Tap the pan on the counter a few times to remove any air bubbles. Bake for 20 minutes or until a wooden pick inserted in center of one of the muffins comes out clean.

Let cool on a wire rack for 15 minutes. Run a knife around the muffins to loosen them and unmold. Cool completely on the rack.

lamb stew

Whenever I eat lamb, my first whiff of it always seems a little…off. Is lamb like feety cheese – stinky, but in a good way? Or am I just attuned to beef, and I’m surprised when the lamb smells different? Whatever, I’ve decided that I officially like lamb. Stinky or not.

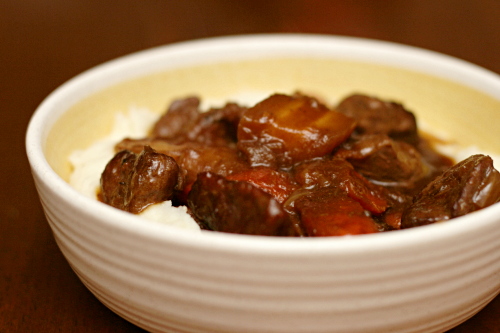
This stew is not any sort of authentic ethnic lamb stew – not Morrocon or Irish or whatever. It’s just lamb stew. It’s what I was in the mood for at the time – chunks of lamb, onions, root vegetables, thyme, and dark rich beer.

My only uncertainty was which type of lamb meat to use. I usually use beef chuck roast for stew, but what is that equivalent to for lamb? Certainly not sirloin, which was one of my few options. I also didn’t want to use expensive rib chops. Leg? Too big. Shanks? Dur…I don’t know. I went with a combination of sirloin meat and loin chops. I think blade chops would be a great option, but my store didn’t have them.

Whatever I did must have worked though, because the stew was just great. So rich and hearty and comforting. And distinctively…lamby. Which is a good thing.

One year ago: German Apple Pancake

Printer Friendly Recipe
Lamb Stew

The type of lamb to use is ill-defined, because a variety of lamb cuts might not be available and a number of different cuts will work. If you can find them, go for blade chops. I used a combination of loin chops and a sirloin steak, and it worked out very well. If the cut you use contains bones, use the higher amount of meat (around 3 pounds); otherwise, use around 2 pounds of meat.

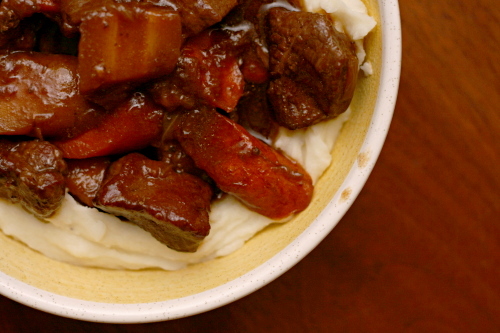
I served this over mashed potatoes, which I really enjoyed. You can also replace the parsnips with potatoes if you want something a little more like traditional stew.

Serves 6

3 tablespoon vegetable oil
2-3 pounds lamb meat, fat trimmed and cut into 1-inch chunks, bones reserved (see note)
salt
3 onions, chopped course
1 (12-ounce) bottle of stout
2 cups water
½ teaspoon black pepper
1 teaspoon dried thyme (or 2 sprigs fresh)
12 ounces carrots, halved lengthwise and sliced on a slight bias about ½ inch thick
12 ounces parsnips, halved lengthwise and sliced on a slight bias about ½ inch thick
¼ cup minced parsley

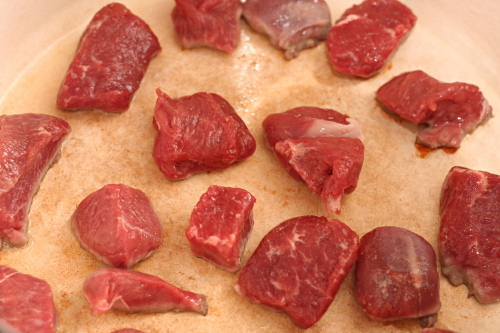
1. Adjust a rack to the lower-middle position and heat the oven to 325 degrees. Heat 1 tablespoon of the oil in a 5-quart Dutch oven over medium to medium-high heat. Add half of the meat, with pieces spaced about one inch apart. Cook without stirring for 2-3 minutes, until the first side is dark brown. Turn each piece to another flat side and cook for another 2-3 minutes, until the second side is dark brown. Continue cooking and turning the pieces until all sides are dark brown, about 10 minutes. Remove the lamb from the pot and place it on a plate. Repeat with another tablespoon oil and the remaining lamb. (If you use a 7-quart Dutch oven instead of a 5-quart, you might be able to fit them all in one batch.)

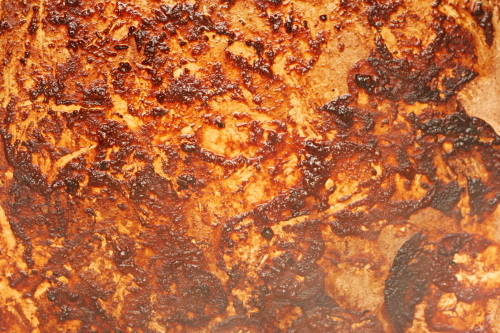
2. Reduce the heat to medium. Add the last tablespoon of oil to the empty, unrinsed pot, then add the onions and a pinch of salt. Sauté the onions, scraping the browned bits from the bottom of the pot and stirring occasionally, for 8-10 minutes, until the onions are softened and browned around the edges.

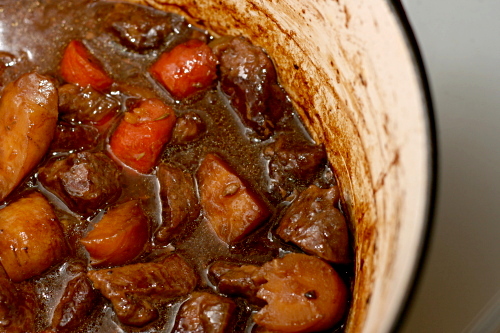
3. Add the browned meat, lamb bones, beer, water, 1½ teaspoons salt, pepper, and thyme to the pot with the onions. Bring to a simmer over medium-high heat, then cover the pot and place it in the oven. Cook for one hour, uncovered.

4. Add the carrots and parsnips to the stew and cook for another hour, or until the meat is tender and the vegetables are softened. Remove the lamb bones, stir in the parsley, adjust the salt and pepper if necessary, and serve.

pecan pie

Conversations from this Christmas:

  • Me: I was thinking we could all go to the botanical garden’s light show like we did a couple years ago.
  • My sister: Oh yeah, we did that last year too, so it’s a new tradition.

  • 4-year old, after opening a present: A truck! Vroom vroom! Can I open another present now?
  • His mom: No, the tradition is that we all take turns, so you need to wait until Aunt Bridget and Grandma each open a present; then it will be your turn again.

  • My brother: Are we really going to go look at the luminarias across town? It’s already after 10pm, and it’s 15 degrees out.
  • The rest of us: Of course we are! It’s tradition!

We take tradition seriously in my family, and that extends to the holiday meal. It’s turkey and fixings, and variations are not appreciated. Complaints will be lodged if the cranberry sauce has too much orange zest, the stuffing has too much sausage, or, worst of all, pumpkin cheesecake replaces the pie.

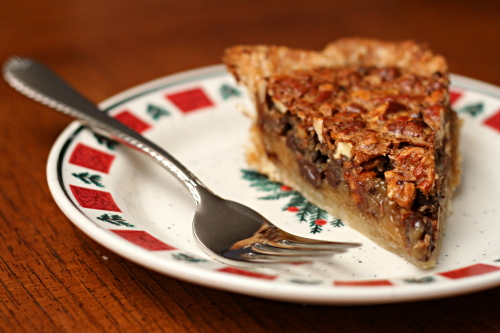
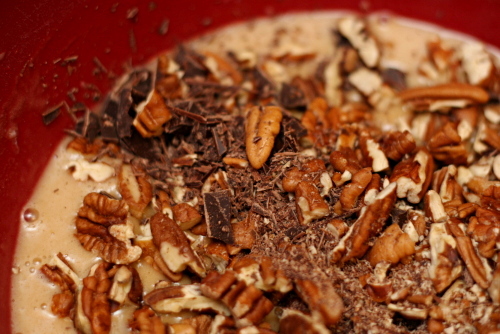
So I waffled on what to do with Dorie’s pecan pie recipe – I liked the idea of adding bitter ingredients like chocolate and espresso to cut the sweetness of regular pecan pie, but I didn’t want to make something so different that my mom would have to make her standard pecan pie recipe as soon as I went home to satisfy her craving. I ended up reducing the chocolate from 3 to 2 ounces, skipping the cinnamon because I didn’t really want it, and skipping the espresso because I didn’t have any available.

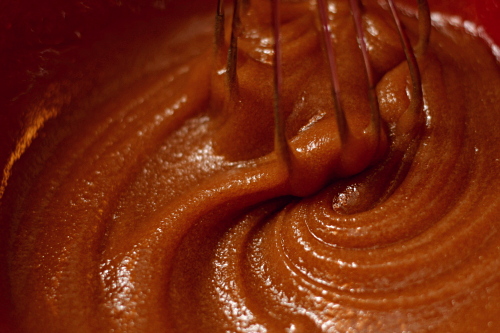
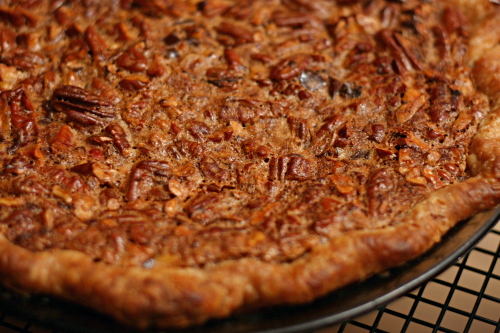
And it was great! I’ve tried a number of pecan pie recipes, and this is the only one that I’ve really enjoyed. The small amount of chocolate was a nice treat, but mostly it was the brown sugar and the balance of corn syrup to pecans that made this pie so good. In fact, everyone liked it – even those of us who don’t traditionally even eat the pecan pie.

Beth chose this pie for Tuesdays with Dorie, and she has the recipe posted.

One year ago: Tall and Creamy Cheesecake

rosy poached pear and pistachio tart

Copy of IMG_1364

I’m not really good with pears. I don’t know much about them, so I never buy them. And, of course, because I never buy them, I don’t learn much about them. Which types are best for baking and for eating? When are they in season? How do I know when they’re ripe? How long do they take to ripen after you buy them?

Copy of IMG_1336

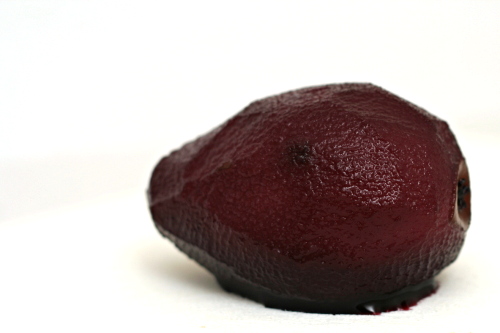
Due to my lack of pear knowledge, I was a little worried about how my tart would come out. I should have looked up what kind of pear to use, plus I forgot to buy mine early so it would have time to ripen before I needed to make the tart.

Copy of IMG_1352

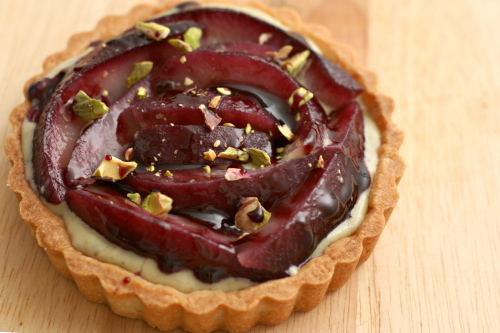
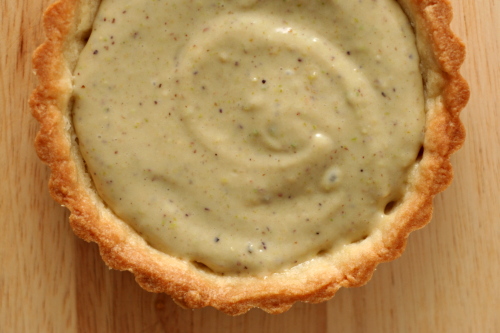
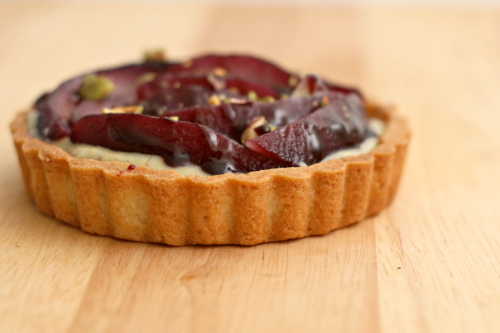
It probably would have been a little better if my pear had been softer, but, as it was, this was a pretty darn good tart. I mean, the pear is cooked in wine for over half an hour – how could that be bad? Plus, pastry cream is just delicious, although pistachio pastry cream resembles split pea soup a little too closely for my comfort. Good thing it’s covered by that beautiful purple poached pear!

Copy of IMG_1355

Lauren chose this for Tuesdays with Dorie and she has the recipe posted.

One year ago: Linzer Sablés

Copy of IMG_1361

slice and bake brown sugar cookies

Copy of IMG_1207

It’s Thanksgiving! And that means it’s officially Christmastime!

Right?

Oh, it means something about giving thanks? Hmm. That’s cool too.

Copy of Copy of IMG_1129

Still, once the feast is over, it’s all about Christmas. I used to try to hold off thinking about, hearing, and seeing anything Christmas-related until Thanksgiving, but you can imagine how successful that strategy was. These days, I’m more in the ‘if you can’t beat ‘em, join ‘em’ mindset. I didn’t play carols or put up my tree, but I did smile over cute decorations.

Copy of IMG_1153

What better way to kick off the Christmas season than cookies? One of my favorite Christmas cookies, in fact, and I think I finally figured out exactly why I like them so much.

Copy of Copy of IMG_1198

The dough is pretty typical for cookies, with butter, sugar, salt, eggs, vanilla, flour, and leavening. But, it uses twice as much brown sugar as white sugar, which…you guys! It’s chocolate chip cookie dough, without the chocolate! Nothing against chocolate, but that’s pretty much my perfect cookie.

Copy of IMG_1192

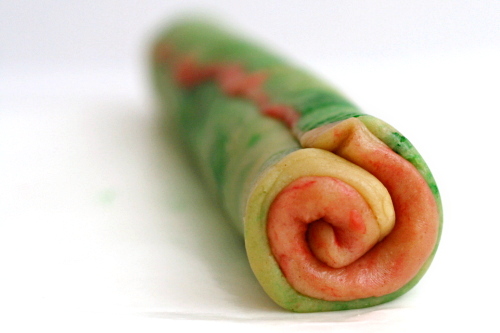
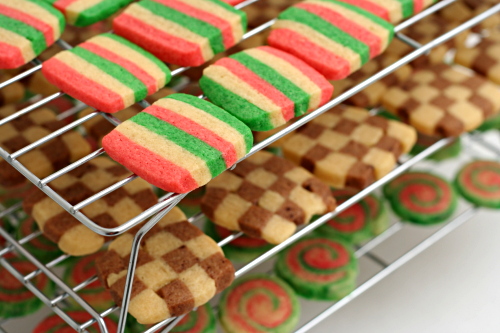
Plus, they’re so pretty. It takes a bit of effort to get them into the different shapes, but once they’re formed, you just throw the logs of dough in the freezer, then bake however many you want whenever you want.

Copy of IMG_1190

These cookies are delicious, they’re not hard to make, they look impressive, and their timing is completely flexible. In other words, they’re perfect. There can be no better way to shift into the Christmas season.

Copy of IMG_1208

One year ago: Multigrain Pancakes

Printer Friendly Recipe
Slice and Bake Brown Sugar Cookies

Makes about 8 dozen

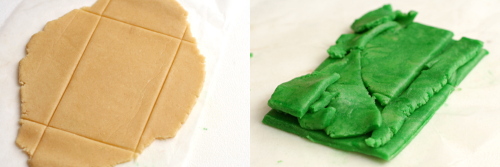
The only slightly difficult part of this recipe is rolling out the dough to an exact size. The best method I found was to initially roll it out to about twice the desired size, then trim the edges to a shape 1 inch smaller in each direction than you eventually want. Place the trimmings on the cut rectangle, cover with wax paper, and roll out to your final desired size (see photos above).

Update 12/22/2011: I like these cookies even better with a ½ cup less flour (3½ cups total).  The dough is stickier, and there’s no way you’d be able to roll it out to the right size, but I’ve decided that simply pressing it to the right size is easier anyway.

4 cups (19.2 ounces) unbleached flour
1 teaspoon baking powder
¼ teaspoon baking soda
2 eggs, preferably room temperature
2 teaspoons vanilla extract
20 tablespoons (2½ sticks) butter, room temperature
1 teaspoon salt
1 cup (7 ounces) firmly packed light brown sugar
½ cup (3½ ounces) granulated sugar
½ ounce unsweetened chocolate, finely chopped

1. In a medium-sized bowl, combine the flour, baking powder, and baking soda. Break the eggs into a small measuring cup, whisk them lightly, and mix in the vanilla.
2. Place the butter in the bowl of a stand mixer fitted with the paddle attachment (or a large mixing bowl if you’re using a hand-held mixer). Beat the butter on medium-low speed until it’s smooth, then add the salt and both sugars. Continue beating on medium-low until the mixture is light and fluffy, about 2 minutes, scraping the sides of the bowl as needed. With the mixer running, gradually add the egg mixture. Once the eggs have been added, scrape the sides of the bowl once, then continue mixing on medium speed for about 1 minute. Reduce the mixer speed to low and gradually add the flour mixture, mixing just until evenly combined. Divide the dough into three equal portions.

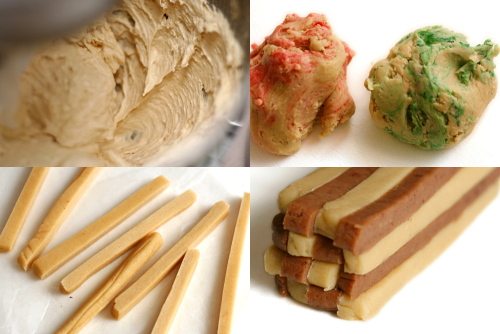
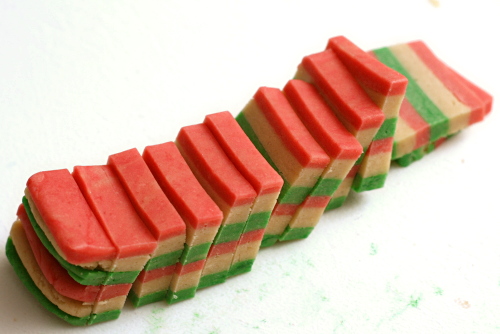
3. For the striped cookies: Divide the first portion of dough into three more equally sized parts. Color one third red, another green, and leave the last one white. Between sheets of wax paper, roll each portion out to a 3-by-9-inch rectangle. Freeze the rectangles for about 10 minutes, until they’re firm enough to cut and stack. Cut each rectangle in half lengthwise to form two 1½-by-9-inch rectangles. Stack the rectangles of dough, alternating colors, to form a block of dough with stripes. Trim the edges if desired. Wrap in wax paper and freeze for at least four hours, or up to 4 weeks.

4. For the checkerboard cookies: Place the chocolate in a microwave-safe bowl and microwave on half power for about 30 seconds. Stir, then repeat the heating and stirring until fully melted, being careful not to burn the chocolate. Divide one portion of dough into two equally sized parts. Mix the chocolate into one half and leave the other plain. Roll each portion into a 9-by-3-inch rectangle. Freeze the rectangles for about 10 minutes, until they’re firm enough to cut and stack. Cut each rectangle into eight 9-by-3/8-inch strips. On a sheet of wax paper, lay four strips next to each other, alternating colors. Press the strips together gently to remove any gaps. Lay another four strips on top of the first layer, alternating colors between layers. Repeat twice more, until there are four layers of four strips each. Trim the edges if desired. Wrap in wax paper and freeze for at least four hours, or up to 4 weeks.

5. For the spiral cookies: Divide the last portion of dough into two equally sized parts. Color one half red and the other green. Between sheets of waxed paper, roll each portion of dough into an 8-by-8-inch square. Without chilling the dough, stack the squares, then tightly roll them together to form a spiral. Wrap the dough in wax paper and freeze for at least fours hours, or up to 4 weeks.

6. When ready to bake, adjust an oven rack to the middle position and heat the oven to 350ºF. Line a baking pan with parchment paper or a silicone mat. Slice the frozen logs into cookies about 1/8-inch thick. Lay the cookies on the prepared pan, about ½-inch apart. Bake for 7-10 minutes, just until the tops no longer look wet. Let the cookies cool on the pan for about 2 minutes, then transfer them to wire racks. Serve at room temperature. Stored in an airtight container, the cookies will be good for at least a week.

Copy of IMG_1220

all-in-one holiday bundt cake

Copy of IMG_0911

When I did my bake-and-send extravaganza last summer, I unintentionally left a few key people out. Namely, our moms, both mine and Dave’s. Oops.

Copy of IMG_0871

I did, however, send a box of cookies to my mother-in-law’s sister. Who, of course, called my mother-in-law, mentioned the cookies, and then…I was in trouble. Well, not in trouble, because my mother-in-law is too nice for that, but not not in trouble either.

Copy of IMG_0884

So I finally made up for it recently by sending a box of fall-themed treats – molasses cookies, pumpkin biscotti, and this cake. Phew. No longer in the daughter-in-law doghouse.

Copy of IMG_0906

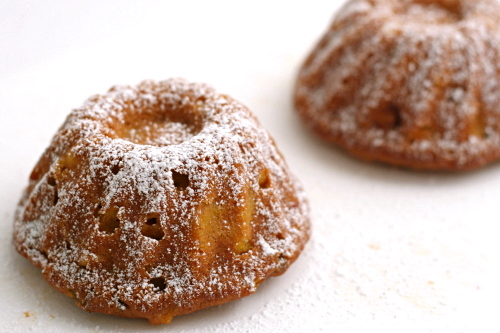
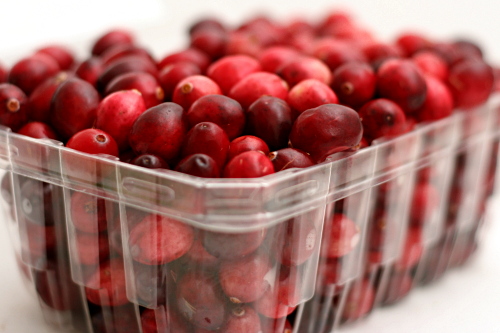
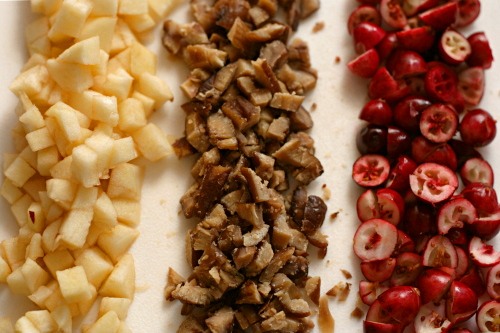
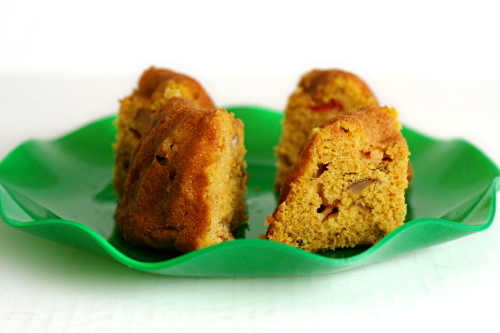
This is not a simple cake – we’re talking pumpkin, cranberries, apples, nuts, spices. I thought it smelled a lot like apple cake, but when I was eating it, the flavor of the cranberries stood out the most. It was a good cake – tasty and moist. I enjoyed it, and I hope my mother-in-law did too.

Now perhaps I should consider sending her a thank you note for the birthday present she sent me in August?

Copy of IMG_0934

Britin chose this cake for Tuesdays with Dorie, and she will have the recipe posted.  I substituted chestnuts for the pecans.

One year ago: Thanksgiving Twofer Pie

Copy of IMG_0908

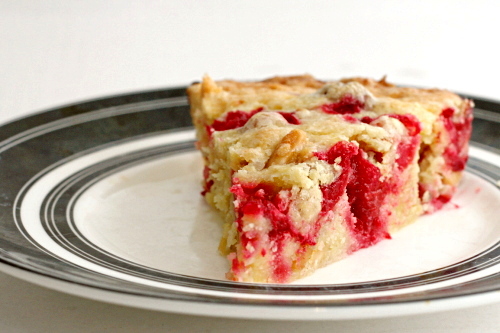
cranberry nut dessert

Copy of IMG_1245

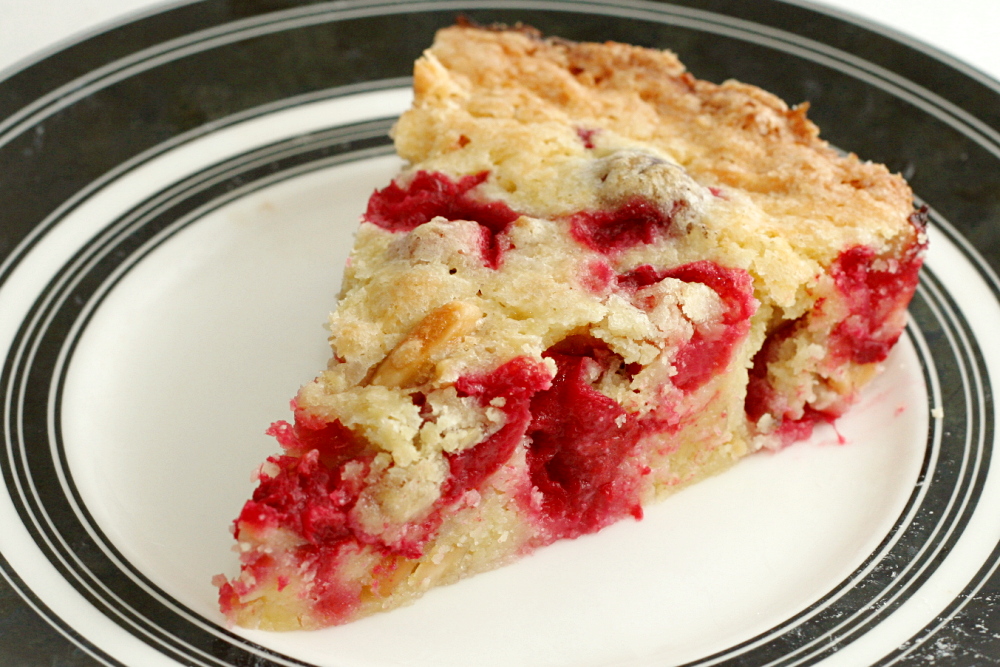
Sometimes I’m too full of myself for my own good. When I saw this on Jen’s site, I noted that she called it ‘cranberry dessert.’ But, in my hubris, I figured, what the hell, it looks like a cake. I’ll call it a cake and serve it as a cake.

Copy of IMG_1202

In retrospect, though, the vague title ‘dessert’ is probably more appropriate. Or maybe cranberry clafoutis? Except with more butter. Cobbler doesn’t quite work because the breading isn’t biscuits.

Copy of IMG_1205

Even looking at the photos now, it looks like a cake. The recipe is mixed like a quick bread, so that’s cake-like.

Copy of IMG_1206

But somehow, when I was eating it, it seemed more like a fruit dessert, maybe because the ratio of fruit to batter is so high. It was fantastic on its own, but it did cry out for a scoop of vanilla ice cream. Next time I won’t deny it.

Copy of IMG_1210

One year ago: Lime Meltaways

Printer Friendly Recipe
Cranberry Nut Dessert (rewritten from Use Real Butter)

Most nuts would work here, but I used lightly toasted almonds and it seemed like a perfect match.

1 cup (4.8 ounces) all-purpose flour
1 cup (7 ounces) granulated sugar
¼ teaspoon salt
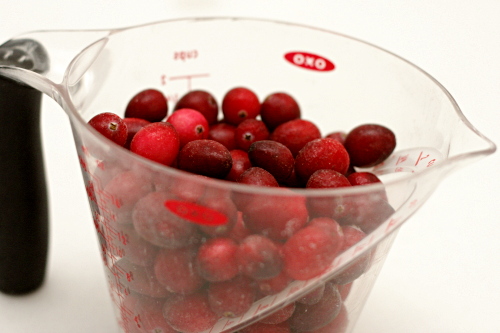
2 cups fresh or frozen cranberries
½ cup chopped nuts
2 eggs
8 tablespoons (1 stick) butter, melted and cooled
½ teaspoon almond extract

1. Adjust a rack to the middle position and heat the oven to 350ºF. Spray a pie pan with spray oil.

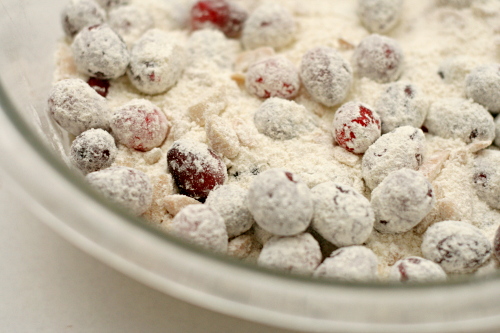
2. In a large bowl, combine the flour, sugar, salt, cranberries, and nuts. In another bowl, whisk the eggs until broken up, then whisk in the butter and almond extract. Pour the liquid ingredients into the dry ingredients and stir until just combined.

3. Spread the batter in the prepared pan; bake for 40 minutes or a until toothpick inserted near the center of the pan comes out clean or with a few crumbs hanging onto it. Let the dessert cool for at least 15 minutes before serving. Serve with ice cream or whipped cream, if desired.

Copy of IMG_1248

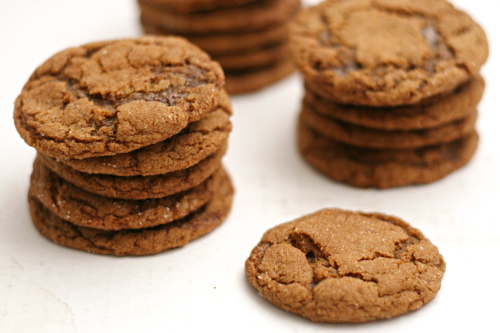
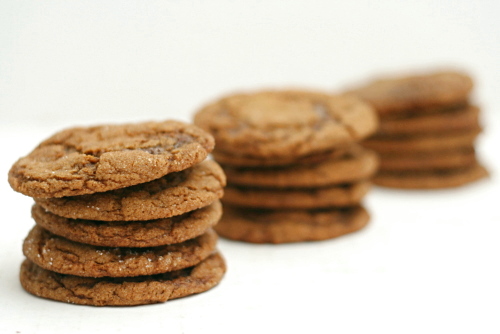
sugar-topped molasses spice cookies

Copy of IMG_0865

A story:

I was trying to decide where to go to graduate school, visiting schools and meeting with potential advisors. One of those advisors had me over for dinner at his house with his family. His wife said she’d recently made molasses taffy, and I blurted out, “It doesn’t taste like molasses, right? That would be disgusting!” Yes, she said, clearly taken aback, it tastes like molasses.

Copy of IMG_0850

Oh, god, it still makes me cringe. Shut up, Bridget.

It’s not my fault! I didn’t know much about molasses back then, and in fact had only recently bought my first jar – of blackstrap molasses, because I didn’t know there were different types. No wonder I thought all molasses tasted bad.

Now I know better. Molasses = gingerbread = good.

Copy of IMG_0853

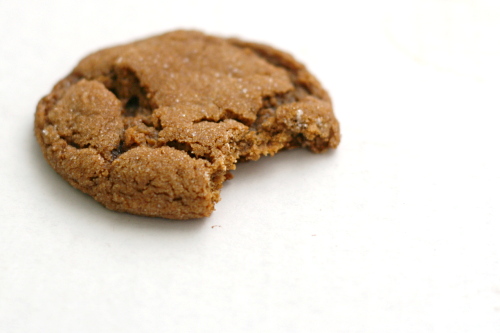
These cookies are even more molassey than gingerbread, which I don’t mind at all these days. And you know what? I ate a piece of that molasses taffy, way back when, and it wasn’t all bad either. I must have come up with something appropriately polite to say, because four years later, that advisor gave me a degree.

Copy of IMG_0870

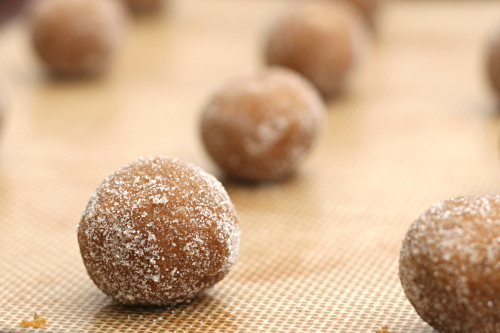
Pamela has the recipe posted for Tuesdays with Dorie. I liked the texture and shape of the cookies better when they were baked at 375ºF for 8-10 minutes instead of 350ºF for 12-14 minutes.

One year ago: Rice Pudding

Copy of IMG_0868

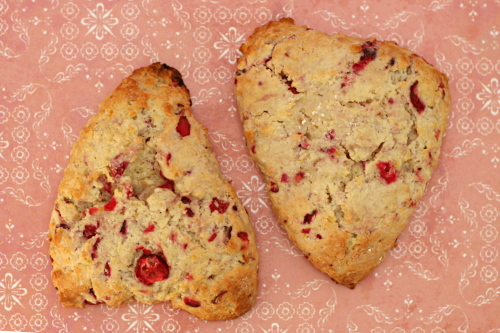
cranberry orange scones

Copy of IMG_1625

This recipe changed the whole shape of my last year. Before making these great scones, I’d spend a large part of both weekend mornings cooking, usually something sweet one day and something savory the other. It made for a nice breakfast category here, but it wasn’t the best way to relax on the weekend.

Copy of IMG_1123

Not anymore. I still often cook something one morning, but on the other, it’s all about scones. I make the dough early in the week and freeze it, then on a lazy weekend morning, I just have to bake them, make coffee (or, more often, wait for Dave to), and sit down to flip through a cookbook. It’s become one of my favorite times of the week.

Copy of IMG_1126

These pictures? They’re from when I made the scones last winter, but it was way past cranberry season, so I’ve been holding onto this blog entry for months and months.

Copy of IMG_1137

It’s time. Cranberries are showing up in stores, and there is no better way to enjoy them. These are so tender, have just the right sweetness, and make for a stress-free weekend breakfast, even with guests. Even after a year of making scones, these are still one of my favorites.

Copy of IMG_1631

One year ago: Warm Chickpea and Butternut Squash Salad

Printer Friendly Recipe
Cranberry Orange Scones (adapted from Gourmet via Smitten Kitchen)

The recipe originally calls for (Meyer) lemon zest, but orange – or tangerine, which I’ve also used – is such a great partner for cranberry that I couldn’t resist using it instead. I also like increasing the cranberries a bit (already reflected in the recipe).

I’ve baked this recipe at high altitude (at least 5000 feet) with good results. They weren’t quite as pretty, but the taste and texture weren’t affected.

I always flash-freeze scones, then bake them straight from the freezer, adding a couple extra minutes to the baking time.

Makes 8 scones

1½ tablespoons freshly grated orange zest
2½ cups (12 ounces) all-purpose flour
½ cup (3.5 ounces) sugar plus 3 tablespoons
1 tablespoon baking powder
½ teaspoon salt
¾ stick (6 tablespoons) cold unsalted butter, cut into bits
1½ cups fresh cranberries, chopped coarse (I usually do this in the food processor)
1 large egg
1 large egg yolk
1 cup heavy cream

1. Adjust an oven rack to the middle position and heat the oven to 400°F. Line a large baking sheet with parchment paper or a silicone baking mat.

2. In a small bowl, toss together fresh cranberries and 3 tablespoons sugar. In another small bowl, lightly beat the egg and yolk, then stir in cream.

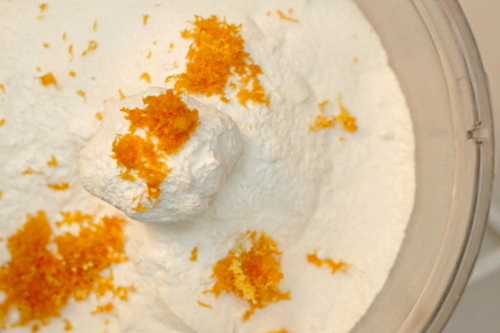
3. In a food processor, pulse the flour, ½ cup sugar, baking powder, salt, and zest until combined. Add the butter and process until the mixture resembles coarse meal. Transfer to a large bowl. (You can also just smoosh the butter into the dry ingredients with your fingers instead of using a food processor.) Stir the cranberries into the flour mixture. Then gently fold the egg mixture into the flour until just combined.

4. On a well-floured surface with floured hands, pat the dough into a 1-inch-thick round (about 8 inches in diameter). With a 2-inch round cutter or the rim of a glass dipped in flour, cut out as many rounds as possible, rerolling the scraps as necessary. (Or cut the circle into wedges, which is my standard method.) Arrange the scones about 1 inch apart on the prepared baking sheet and bake 15 to 20 minutes, or until pale golden. Cool about 10 minutes, then serve.

Copy of IMG_1626