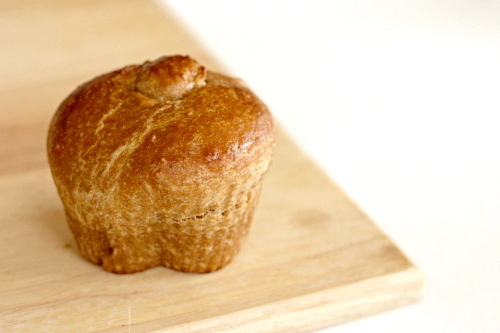
tartine country bread

Sometimes I’ll be reading a recipe, and it’ll say “we simplified this horribly long complicated process with very little effect on the outcome!” and I always think, “nooo! I want to know the horribly long complicated process!” That’s why I made traditional lasagne Bolognese and barbecued a pork shoulder on the grill. And that is why I have now made bread without any commercial yeast – just the wild stuff.

That means that this bread takes at least a week from start to finish, probably a few days longer. Is it worth it? Oh, who knows. I’ve made some pretty fantastic bread using Peter Reinhart’s recipes too. But this isn’t about one loaf of bread. It’s about having a mixture of old fermented flour and wild fungus in your refrigerator, available to add just a little extra oomph to any bread you make.

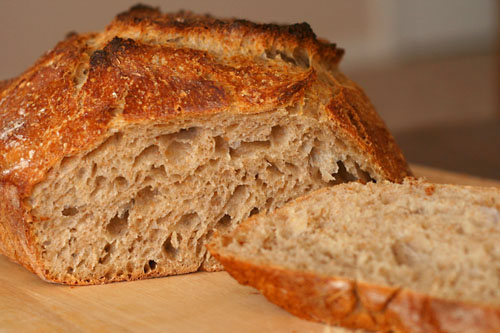
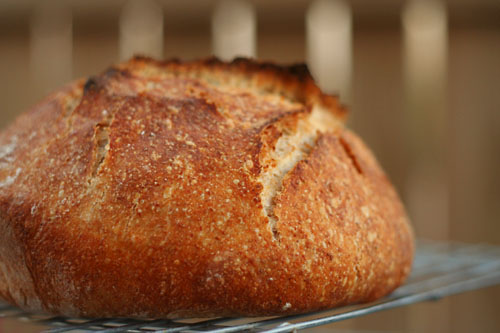
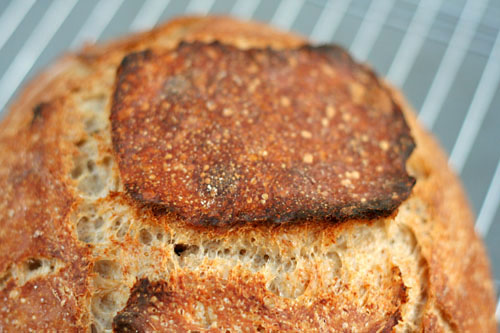
I’ve jotted down the outline of Tartine’s Country Bread recipe below, but the beauty of this method goes far beyond this one loaf of bread, extraordinary though it may be. Because this isn’t about making sourdough bread. Tartine’s country bread isn’t sour, but it has a layer of complexity to it, a sweet savory-ness that makes it really special, not to mention the beautiful burnt red crust.

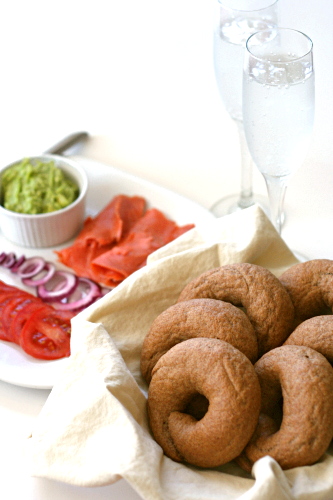
Chad Robertson has pages and pages of information in his book (and Martha Stewart has a tutorial on her site); my version here is merely the cliff notes. But the key here isn’t the nitpicky mixing, turning, rising, shaping directions. The key is that magical stinky starter you created. And with the starter mixture in your fridge, you have the power to add some of that complexity to every bread recipe you make. When I mix up a whole wheat pre-dough that uses yeast, I mix in some of this starter instead of instant yeast, which has resulted in some exceptional bagels recently. I’ve also started using the country bread dough for pizza, which makes for a bubbly crust with the bottom so crisp it’s almost crackly. This is why I like to know the whole horribly long complicated process – not only is the outcome often truly special, but it gives me the confidence to take the method and adapt it for my own needs.

One year ago: Turkey Burgers
Two years ago: Potato Galette
Three years ago: Orange Vanilla Opera Cake

Printer Friendly Recipe
Tartine’s Basic Country Bread (rewritten from Tartine Bread)

Makes 2 large loaves

The only ingredients in this bread are flour, water and some salt at the end. However, they’re mixed at so many different stages in the process that I’ve chosen not to include an ingredient list. Instead, the ingredients are bolded in the directions.

For pizza, I like to add a squeeze of honey (or a spoonful of sugar) to the dough to help it brown in the oven. The bread doesn’t get the same beautiful burnished color as the loaf because it isn’t covered while it bakes.

Make the starter:

I’ve provided precise measurements here, but it isn’t necessary to follow them exactly as long as your starter always has the consistency of a thick batter.

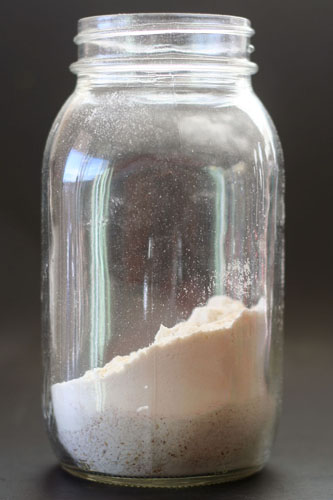
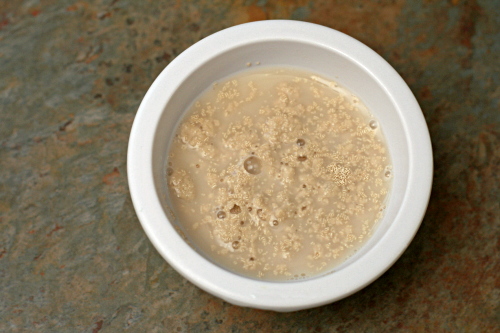
1. Mix ½ cup room temperature filtered water with ½ cup white bread flour and ½ cup whole wheat flour. Cover the bowl with a kitchen towel and set aside in a cool, shaded spot for two days.

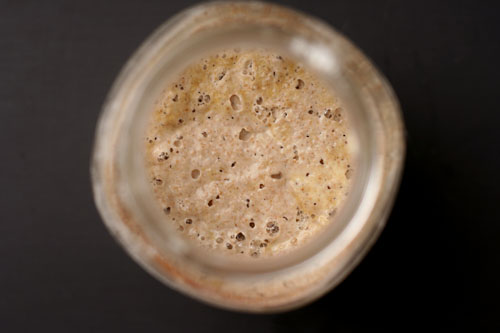
2. Check the culture to see if any bubbles have formed around the sides and on the surface. If not, let it sit for another day. The culture is ready when it smells like stinky cheese and tastes very acidic. It’s okay if a dark crust has formed on top.

3. Discard three-quarters of the culture. To the remaining culture, add ¾ cup water, 6 tablespoons white bread flour and 6 tablespoons whole wheat flour. Stir vigorously until there are no lumps. Repeat this step once a day until…

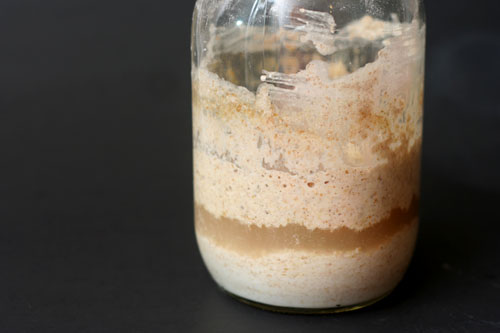
4. Your starter is finished when it behaves in a predictable pattern after each feeding, from stinky and sharply acidic before feeding and sweet and milky just after feeding. The volume should increase for several hours after feeding, then begin to collapse.

To store and keep your starter: Lightly covered, the starter can be kept indefinitely in the refrigerator. (My mom keeps hers in a covered pitcher; I keep mine in a canning jar with a paper towel screwed on instead of the lid. A bowl with a cover would work fine.) To keep it active and healthy, feed it every week or two by following the directions below to make leaven for bread (step 1 of the bread part of the recipe).

Make the bread:

1. To make the leaven: Discard all but 1 tablespoon of the starter. Feed the remaining starter with 200 grams of warm water, 100 grams of whole wheat flour, and 100 grams of bread flour. Let the mixture rise overnight at room temperature. When it’s ready, the leaven should have risen slightly, float in room temperature water (test a small piece; you can still use this piece in the final dough), and smell like overripe fruit.

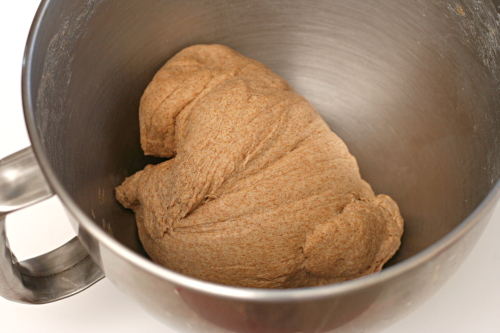
2. In a large (huge, actually) bowl, mix 700 grams of water and 200 grams of the leaven. (The remainder of the leaven is the starter that you’ll store and feed regularly.) Add 800 grams of bread flour and 200 grams of whole wheat flour; stir until the flour is evenly moistened. The dough won’t be smooth. Let it rest for 25 to 40 minutes while the gluten starts forming, the flour starts hydrating, and the flavor starts developing.

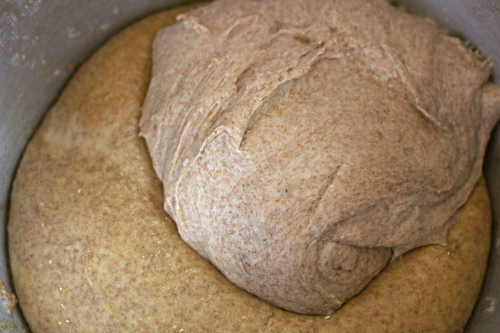
3. Add 20 grams of salt and 50 grams of water to the dough, and squeeze the dough to mix them in. This dough isn’t kneaded; instead, fold it a few times by using a dough scraper to scoop up one side of the dough and drape it over the rest of the dough.


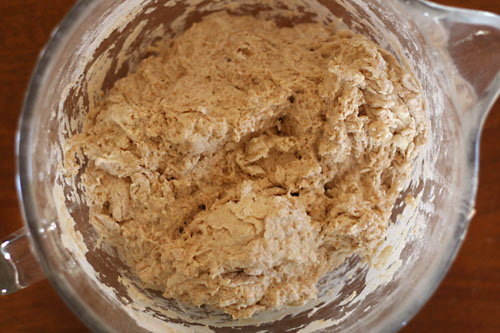
before turning

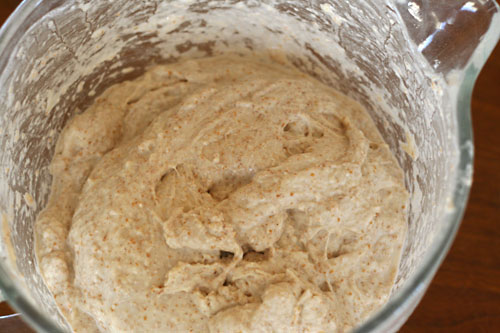
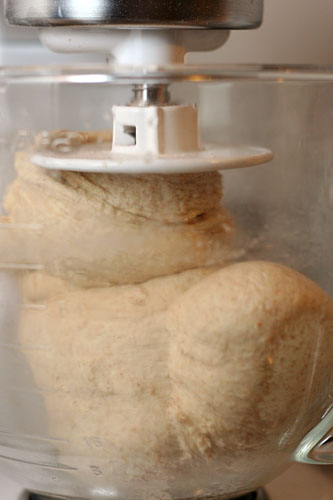
4. Allow the dough to ferment for 3 to 4 hours and give it another few turns every 30 minutes. This takes the place of kneading. Be more gentle with the turning toward the end of the rising time. The dough is ready when it’s slightly increased in volume and is full of air bubbles (which will be visible on the sides if you’ve used a clear container).


after one turn


after two turns


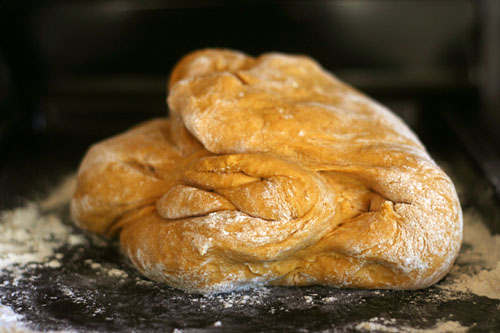
ready to shape

5. Turn the dough out onto floured surface or a damp kitchen towel. Divide it into two portions. To shape each one into a round, cup your hands over the top of the dough and rotate the dough around on the counter. Cover the rounds with a damp towel and set them aside to rest for 20 to 30 minutes.

6. To increase the surface tension of the dough, ensuring that the bread rises up and not out in the oven, perform a series of folds. Working with one ball of dough at a time, stretch it out and fold it over several times, eventually ending up with a neat square. Cup your hands around the dough and rotate it on the counter to smooth the surface again.
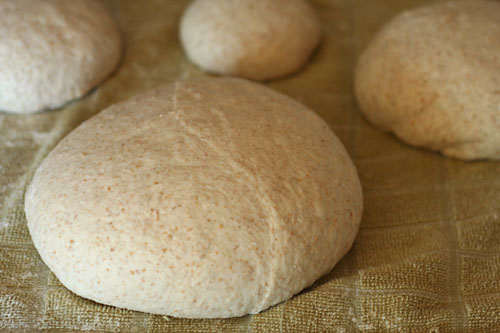

one large loaf and several smaller portions instead of two equal portions

7. Transfer each round to a floured towel-lined bowl or basket with the seam facing up. (Actually, I prefer to use an oiled bowl, covered with a damp towel. If you want to freeze the dough, transfer it to a ziptop bag sprayed with nonstick spray and store in the freezer. Let it defrost overnight in the refrigerator before continuing with the recipe.) Let rise for 2-4 hours at room temperature or, for maximum flavor, overnight in refrigerator.

8. Half an hour before you’re ready to bake the bread, remove the dough from the refrigerator. Place a Dutch oven and its lid on the middle rack in the oven and heat the oven to 500 degrees. When the oven is hot, turn the dough out of its bowl onto a floured work surface or a damp kitchen towel so that the seam is down. Use a very sharp or serrated knife to cut four intersecting ½-inch deep slashes in the dough, forming a square of cuts. Carefully place the dough into the heated Dutch oven; cover the pot with its lid and transfer it to the oven. Immediately reduce the oven temperature to 450 degrees. Bake 20 minutes, then remove the lid and bake 20-25 minutes longer, until the bread is deep golden brown and an instant read thermometer inserted into the center of the loaf reads about 205 degrees. Remove the bread from the pan and cool on a wire rack for an hour before serving.
semolina bread

Supposedly, my freezer is organized to have a shelf for meat, one for bread, one for prepared foods, and one for ingredients (mostly green chile and egg whites). In reality, bread tends to find its way onto each of the other shelves and eventually takes over. During my last freezer overhaul, I gave baked bread its own shelf and bread dough got moved to the ingredient shelf, which has plenty of open space now because we are, sadly, almost out of last year’s crop of green chile.

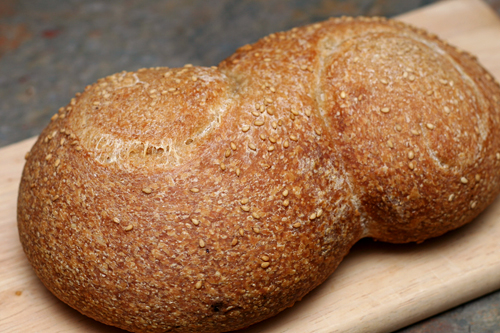
Besides our weekday snack supply of muffins (for Dave) and whole wheat bagels (for me), there’s usually homemade hamburger buns, hot dog buns, and sandwich thins, several bags of pizza dough, odds and ends of loaves whose genesis I don’t remember, and both baked and unbaked versions of whatever rustic bread I’m playing with at the time. The lovely s-curve of this semolina bread recipe caught my eye as soon as I got Peter Reinhart’s Bread Baker’s Apprentice, years ago. I know I could have used that shape for any free-form loaf, but I saved it until I made the recipe it accompanies.

The three loaves of this semolina bread, one baked immediately and two frozen after shaping, didn’t last long in the freezer. I found every opportunity to bake up another loaf of this chewy golden bread. I’d start a new batch if there was any room in the freezer for what we don’t eat in one night.

One year ago: Brown Sugar Cookies
Two years ago: Brandied Berry Crepes
Three years ago: Breakfast Strata with Mushrooms, Sausage and Monterey Jack

Printer Friendly Recipe
Semolina Bread (adapted from Pane Siciliano from Peter Reinhart’s Bread Baker’s Apprentice)

1 recipe pate fermentée (recipe follows)
1¾ cups (8 ounces) bread flour
1¾ cups (8 ounces) semolina flour
1¼ teaspoon salt
1¼ teaspoon instant yeast
2 tablespoons olive oil
1 tablespoon honey
1¼ cups water, room temperature
sesame seeds

1. Remove the pate fermentée from the refrigerator 1 hour before mixing the final dough.

2. Stand mixer: Mix the pate fermentée, flours, salt, yeast, oil, honey, and water in the bowl of a stand mixer fitted with the dough hook. Mix on medium-low speed until the dough is elastic and supple, about 8 minutes. You may need to add a little more flour or water to get the correct consistency – smooth and tacky, but not sticky. Transfer the dough to an oiled bowl and cover with plastic wrap or a damp dishtowel.

By hand: Cut the pate fermentée into 8-12 pieces. Mix the flours, salt, and yeast in a large bowl. Make a well in the middle of the dry ingredients and add the pate fermentée, olive oil, honey, and water. Stir the mixture until the dough comes together. Transfer it to a floured board or countertop and knead, incorporating as little flour as possible, for about 10 minutes, until the dough is elastic and supple. You may need to add a little more flour or water to get the correct consistency – smooth and tacky, but not sticky. Transfer the dough to an oiled bowl and cover with plastic wrap or a damp dishtowel.

3. Ferment at room temperature for about 2 hours, until the dough doubles in size.

4. Divide the dough into three equal portions. Very gently pull the edges of each portion around to one side and pinch them together to form a ball. Roll the dough between the palm of your hand and a lightly floured board or a damp kitchen towel (my preferred method). With the seam side up, push the sides of your thumbs into the dough, pulling the dough into an oblong. Pinch the seam together; repeat the process once more on the same dough ball to form a rope. Roll the rope, pushing it out into a longer rope, until it’s about 24 inches long. If it resists you at any point, let it rest for a few minutes before trying again. Then, working with each end simultaneously, coil the dough toward the center, forming an S-shape. Arrange the shaped loaves on parchment paper and sprinkle them with sesame seeds. Cover loosely with plastic wrap and refrigerate overnight.

5. The next day, remove the dough from the refrigerator. Let it warm up and, if necessary, finish rising, which will take a couple hours. The dough is ready to bake when it has doubled in size and remains dimpled when poked.

6. While the dough is rising, place a baking stone on the bottom rack of the oven and a heavy metal baking pan on the top rack. Heat the oven to 500 degrees.

7. Transfer the risen loaves with the parchment paper to the hot baking stone. Pour 1 cup hot water into the metal pan on the top rack and close the door. After 30 seconds, open the door and spritz the sides of the oven with water. Repeat twice more at 30 second intervals. After the final spray, lower the oven temperature to 450 degrees and bake for 25 to 30 minutes longer, until the crust is golden brown and the internal temperature is between 200 and 205 degrees.

8. Transfer the bread to a wire rack; cool 45 minutes before serving.

Pate fermentée

1⅛ cups (5 ounces) unbleached all-purpose flour
1⅛ cups (5 ounces) unbleached bread flour
¾ teaspoon salt
½ teaspoon instant yeast
¾ cup to ¾ cup plus 2 tablespoons (6 to 7 ounces) water

1. Stir together the flours, salt, and yeast in a 4-quart bowl (or in the bowl of a standing mixer). Add ¾ cup of the water, stirring until everything comes together and makes a coarse ball (or mix on low speed for 1 minute with the paddle attachment). Adjust the flour or water, according to need, so that the dough is neither too sticky nor too stiff. (It is better to err on the sticky side, as you can adjust easier during kneading. It is harder to add water once the dough firms up.)

2. Sprinkle some flour on the counter and transfer the dough to the counter. Knead for 4 to 6 minutes (or mix on medium speed with the dough hook for 4 minutes), or until the dough is soft and pliable, tacky but not sticky. The internal temperature should be 77 to 81 degrees.

3. Lightly oil a bowl and transfer the dough to the bowl, rolling it around to coat it with oil. Cover the bowl with plastic wrap and ferment at room temperature for 1 hour, or until it swells to about 1½ times its original size.

4. Remove the dough from the bowl, knead it slightly to degas, and return it to the bowl, covering the bowl with plastic wrap. Place the bowl in the refrigerator overnight. You can keep this in the refrigerator for up to 3 days, or freeze it in an airtight plastic bag for up to 3 months.

I’m donating my Bourbon Pound Cake to Bloggers Bake for Hope.  This and over fifty other treats are available to be shipped directly to you. You can bid on your favorites starting May 4th; all proceeds go to Massachusetts Komen for the Cure.


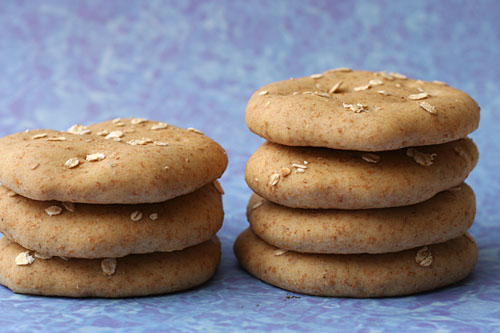
sandwich thins

Ah, carbs. They’re the best, aren’t they? They don’t even need to be combined with carb’s best friend, butter, to be a treat. A hunk of airy-crumbed, chewy-crusted bread with a glass of dry red wine is a pleasure all on its own. A few slivers of cheese balance and enhance the flavors of each, but it isn’t necessary. All I need is the carbs.

Remember when the base of the food pyramid was carbs? Those were the good ol’ days. I’ve reversed my own personal food pyramid to be mostly fruits and vegetables, a goodly amount of protein, and a smattering of carbs (on weekdays; all bets are off on Saturday). A giant Kaiser roll, sadly, is more than a smattering.

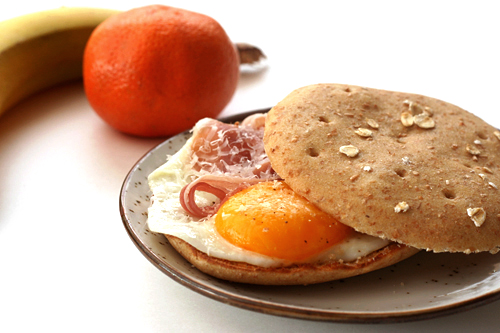
Sandwich thins, however, are the perfect compromise between wanting carbs and not wanting to overdo it. But just because there’s less bread per sandwich doesn’t mean the bread can be less good. You still want it to be soft and tender, but also sturdy, and if it could be all that and still be whole grain, that would be no bad thing.

I hear you can buy these in the store or some such thing, but I’m not acquainted with the bread aisle at the grocery store, and anyway, what’s the fun in that? Buying things that we could spend hours of our busy schedules making from scratch is not what this blog is about.

One year ago: Mediterranean Pepper Salad
Two years ago: Lemon Cream Cheese Bars
Three years ago: Salmon Cakes, Flaky Biscuits, Hashed Brussels Sprouts

Printer Friendly Recipe
Sandwich Thins (adapted from food.com via Confections of a Foodie Bride)

Makes 16

I meant to follow the directions when I made this, but I didn’t actually read them before starting. So I mixed it like a regular bread dough, and it worked just fine.

I doubt wheat bran and vital wheat gluten are crucial to this recipe. If you don’t have vital wheat gluten, just use more white flour (or better yet, substitute bread flour, if you have it, for the all-purpose flour). If you don’t have wheat bran, substitute more whole wheat flour. Bread is forgiving.

1 egg
1¼ cups warm water
2 tablespoons olive oil
2 cups (10 ounces) whole wheat flour
1 cup (4.8 ounces) all-purpose flour
½ cup wheat bran
2 tablespoons vital wheat gluten
2 teaspoons instant yeast
¼ cup (1.75 ounces) sugar
1 teaspoons salt
2 tablespoons rolled oats

1. Stand mixer: In a large measuring cup, lightly beat the egg; whisk in the water and oil. In the bowl of a stand mixer fitted with the dough hook, mix the flours, bran, gluten, yeast, sugar, and salt. With the mixer on low speed, gradually add the liquid ingredients. Continue mixing on medium-low until the dough is elastic and supple, about 8 minutes. You may need to add a little more flour or water to get the correct consistency – soft but not sticky.

By hand: In a large measuring cup, lightly beat the egg; whisk in the water and oil. Mix the flours, bran, gluten, yeast, sugar, and salt in a large bowl. Make a well in the middle of the dry ingredients and pour in the liquid ingredients. Stir the mixture until the dough comes together. Transfer the dough to a floured board or countertop and knead, incorporating as little flour as possible, for about 10 minutes, until the dough is elastic and supple. You may need to add a little more flour or water to get the correct consistency – soft but not sticky.

2. Transfer the dough to an oiled bowl and cover with plastic wrap or a damp dishtowel. Set the dough aside to rise until it has doubled in volume, about 1½ hours.

3. Line 2 baking sheets with parchment paper or silicone mats. Divide the dough into 16 equal portions. Roll each portion into a ball; then flatten it between your palms. Place it on the baking sheet and press down, working the dough into a thin 5-inch round. Brush the tops with water; sprinkle with rolled oats. Cover with damp kitchen towels and let rise until slightly risen, about 45 minutes.

4. Preheat the oven to 350 degrees. Use the blunt end of a wooden skewer to poke 9 holes in each roll. Bake 12-15 minutes, until puffed and dry on top. Cool completely before slicing.

pumpkin cinnamon rolls

The problem with the internet is that you don’t get to believe, even for a minute, that you were the first to come up with an idea. First there was sushi bowls, most recently it was eggnog martinis, and last month there were pumpkin cinnamon rolls. I thought I was a genius. Pumpkin and cinnamon! A classic combination! I could just take pumpkin bread dough, roll it out, spike the cinnamon filling mixture with cloves and nutmeg, and top it with a cream cheese glaze. It’s the perfect combination of pumpkin and accents! I deserve accolades! Awards! At the very least, lots of blog hits!

Oops, never mind. Many many people have done this before. Still. I’m convinced that my pumpkin cinnamon rolls are better than theirs. It’s all about balance – cinnamon rolls should be decadent treat worth the splurge, but you might as well save the calorie-dense ingredients for where they’re going to make the most impact.

I’m convinced that a super rich dough for cinnamon rolls isn’t worth the calories. Once the dough is filled with a sugary spiced filling and topped with a creamy glaze, extra fat in the dough just gets lost. If you don’t notice it, why bother with it? On that same note, I used oil in the dough instead of butter. You can use butter if you prefer, but again – the taste of butter will be overpowered by the filling and glaze, but the added tenderness of oil compared to butter will not go unnoticed.

Pumpkin, cinnamon, cream cheese, and sugar – for breakfast! The dough part is light, soft, and orange; the filling is sweet and spice and everything nice; and the glaze, well, it has cream cheese. I told you I was a genius.

One year ago: Twice-Baked Potatoes
Two years ago: White Chocolate Lemon Truffles, Pumpkin Seed Brittle, Vanilla Bean Caramels

Pumpkin Cinnamon Rolls

You can chill the rolls after they’re shaped, rolled, and cut, but before rising. They’ll still need several hours in the morning to finish rising, bake, and cool, although you can speed the rising along by giving them a very warm place to get started.

A riskier method to get cinnamon rolls at a reasonable breakfast hour is to adjust the amount of yeast. I used ½ teaspoon yeast instead of 2 teaspoons. Your first rise will take several hours. Then you can roll, cut, and chill the dough (or freeze it and defrost in the refrigerator). Take the prepared, chilled rolls out of the fridge before you go to bed and they should be perfectly risen and ready to bake when you wake up.

Dough:
4-4 ½ cups (20 to 21¼ ounces) unbleached all-purpose flour
2 teaspoons instant yeast
⅓ cup (2.33 ounces) sugar
1½ teaspoons salt
2 eggs
1 (15-ounce) can pumpkin
4 tablespoons vegetable oil

Filling:
¾ cup packed (5¼ ounces) light brown sugar
1 tablespoon pumpkin pie spice (or a mixture of mostly cinnamon with some cloves, nutmeg, and ginger)
⅛ teaspoon salt
1 tablespoon melted butter

Glaze:
1 cup (4 ounces) confectioners sugar, sifted to remove lumps
1 ounce cream cheese, softened
½ teaspoon vanilla extract
1-2 tablespoons milk

1. Stand mixer: Mix the flour, yeast, sugar, and salt in the bowl of a stand mixer fitted with the dough hook. In a large measuring cup, lightly beat the eggs; whisk in the pumpkin and oil. With the mixer on low speed, gradually add the liquid ingredients. Continue mixing on medium-low until the dough is elastic and supple, about 8 minutes. You may need to add a little more flour or water to get the correct consistency – soft but not sticky.

By hand: Mix the flour, yeast, sugar, and salt in a large bowl. In a large measuring cup, lightly beat the eggs; whisk in the pumpkin and oil. Make a well in the middle of the dry ingredients and pour in the liquid ingredients. Stir the mixture until the dough comes together. Transfer it to a floured board or countertop and knead, incorporating as little flour as possible, for about 10 minutes, until the dough is elastic and supple. You may need to add a little more flour or water to get the correct consistency – soft but not sticky.

2. Mix together the filling ingredients in a small bowl. Grease a 13 by 9-inch baking dish.

3. After the dough has doubled in bulk, press it down and turn it out onto a lightly floured work surface. Using a rolling pin, shape the dough into a 16 by 12-inch rectangle, with a long side facing you. Sprinkle the filling evenly over the dough, leaving a ½-inch border at the far edges. Roll the dough, beginning with the long edge closest to you and using both hands to pinch the dough with your fingertips as you roll. Using unflavored dental floss or a serrated knife, cut the roll into 12 equal pieces and place the rolls cut-side up in the prepared baking dish. Cover with plastic wrap and place in a warm, draft-free spot until doubled in bulk, 1½ to 2 hours.

4. When the rolls are almost fully risen, adjust an oven rack to the middle position and heat the oven to 350 degrees. Bake the rolls until golden brown and an instant-read thermometer inserted into the center of one reads 185 to 188 degrees, 25 to 30 minutes. Cool for 10 minutes. Meanwhile, stir the glaze ingredients together until smooth. Glaze the rolls and serve.

whole wheat bagels

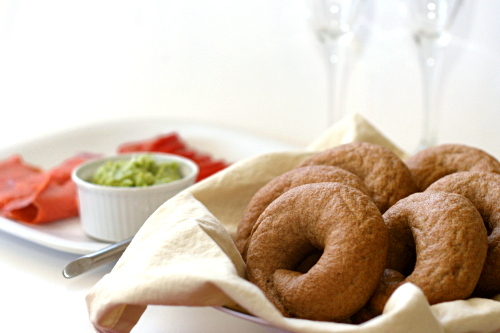
It’s possible that bagels are my favorite food. Yes, more so than tomato soup, than macaroni and cheese, even more so than chocolate chip cookie dough! And so I eat one almost everyday. It’s basically my lunch break and it’s a happy little time for me with my bagel, my black tea, and my Google Reader.

But here’s the thing – if I’m going to be eating a bagel every single day, I better make sure it’s healthy. For years, I made bagels with half white and half whole wheat flour, and I felt like that was a nice compromise between delicious and nutritious. Bagels with no white flour would be like hockey pucks, right? And they would taste like whole wheat. The horror!

I know I’m becoming a broken record, but the answer, of course, is in Peter Reinhart’s Whole Grain Breads. All it takes is a little overnight soak, and those whole grains act like refined white flour – they taste sweeter, form supple doughs, and bake into tender, light breads.

Not that it was smooth-sailing from the beginning with this bagel recipe. The problem I was having with this is that it’s too simple. Most bagel recipes need an overnight retardation in the refrigerator before they can be boiled and baked. This recipe doesn’t require that, and in fact, doesn’t need much time for a second rise at all. I’ve had the hardest time getting this through my stubborn head, and so over and over, I was making over-risen, sunken, ugly bagels.

A year after I started using this recipe, I think I’ve finally nailed it. You know what I did? I followed the recipe closer. My happy little bagel break just got a little happier.

One year ago: Pasta with No-Cook Tomato Sauce and Fresh Mozzarella
Two years ago: Country Egg Scramble

Printer Friendly Recipe
Whole Wheat Bagels (adapted from Peter Reinhart’s Whole Grain Breads)

Makes 8 large bagels or 12 small bagels

There are a few shortcuts in this compared to Reinhart’s original recipe. I make it every couple of weeks, so the faster I can get it done, the better!

I’ve played with the timing of this recipe quite a bit. The original results in fresh bagels 5-6 hours after you start (the second day). But I usually want them in the morning. You can refrigerate the dough in two places – either after the bagels are formed (in which case you should decrease the yeast slightly to prevent the bagels from over-rising) or right after kneading. The last time I refrigerated it after kneading, it rose overnight in the fridge, and in the morning, I immediately shaped the bagels and boiled them shortly afterward.

Pre-dough 1:
8 ounces whole wheat flour
¼ teaspoon instant yeast
6 ounces (¾ cup) water

Pre-dough 2:
2 tablespoons barley malt syrup
5 ounces water
8 ounces whole wheat flour
½ teaspoon salt

Final dough:
both pre-doughs
1 tablespoon water
2 teaspoons yeast
¾ teaspoon salt
7 tablespoons flour, plus more if necessary
1 tablespoon baking soda (for boiling)

1. In the bowl of a stand mixer fitted with the dough hook, mix all of the ingredients in Pre-dough 1 on medium-low speed until combined. Set aside for 5 minutes. Meanwhile, in a 1-cup measuring cup, stir together the barley malt syrup and the 5 ounces of water in Pre-dough 2. Set aside, stirring occasionally, until the barley malt syrup dissolves into the water. Return to Pre-dough 1 and knead on low speed for 1 minute. Transfer to a small bowl and cover with plastic wrap or a damp kitchen towel. Refrigerate overnight. Add the flour and salt for Pre-dough 2 to the empty mixer bowl; with the mixer on low speed, pour in the water-syrup mixture. Mix on medium-low just until combined. Cover the mixer bowl with plastic wrap or a damp kitchen towel and set aside at room temperature for at least 8 hours or overnight.

2. The following day, transfer the refrigerated Pre-dough 1 to room temperature for a couple hours to warm slightly. When you’re ready to make the final dough, stir together the 1 tablespoon water and the yeast. In the bowl of a stand mixer fitted with the dough hook, mix both pre-doughs, the water and yeast, and the salt on low speed until combined. While the mixer is running, add in the flour, 1 tablespoon at a time, until it’s fully absorbed by the dough. Knead on low speed for 5-6 minutes, adding more flour or water if necessary to form a smooth, firm dough. It shouldn’t be sticky.

3. Let the dough rise at room temperature until it increases to about 1½ times its original size, 1-2 hours.

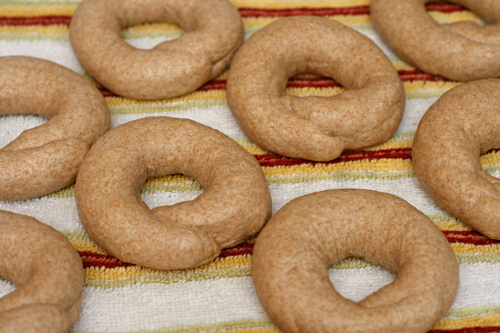
4. Divide the dough into 8-12 pieces. Shape each piece into a smooth ball, then roll each piece into a rope about ¾-inch thick (slightly thicker for larger bagels). Bring the ends of the rope together and gently roll them on a flat surface to seal. Set aside for about 20 minutes.

5. Meanwhile, preheat the oven to 500 degrees, line a baking sheet with parchment paper or a silicone mat, and bring at least three inches of water to a boil in a large pot over high heat. Add 1 tablespoon baking soda, reduce the heat to medium-high and gently drop 2-4 bagels (as many as will fit without crowding) into the water. Boil for 1 minute, flipping the bagels halfway through.

6. Place the boiled bagels on the prepared baking sheet. Transfer the sheet to the oven, reduce the oven temperature to 450 degrees, and bake until the bagels are browned and feel hard, 13 minutes for small bagels and slightly longer for larger bagels. (The bagels will soften as they cool.) Cool completely before serving. (I can only fit one baking sheet, holding half a batch of bagels, in my oven at once, so I refrigerate the remaining unboiled bagels until the first pan is almost done baking, then boil and bake them.)

whole wheat challah

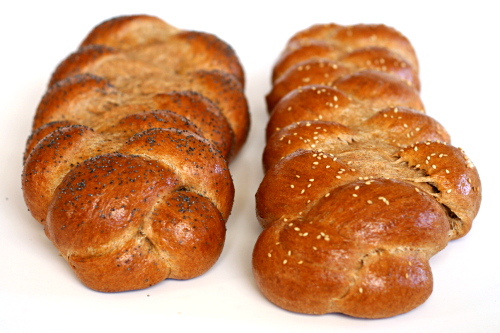
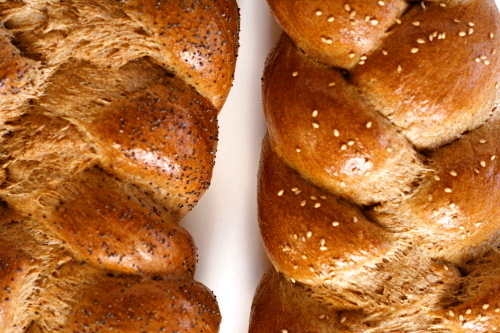
This is the third or fourth challah recipe I’ve tried and most certainly my favorite. Yes, the whole wheat version is the best challah I’ve made. I’m surprised too.

Maybe challah doesn’t seem like something that would adapt well to whole wheat? Whole wheat bread is often denser and drier than refined flour loaves, and challah should be light and fluffy and tender. Peter Reinhart knows this; you must trust Peter Reinhart.

He uses his standard whole wheat trick of soaking the whole wheat flour overnight to break down the grains. In this case, one of the pre-doughs uses eggs instead of water as the soaking liquid. He uses oil instead of the butter many recipes require. Everyone loves the taste of butter, but I’m becoming more and more enamored with oil in baking, because it makes things so tender and moist.

I really don’t think I like whole wheat bread any more than the average person. I think it’s just that, using Reinhart’s recipes, I can make some exceptionally good whole wheat bread. This is perfect challah whether you’re a white bread or a wheat bread lover.

One year ago: Lemon Meringue Cake
Two years ago: Fried Egg and Sausage Ciabatta Breakfast Pizzas

Printer Friendly Recipe
Whole Wheat Challah (adapted slightly from Peter Reinhart’s Whole Grain Breads)

You can do more complicated braids with this if you prefer. Just do an internet search for instructions for 4-, 5-, and 6-strand braids.

Soaker:
1¾ cups (8 ounces) whole wheat flour, preferably fine grind
½ teaspoon salt
¾ cup water

Biga:
1¾ cups (8 ounces) whole wheat flour, preferably fine grind
¼ teaspoon instant yeast
½ cup water
2 tablespoons vegetable oil
1 large egg
4 large egg yolks

Final dough:
the soaker
the biga
7 tablespoons (2 ounces) whole wheat flour, plus more for adjustments
¾ teaspoon salt
2¼ teaspoons instant yeast
2 tablespoons sugar or brown sugar, or 1½ tablespoons honey or agave nectar
2 tablespoons vegetable oil

Toppings:
1 egg
1 tablespoon water
pinch salt
poppy seeds or sesame seeds (optional)

1. For the soaker: In a medium mixing bowl, mix all of the ingredients together. Cover and leave at room temperature for 12 to 24 hours, or refrigerate for up to 3 days. If the dough is refrigerated, leave it at room temperature for 2 hours before mixing the final dough.

2. For the biga: In a medium mixing bowl, mix all of the ingredients together. Knead for 2 minutes; the dough will feel very tacky. Let the dough rest for 5 minutes, then knead for 1 minute. Cover and refrigerate for at least 8 hours and up to 3 days. Leave it at room temperature for 2 hours before mixing the final dough.

3. For the final dough: Cut the soaker and biga into about 12 smaller pieces. Put the pieces in the bowl of a standing mixer fitted with the dough hook along with the 7 tablespoons flour, the salt, instant yeast, sugar, and oil. (Or mix by hand in a large bowl.) Mix on slow speed for about 1 minute, until the dough comes together, then increase the speed to medium-high and continue mixing and kneading for 6 minutes, adding flour if necessary, until the dough is soft and tacky, but not sticky. (Or knead by hand for 6-8 minutes.) Let the dough rest for 5 minutes, then resume kneading for 1 minute. Form the dough into a ball and place it in a greased bowl. Cover and let rise at room temperature for 45 to 60 minutes, until it is about 1½ times its original size.

4. Gently transfer the dough to a lightly floured work surface. Divide the dough into 6 evenly sized pieces for 2 smaller loaves or 3 evenly sized pieces for 1 large loaf. Roll each portion of dough into a rope about 10 inches long, letting the dough rest for 5 minutes if it’s very elastic. Braid the ropes.

5. Place the braid(s) on a sheet pan lined with parchment paper or a silicone mat. To make the egg wash, whisk the egg, water, and salt (listed above in Toppings) together. Brush the braids with the egg wash, cover, and let rise at room temperature for 30 minutes.

6. Brush the dough with the egg wash again, then top with poppy seeds or sesame seeds, if using. Leave the dough uncovered and let rise for 15 more minutes. Preheat the oven to 400 degrees.

7. Place the challah on the middle shelf, reduce the heat to 325 degrees, and bake for 20 minutes. Rotate the loaf 180 degrees and bake for another 20 minutes. Check the bread and rotate again if it is baking unevenly. Continue baking for an additional 10 to 15 minutes, until the bread is a rich brown all around, sounds hollow when thumped on the bottom, and registers at least 195 degrees at the center.

8. Transfer the bread to a cooling rack and let it cool for at least 1 hour before serving.
raisin swirl bread

Dave has recently encountered an enviable problem. After starting to exercise a few months ago for the first time in years, he started losing weight too fast.

Losing weight. Too fast.

So now we’re trying to come up with ways to get him more healthy calories that don’t create much more work. Hard-boiled eggs, peanut butter, protein shakes, and bread. Making a loaf of bread every couple of weeks for him to eat at work does require more effort, but it isn’t work, because I like making bread.

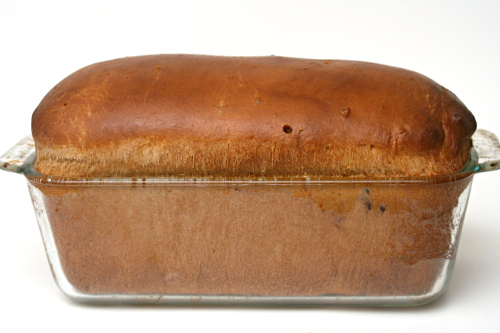
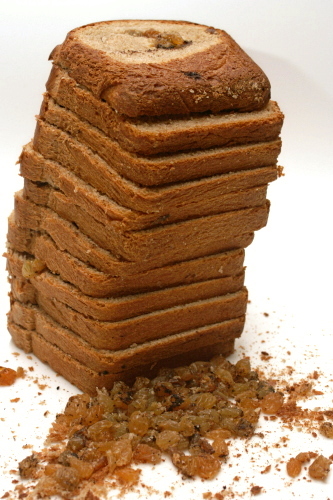
I haven’t bought bread since moving to New Mexico last winter, and I haven’t made pure white bread since discovering I could adapt any recipe to be at least partially whole wheat with no detriment to flavor or texture. It worked just as well with this bread as it has in the past, giving me a light, tender loaf of bread made a little more special with a spiral of raisins and sugar and cocoa. Not that I got to eat more than a slice, since most of this loaf went to He Who is Super Annoying Because He Gets to Eat Twice as Much Food as Me.

Susan chose this bread for Tuesdays with Dorie, and she has the recipe posted. I mixed 2 cups (9.6 ounces) of whole wheat flour with ¾ cup of the milk and ½ teaspoon of the salt and let it sit overnight before combining it with the rest of the ingredients. And for whatever reason, 1 cup of raisins was way too much for me and they all fell out when I cut into the bread. But no one else had this problem, so apparently I’m just a weirdo. Still, next time, ½ cup of raisins.

One year ago: Honey Peach Ice Cream
Two years ago: Cappuccino Cream Puff Rings

croissants 3 (martha stewart)

I worked in a lab for years, but I never absolutely loved it. You’d think I would have, considering that I basically mixed up ingredients and baked them, but I guess without that crucial eating-the-batter – sorry, of course I mean that eating-the-result step, it just wasn’t as fun.

Plus I could never get the hang of keeping good records in the lab. My notebook seemed to be both unorganized and lacking crucial information. I took detailed notes on the amount and type of ingredients used and the baking temperature and time, but whenever I needed to look up details of the result, I was left with a few marginally descriptive words.

In the kitchen, it’s the opposite. The result, now that’s memorable, especially in this case – slightly sweet, intensely flaky, dark golden brown, impossible to resist, always leaving me wanting another.

The path to that result isn’t as memorable, particularly in the amount of instant dry yeast I used. Probably I should have written that down somewhere. I’m going to hypothesize – remember, hypothesizing is not the same thing as guessing! It’s an educated guess, which is to say, don’t skip out on this recipe just because the fresh yeast called for in the original recipe is dumb and I’m bad at note-taking, because the chances are very good that my estimate of the amount of yeast I used isn’t too terribly terrible, and anyway, it’s yeast and yeast always does its job eventually.

Anyway. I’m going to hypothesize that I used about one packet of yeast. Please accept my apologies for not taking thirty seconds to write it down. This must be why I now have an office job instead of a lab job.

One year ago: Anadama Bread
Two years ago: Baba Ghanoush and Falafel

Printer Friendly Recipe
Croissants (adapted from Martha Stewart’s Baking Handbook)

Makes 12

1 cup cold milk
1 tablespoon honey
14 ounces (about 3 cups) all-purpose flour
¼ cup (1.75 ounces) sugar
2¼ teaspoons salt
2¼ teaspoons (1 packet) instant yeast
20 tablespoons (2½ sticks) unsalted butter, cold
1 large egg, lightly beaten with a pinch of salt and a dribble of water or milk

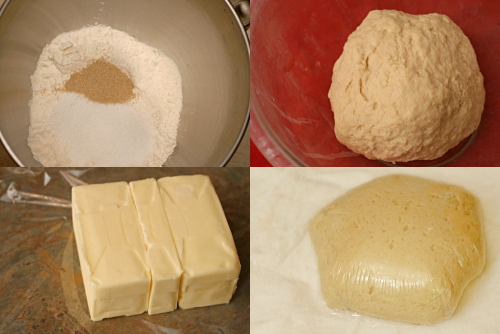
1. Make the dough package: Pour the milk and honey into a 2-cup liquid measuring cup, and stir to combine; set aside. In the bowl of an electric mixer fitted with the dough hook, stir together 12 ounces (about 2¾ cups) of the flour, the sugar, yeast, and salt; stir to combine. Add the milk mixture and mix on low speed until the dough just comes together, 2 to 3 minutes.

2. Turn out the dough onto a lightly floured work surface; gently knead to form a smooth ball, about 45 seconds. Wrap in plastic and refrigerate at least 1 hour or overnight.

3. Make the butter package: Lay the butter sticks side by side on a piece of plastic wrap, and sprinkle with the remaining 1 ounce (about 2 tablespoons) flour. Pound with a rolling pin until the flour is incorporated; roll into a 4- by 3-inch rectangle. Wrap tightly and refrigerate for at least 1 hour or overnight.

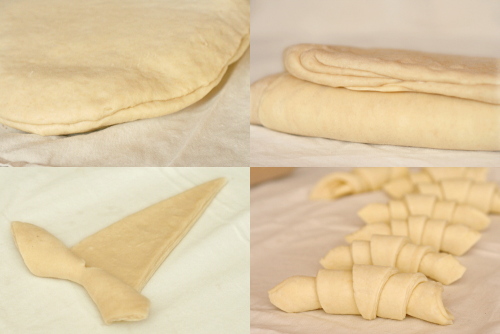
4. Remove the dough package from the refrigerator; place on a lightly floured work surface. Roll out to an 8-by-10-inch rectangle, about ½ inch thick, with a short side facing you. Remove the butter package from the refrigerator; place on the bottom half of the dough; fold the top half of the dough over the butter, and pinch the edges to seal.

5. Roll out the dough to a 10-by-10-inch square about ½ inch thick; keep the corners as square as possible. Remove any excess flour with a dry pastry brush. Starting at the far end, fold the square in thirds, as you would a business letter. This completes the first of three turns. Wrap in plastic and refrigerate for 1 hour.

6. Repeat rolling and folding as above two more times, starting with the flap opening on the right, as if it were a book, and refrigerate at least 1 hour between turns. To help you remember how many turns have been completed, mark the dough after each: Make one mark for the first turn, two for the second, and three for the third. After the third, wrap the dough in plastic, and refrigerate 6 to 8 hours, or overnight.

7. Turn out the chilled dough onto a lightly floured work surface. Roll out the dough to a 30-by-8-inch rectangle. (If the dough becomes too elastic, cover with plastic wrap, and let rest in the refrigerator for 10 minutes.) Using a pizza wheel, cut the dough into triangles, each with a 4-inch base (you will have scraps of dough at both ends). Cut a 1-inch slit in the center of the base of each triangle. Place triangles in a single layer on a clean work surface.

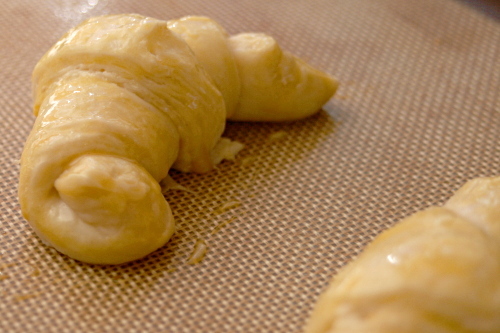
8. To shape the croissants, stretch the two lower points of each triangle to enlarge the slit slightly. Fold the inner corners formed by the slit toward the outer sides of the triangles, and press down to seal. Using your fingertips, roll the base of each triangle up and away from you, stretching the dough slightly outward as you roll; the tip should be tucked under the croissant. Pull the two ends toward you to form a crescent. Transfer the crescents to a parchment-lined baking sheets, 2 inches apart. Cover loosely with plastic wrap, and let rise in a warm place until very spongy and doubled in bulk, 45 to 60 minutes.

9. Preheat the oven to 400ºF, with a rack in the middle position. Lightly brush the crescents with the beaten egg. Bake until the croissants are puffed and golden brown, about 15 to 20 minutes. Transfer the sheet to a wire rack to cool. Serve warm or at room temperature.

pizza with figs, prosciutto, gorgonzola, balsamic, and arugula

I went to dinner at a fancy pizza place with my parents and Dave a few months ago, and my dad ordered a pizza that seemed appropriate for him – cheeseburger.  Because the more meat, the better!  Hold the vegetables please, is generally his motto.  Oh, I laughed and laughed when his pizza arrived covered in lettuce.  He scraped it right off.

Not that I’ve been much better about the idea of salad on pizza.  It’s a pretty popular concept, but so far I’ve wanted to keep my bread and cheese unadulterated by large amounts of greenery.

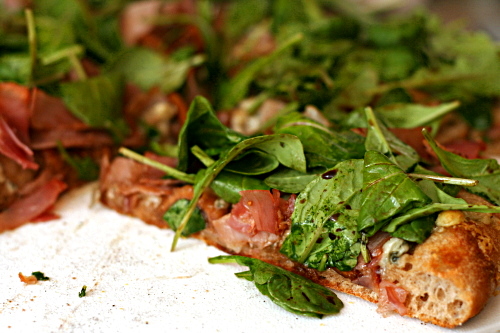
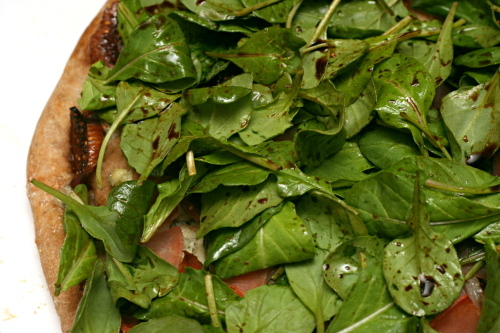
I guess when you’re already putting figs on pizza (oh, how I’d love to see my dad’s face if there were figs on his pizza!), arugula doesn’t seem so weird by comparison.  It turns out that the figs and arugula work really well together.  The figs add sweetness, the prosciutto saltiness, the arugula freshness, and the blue cheese…um…stinky-feetiness?  But in a good way.  In a very, very good way, in fact.

One year ago: Brandied Berry Crepes
Two years ago: Breakfast Strata with Sausage, Mushrooms, and Monterey Jack

Printer Friendly Recipe
Pizza with Figs, Prosciutto, Gorgonzola, Balsamic, and Arugula (adapted from Bon Appetit via epicurious)

The original recipe calls for fresh figs; since I used dried, I soaked them in port for a while to plump them.  However, I’m not sure this is necessary.

Makes 1 12-inch pizza, serving about 3 people

6 small fresh figs, cut into thin slices
2 tablespoons balsamic vinegar, divided
cornmeal (for sprinkling)
12 ounces (¾ pound) pizza dough (⅓ of this recipe), after its first rise
1 cup crumbled Gorgonzola cheese (about 4 ounces)
3 ounces thinly sliced prosciutto, cut into strips
2 teaspoons extra-virgin olive oil
3 ounces stemmed arugula

1. Place a pizza stone on the bottom rack of the oven and preheat the oven to 500ºF. Put the figs in a medium bowl and drizzle 1 tablespoon of the vinegar over them. Set aside.

2. Gently flatten the dough, then pick it up and stretch it out, keeping it as circular as possible. Curl your fingers and let the dough hang on your knuckles, moving and rotating the dough so it stretches evenly. If it tears, piece it together. If the dough stretches too much, put it down and gently tug on the thick spots.

3. Dust a pizza peel with cornmeal and transfer the round of dough to the peel. Rearrange the dough to something reasonably circular; stab it several times with a fork. Top the pizza with the cheese, figs, and prosciutto.

4. Transfer the pizza from the peel to the hot stone. Bake for 8-10 minutes, until the crust is spotty brown. Let the pizza cool on the peel for about 5 minutes.

5. Meanwhile, whisk the remaining 1 tablespoon vinegar with the oil and a pinch of salt and pepper; toss the arugula with the dressing. Spread the salad evenly over the pizza. Slice and serve.
whole wheat brioche

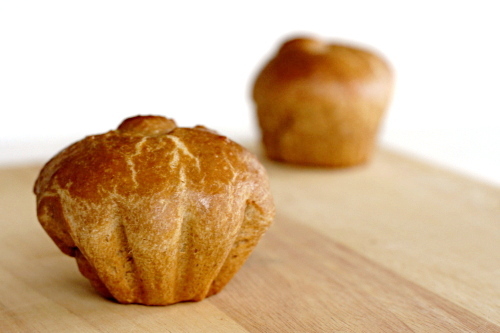
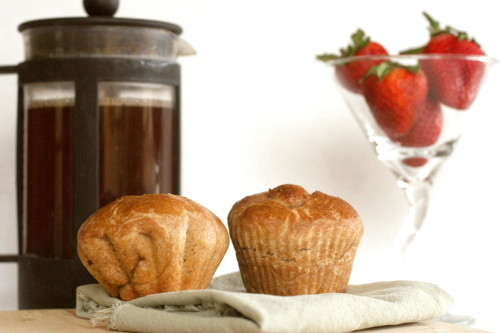
This recipe cracks me up. Each little brioche roll has 1¼ tablespoons of butter in it, so it doesn’t matter how much whole grain you use – these are not good for you.

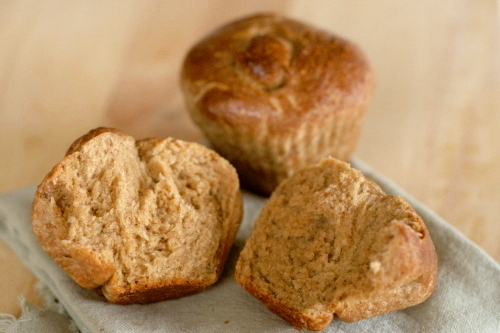
They are, however, good. Of course they don’t have much in common with their white flour cousins, which, if we were talking about people, would be one of those unceasingly friendly people who always have something nice to say. The whole wheat version is more akin to a sarcastic friend who always manages to make you laugh, but sometimes at your own expense. Both are good! Just different.

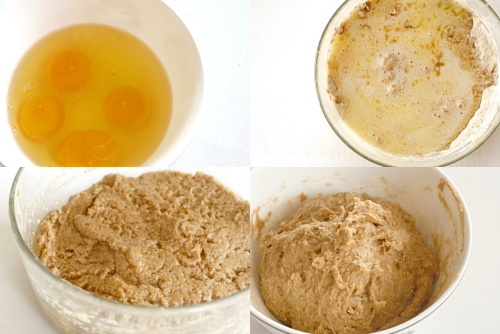
The whole wheat brioche is made along the same lines as the rest of Peter Reinhart’s Whole Grain Breads. What’s fun about this recipe is that the liquid used in one of the pre-doughs is melted butter, and in the other, it’s eggs. The one with the butter had a texture very different from the normal water-hydrated doughs – and not a particularly appetizing one, truth be told, as the best word to describe it would be ‘greasy’. Fortunately, after sitting in the fridge for several hours, the butter hardens and the mixture is more palatable – plus, of course, the liquid has had an opportunity to break down those bran fibers, which is the heart of Reinhart’s whole wheat bread method.

I tried a trick with this bread that was marginally successful. After the final dough is mixed and kneaded, it’s shaped immediately and then needs to rise again – for 3 to 4 hours. We tend to eat breakfast kind of late on weekends, but not that late!

So I reduced the yeast quite a bit, with the goal of extending the rising time to about 8 hours, or overnight. I wanted to wake up, heat the oven and throw the perfectly risen brioche rolls in to bake.

It turns out, though, that I decreased the yeast too much, and the poor little guys didn’t have enough strength to lift up that heavy dough. I still think the method is sound; I just need to use more yeast than I did. (The under-risen after 8 hours brioche were salvageable; I just had to give them an hour or so in a really warm environment before I could bake them.)

Usually my theory is that if food is supposed to be indulgent, then make it indulgent! Why worry about whole grains if you’re mainlining butter? But sometimes it’s just fun to make something weird, and whole wheat brioche is, indeed, weird.

One year ago: Pecan Sour Cream Biscuits
Two years ago: Chocolate Cream Pie

Printer Friendly Recipe
Whole Wheat Brioche (rewritten from Peter Reinhart’s Whole Grain Breads)

I reduced the yeast in the final dough to ½ teaspoon, hoping I could stretch the rising time to 8-10 hours, or overnight. This was too little, but I still think the method is worth trying, but with 1 teaspoon yeast.

I froze the brioche rolls after shaping, before rising. I let them defrost in the fridge for a few hours before moving them to room temperature to rise.

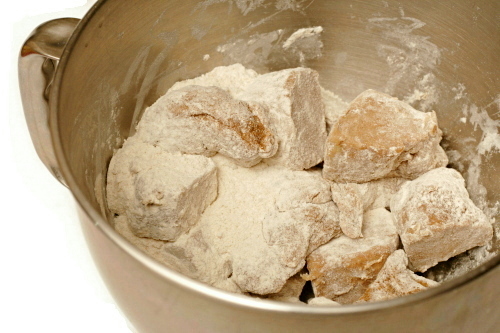
The melted butter kept leaking out of its pre-dough. Once the dough had chilled somewhat, I stirred it back in, so that the pre-dough would be homogeneous.

For the final cup of flour, after both pre-doughs are combined, I used white flour. I know that’s cheating, but I’ve had better results with Reinhart’s whole wheat bagels when white flour is used at the end, and I thought it was probably similar here. The rolls are still 80% whole wheat.

Pre-dough 1:
1¾ cups (8 ounces) whole wheat flour
½ teaspoon salt
½ cup whole milk, scalded and cooled
16 tablespoons (2 sticks) unsalted butter, melted

Mix all of the ingredients until thoroughly combined. Cover and refrigerate at least 8 hours and up to 3 days.

Pre-dough 2:
1¾ cups (8 ounces) whole wheat flour
¼ teaspoon instant yeast
4 large eggs, slightly beaten

Mix all of the ingredients until thoroughly combined. Using a rubber spatula or wet hands, knead the dough in the bowl for a couple minutes; it will be very tacky. Let the dough rest for 5 minutes, then knead again for 1 minute. Cover and refrigerate for at least 8 hours and up to 3 days.

Final dough:
Both pre-doughs
1 cup (4.5 ounces) whole wheat flour (see note)
¾ teaspoon salt
2¼ teaspoons instant yeast (see note)
3 tablespoons sugar

Egg wash:
1 egg beaten with 1 tablespoon water and a pinch of salt

1. Chop the chilled pre-doughs into to 12 pieces each. Combine the pre-doughs, flour, salt, yeast and sugar in the bowl of a standing mixer fitted with the dough hook (or a large bowl if mixing by hand). Mix on slow speed for 3 to 4 minutes, scraping the bowl as needed, (or knead with wet hands) until the pre-doughs are assimilated into each other. Add flour or water, as needed, to form a soft and slightly sticky dough. Knead (either with a mixer or by hand) for 3 to 4 minutes, until the dough is cold, firm, and slightly tacky. Let the dough rest for 5 minutes.

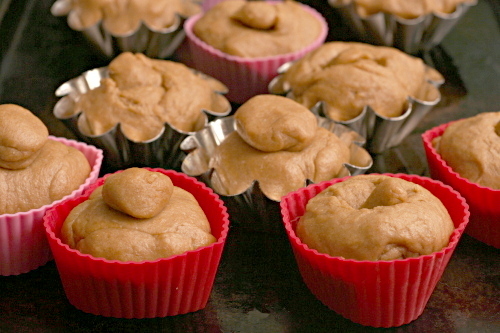
2. Divide the dough into 12 equal pieces and round each into a smooth ball. Spray 12 brioche molds or a 12-cup muffin pan with spray oil. To shape the brioche, roll each piece of dough into a cone; poke a hole through the larger end and slip the small end through the hole. (I also sometimes just formed a much smaller round from a small portion of the dough and stuck that on top of the larger round. I didn’t notice a difference in the baked versions of the two shaping methods.) Place the shaped rolls into the prepared pan and cover loosely with plastic wrap or a damp towel. Let rise at room temperature for 3 to 4 hours, until the dough has grown to about 1½ times its original size.

3. Adjust a rack to the middle position and heat the oven to 425 degrees. Brush the risen rolls with egg wash and place them in the oven, lowering the temperature to 400 degrees. Bake for 17 to 25 minutes, rotating the pan halfway through, until the brioche are dark golden brown, measure 195 degrees in the center, and sound hollow when tapped on the bottom (after one is removed from its pan).

4. Remove the rolls from their molds; cool on a cooling rack for at least 20 minutes before serving.