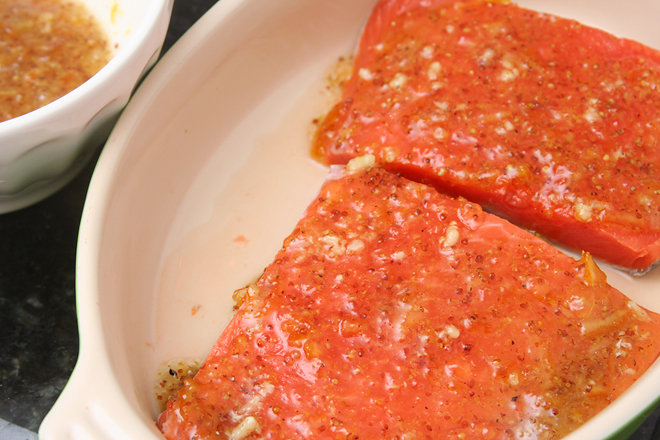
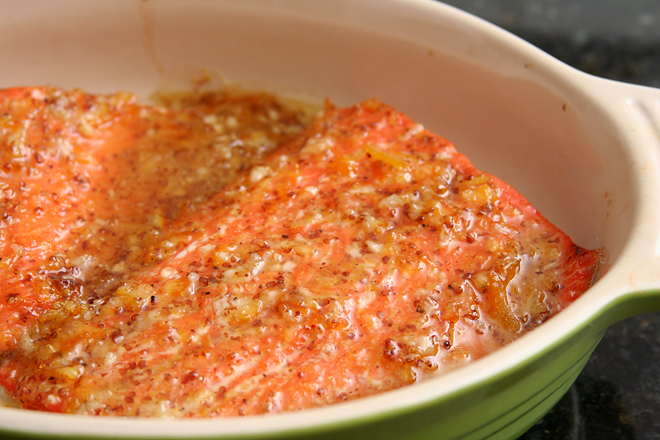
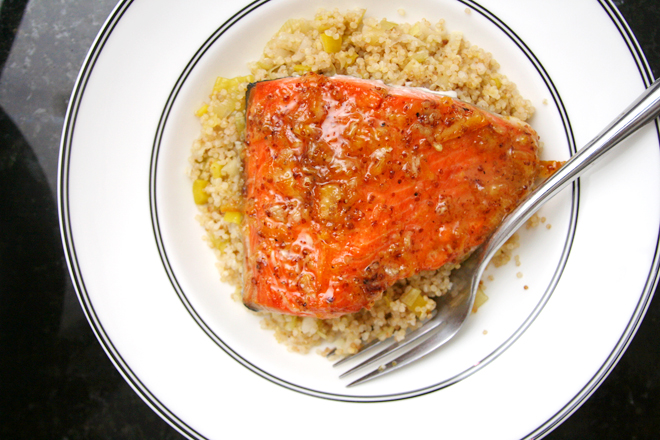
broiled salmon with marmalade-mustard glaze

marmalade mustard salmon 6

While I nursed the four-day-old baby, my mother-in-law asked when we wanted to eat dinner. She said it would take fifteen minutes to cook, and I told her that I should be ready by then, not having yet figured that the baby likes to savor her meals and takes far longer than fifteen minutes to eat.

marmalade mustard salmon 1

But I also didn’t believe my mother-in-law that she could make a full meal in someone else’s kitchen in fifteen minutes. However, it turns out that not everyone makes things as complicated as I do, and this easy dish served with instant rice and steamed broccoli was ready long before the baby was finished eating. It was the not the last time I’d eat my dinner lukewarm after the baby ate hers fresh.

marmalade mustard salmon 4

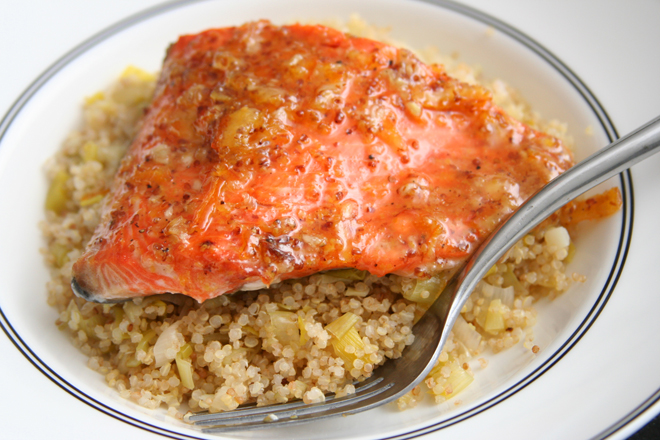
It was also not the last time we’d eat this dish. A recipe that can be made in an unfamiliar kitchen in fifteen minutes is a good one to have around. The glaze has plenty of flavor to spread around the whole meal, so I often serve it over a simple quinoa pilaf with vegetables mixed in. As a bonus, it tastes almost as good lukewarm as it does hot from the oven.

marmalade mustard salmon 5

Broiled Salmon with Marmalade-Mustard Glaze (slightly adapted from Cooking Light)

Serves 4

½ cup orange marmalade
2 tablespoons Dijon mustard
1 garlic clove, minced or pressed through a press, or ½ teaspoon garlic powder
½ teaspoon salt
¼ teaspoon black pepper
4 (6-ounce) salmon fillets

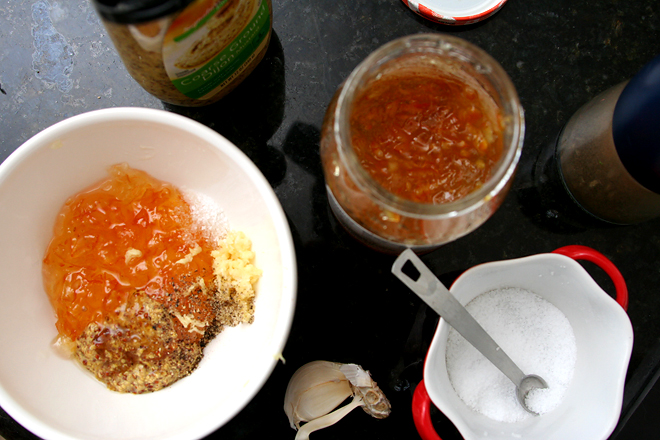
1. Adjust an oven rack to 6 inches below the broiler. In a medium bowl, combine the marmalade, mustard, garlic, salt, and pepper.

2. Arrange the salmon in a broiler-safe dish, skin-side down. Spread half of the marmalade mixture over the salmon.

3. Broil until the glaze is bubbling, about 6 minutes. Spread the remaining marmalade mixture over the salmon, and continue to broil until the salmon breaks into flakes or reads 125 degrees on an instant-read thermometer, about 2 additional minutes. Serve.
marmalade mustard salmon 7

cheesecake thumbprint cookies

cheesecake thumbprints 5

You’d think that since I’m home all day for a few months, I’d be more likely to get recipes out of my cookbooks instead of the internet. I certainly thought I would, especially considering that I keep making New Year’s resolutions to use my cookbooks more often. However, at home as well as at work, the internet beckons and my cookbook shelf goes mostly ignored.

cheesecake thumbprints 1

But clearly, there is good stuff on that shelf that is being missed. This recipe might have caught my eye online, but I wonder if I would have then looked for something similar but more familiar. With such a small amount of sugar in the cookie portion, this was just a little out of my comfort zone.
cheesecake thumbprints 2

I stuck to the recipe though, and I’m glad I did. While the base was, as expected, not too sweet, it wasn’t too unsweet either. Maybe that helps to highlight the cheesecake portion, which, cheesecake being one of my favorite foods, is my favorite part. This is a great reminder of why I keep telling myself that I should use those cookbooks; maybe this time it will stick.
cheesecake thumbprints 4

Cheesecake Thumbprints (rewritten from Martha Stewart’s Baking Handbook)

Makes about 3 dozen cookies

4 ounces cream cheese, room temperature
½ cup (3.5 ounces) granulated sugar, divided
¼ teaspoon salt, plus a pinch
2 large egg yolks, divided
1½ teaspoons sour cream or greek yogurt
¼ teaspoon vanilla extract
16 tablespoons (2 sticks) unsalted butter, room temperature
2 cups (9.6 ounces) all-purpose flour

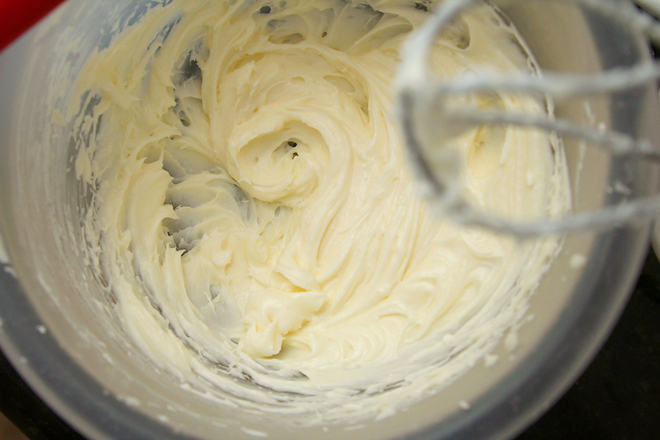
1. In a medium bowl, beat the cream cheese until smooth. Add ¼ cup (1.75 ounces) sugar, a pinch of salt, one egg yolk, the sour cream or greek yogurt, and vanilla extract; mix until smooth. Chill for at least 30 minutes.

2. Heat the oven to 350 degrees. Line two baking sheets with parchment paper or silicone mats.

3. In a large bowl, mix the butter, ¼ cup (1.75 ounces) sugar, and ¼ teaspoon salt until smooth. Add the other egg yolk and mix until blended, then add the flour and mix on low speed until just combined.

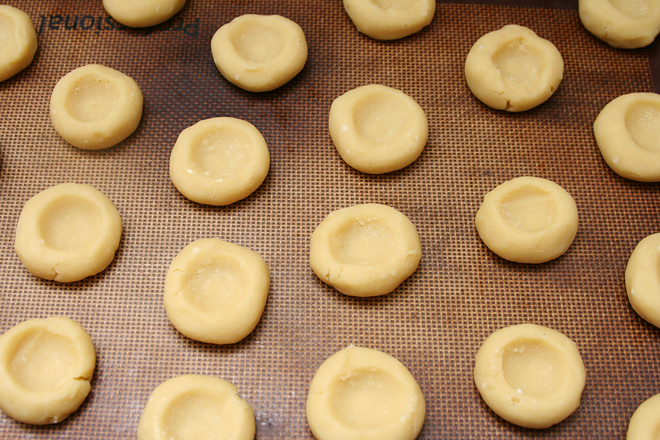
4. Form the dough into balls approximately 1-inch in diameter and place on the prepared baking sheets. Use the round back of a spoon or your finger (I used a round teaspoon measuring spoon) to press indentations in the middle of each ball of dough.

5. Bake for 10 minutes, then remove the pans from the oven and press down the indentations again (I used a tablespoon measuring spoon this time). Return the pans to the oven and bake until the edges of the cookies begin to brown, 7 to 9 minutes. Transfer the pans to wire racks; let the cookies cool completely.

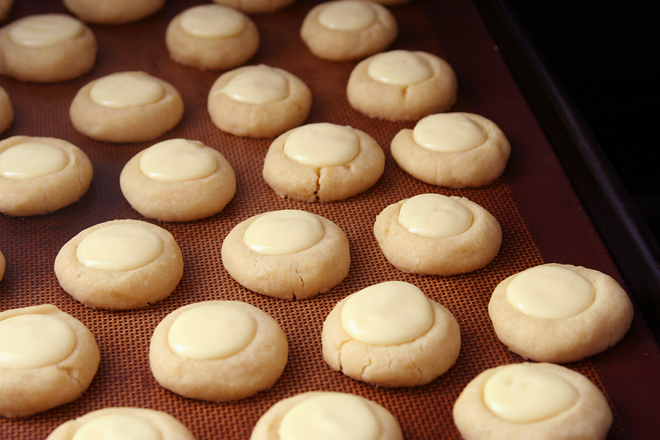
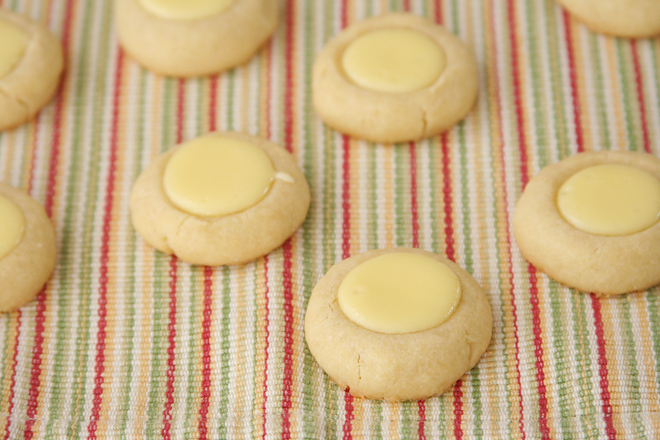
6. When the cookies are cooled, spoon the cheesecake filling into the indentations. Return the cookies to the oven and bake until the filling is set, 7 to 8 minutes. Transfer the cookies to wire racks to cool completely. Chill the cookies at least 4 hours (or overnight) before serving.

cheesecake thumbprints 6

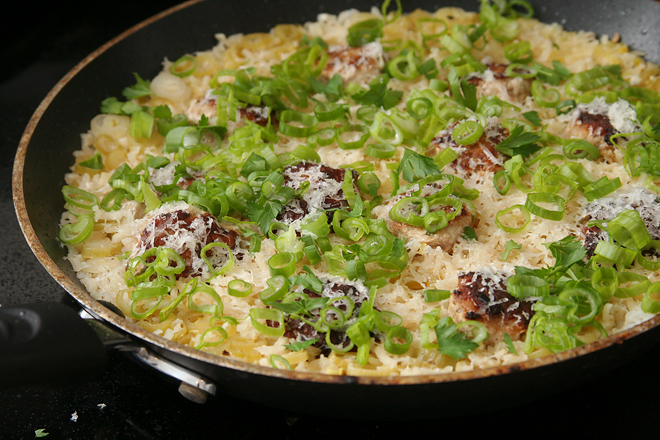
skillet turkey meatballs with lemony rice

lemon turkey meatballs 5

Maybe we’re getting the hang of things. I’m still depending heavily on my freezer meals, but I can count on being able to cook a few nights per week. Last weekend, I even made salmon cakes, broiled asparagus with shallot-lemon vinaigrette, and biscuits for dinner one night. I prepped it all ahead of time, and then when we put the baby down to sleep, I finished cooking everything, plated it, poured the wine – and the baby woke up. Something else I’m getting the hang of: feeding myself while feeding the baby.

lemon turkey meatballs 3

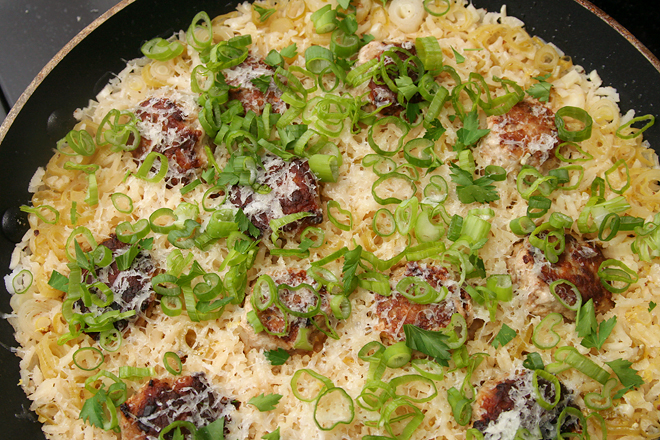
I made this back when she was just three weeks old, when we definitely did not have the hang of things. But I got ahead of the game by making the meatballs (a double batch, with extra to freeze) in the afternoon. The dish is easy enough that it wasn’t much trouble to finish it up when the baby was sleeping that evening.

lemon turkey meatballs 2

And then she woke up while it was cooking, and I fed her, and since I wasn’t proficient at feeding myself while feeding the baby then, I ate my meatballs and rice lukewarm. Fortunately, this is a meal that tastes just fine at room temperature – lemony and light, but substantial enough to last through a night of baby-feeding. However, it was even better when I made it again a few weeks later and got to eat it hot.

lemon turkey meatballs 4

Skillet Turkey Meatballs with Lemony Rice (adapted from Cook’s Country via Elly Says Opa)

Serves 4

½ cup panko bread crumbs
1 large egg
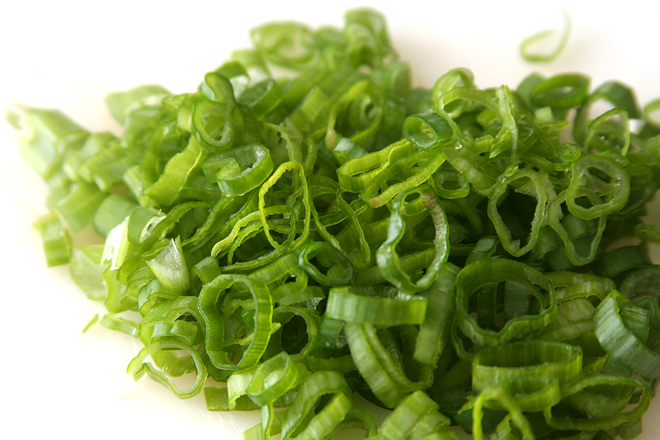
6 scallions, white and green parts separated, divided
¼ cup freshly chopped parsley, divided
½ teaspoon dried oregano
salt and pepper
1 tablespoon grated lemon zest, divided
1 pound ground turkey
2 tablespoons olive oil
1 cup white rice
3 cloves garlic, minced
2¼ cups chicken broth
2 tablespoons lemon juice
½ cup (1 ounce) grated parmesan cheese
lemon wedges for serving

1. In a large mixing bowl, combine the panko and egg. Set aside, stirring occasionally, until the panko is moistened, about 15 minutes. Add 2 tablespoons of the scallion greens, 3 tablespoons parsley, the oregano, 1 teaspoon salt, ½ teaspoon pepper, and 1½ teaspoons lemon zest; stir to combine. Add the turkey; mix thoroughly. Form the mixture into balls approximately 1-inch in diameter; you should have about 24 meatballs.

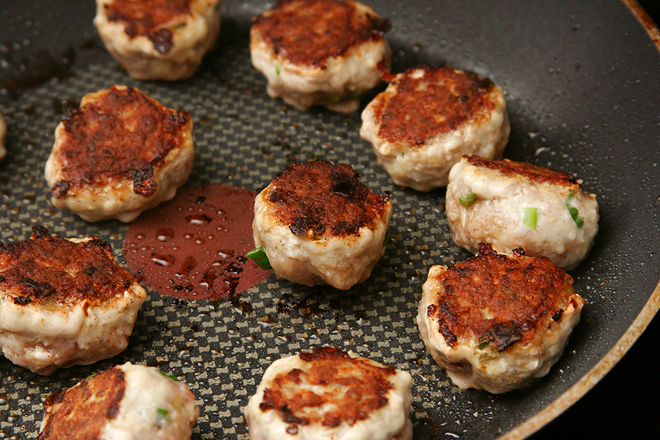
2. In a 12-inch nonstick skillet over medium-high heat, heat the oil until it flows like water when the pan is tilted. Arrange the meatballs in the pan with space between them. Cook without stirring until the bottom sides are brown, about 2 minutes. Flip and brown the opposite side. Transfer the browned meatballs to a plate.

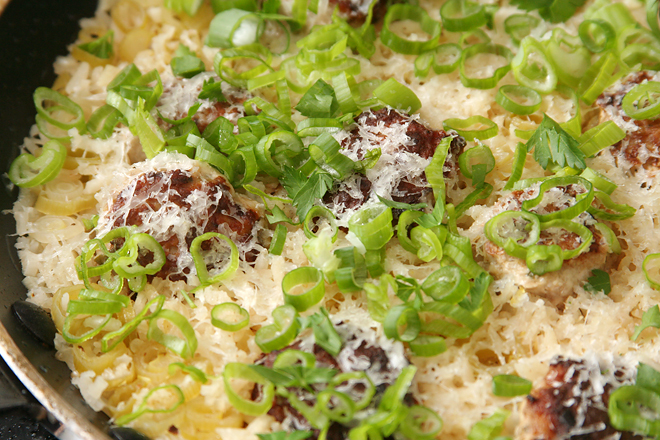
3. Leaving the remaining fat in the skillet, add the rice. Cook, stirring constantly, until the grains are translucent at the edges, 1-2 minutes. Add the garlic and scallion whites and cook, stirring constantly, until fragrant, about 30 seconds. Add the chicken broth, lemon juice, and 1½ teaspoons lemon zest; stir to combine, then arrange the meatballs in the rice. Bring to a simmer, then reduce the heat to low, cover, and cook until the rice is tender and the meatballs are cooked through, about 20 minutes. Remove from the heat and let set, covered, for an additional 5 minutes. Uncover and top with the parmesan cheese, remaining scallion greens, and remaining parsley; serve, with additional lemon wedges.

lemon turkey meatballs 6

strawberry and chocolate cupcakes

strawberry chocolate cupcakes 6

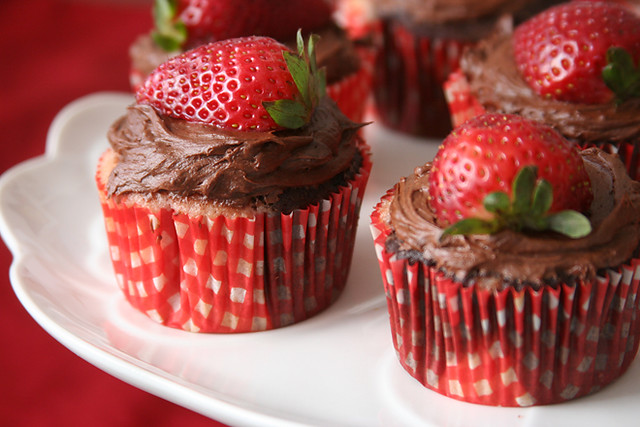
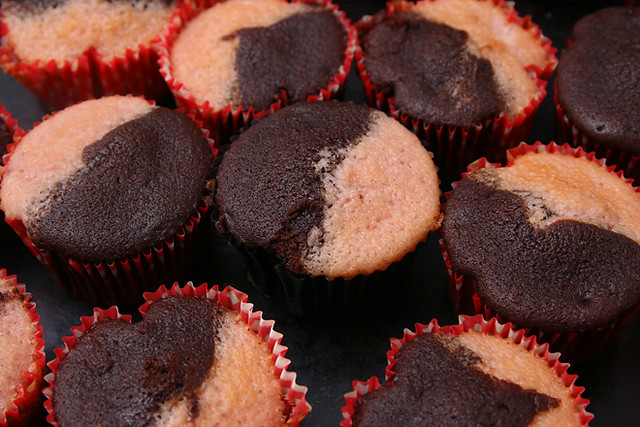
There were probably better things I could have been doing with my time instead of making fancy cupcakes. Surely I should be focusing on easier, more straightforward treats right now. Even better, I had planned to get the flower garden ready for spring that Sunday afternoon. Or I could clean my house. Instead, I couldn’t resist the siren call of my mixer, plus butter, sugar, and flour.

strawberry chocolate cupcakes 1

It went about how most things do these days: I thought I’d have enough time to get the batters made and the cupcakes in the oven, but the baby woke up earlier than expected. Once she’d eaten and we gave her a bath and read a few books to her, I hurried back to finish the cupcakes while Dave took a turn trying to get her to sleep. Then he removed the cupcakes from the pan while I took my turn trying to get her to sleep.

strawberry chocolate cupcakes 2

Baking, frosting, and garnishing cupcakes all in one day is nearly impossible right now, at least if I want to do anything else with my time, like dress the baby up in silly outfits and take pictures. I packed the cupcakes away overnight, then got halfway through making the frosting the next morning when the baby woke up earlier than expected. (The baby almost always wakes up earlier than expected, unless she sleeps for hours longer than expected.)

strawberry chocolate cupcakes 3

Fortunately, I was able to finish the toppings when Dave came home for lunch. He took most of the cupcakes to share at work, and I stashed a couple away for a well-deserved treat for myself. I’ll work in the garden next week (unless I find another fun dessert to bake instead).

strawberry chocolate cupcakes 4

Strawberry Chocolate Cupcakes (cake recipes are both adapted from Alyssa Huntsman’s and Peter Wynne’s Sky High: Irresistible Triple Layer Cakes via Smitten Kitchen; chocolate frosting is from Martha Stewart)

Makes 24 cupcakes

I’m years overdue for a thorough chocolate cupcake comparison, but right now, I’m really happy with this recipe. It’s chocolately, tender, and moist.

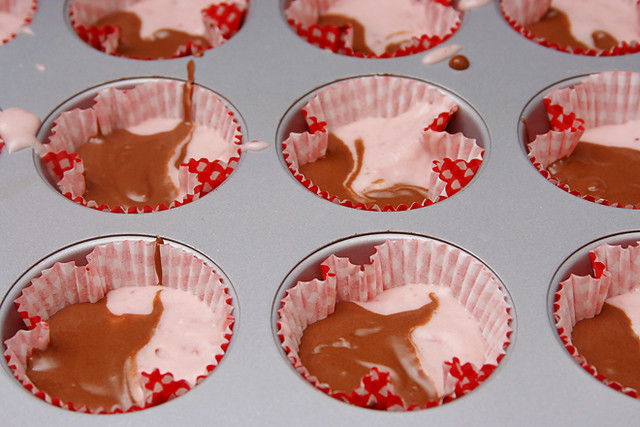
A friend gave me this fun cupcake batter divider, but I’m sure you can just simultaneously spoon both batters into the cups.

Strawberry cake:
1 cup (4 ounces) cake flour
1 cup (7 ounces) sugar
1¾ teaspoons baking powder
¼ teaspoon salt
1 stick (8 tablespoons) unsalted butter, room temperature
½ cup pureed frozen strawberries (from about 5 ounces of strawberries)
3 egg whites
3½ tablespoons milk
1 drop red food dye, optional

Chocolate cake:
1 cup (4 ounces) cake flour
1 cup (7 ounces) sugar
½ cup (1.5 ounces) unsweetened cocoa powder (not Dutch process)
1 teaspoon baking soda
¼ teaspoon salt
1 stick (8 tablespoons) unsalted butter, room temperature
½ cup buttermilk, room temperature
1 egg
½ cup freshly brewed coffee, cooled to room temperature

Frosting and garnish:
7 ounces bittersweet chocolate, finely chopped
4 ounces cream cheese, room temperature
5 tablespoons unsalted butter, room temperature
1½ cups (6 ounces) confectioners’ sugar
3 tablespoons unsweetened Dutch-process cocoa powder
pinch salt
½ cup sour cream
12 strawberries, halved through the stem

1. To make the cupcakes, adjust an oven rack to the middle position and heat the oven to 350 degrees. Line 24 cupcake wells with paper liners.

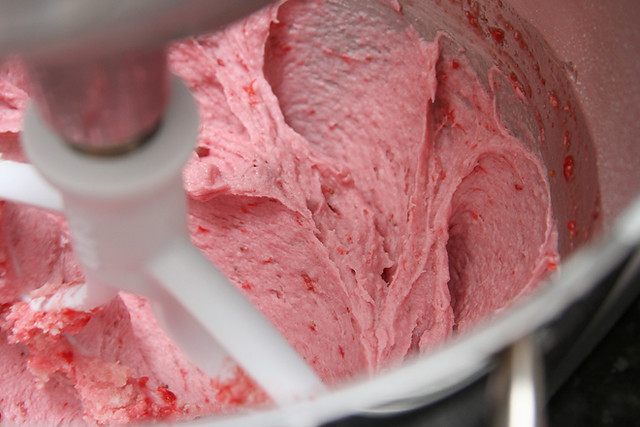
2. For the strawberry cake: Put the flour, sugar, baking powder, and salt in a large mixer bowl. With an electric mixer on low speed, blend for 30 seconds. Add the butter and strawberry puree and mix to blend, then raise the speed to medium and beat until light and fluffy, 2 to 3 minutes.

3. In another large bowl, whisk together the egg whites, milk, and red food dye, if using. Add the egg white mixture to the batter in two or three additions, scraping down the sides of the bowl well and mixing only to incorporate after each addition. Set aside.

4. For the chocolate cake: In a large mixer bowl, combine the flour, sugar, cocoa, baking soda, and salt. With an electric mixer on low speed, blend for about 30 seconds. Add the butter and buttermilk and blend on low until moistened. Raise the speed to medium and beat until light and fluffy, 2 to 3 minutes.

5. Whisk the eggs and coffee together, and add to the batter in 3 additions, scraping down the sides of the bowl and beating only until blended after each addition.

6. Simultaneously spoon the two batters into each cupcake well, filling them about two-thirds full. Bake until a toothpick inserted into the center of a cupcake comes out clean, 18-20 minutes. Cool the cupcakes in the pans on a wire rack for 5 minutes, then remove them from the wells and cool completely on the rack.

7. For the frosting: Melt the chocolate in a heat-proof bowl set over a pot of simmering water. Set aside to cool until just barely warm.

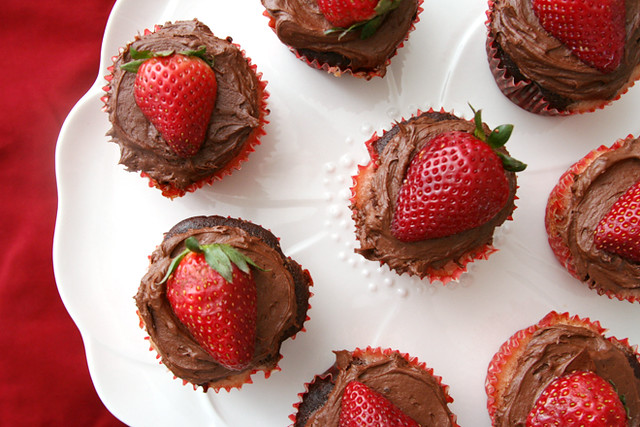
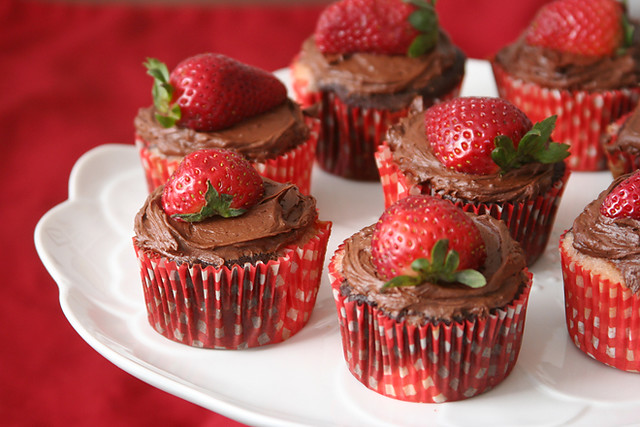
8. In a large mixer bowl, beat the cream cheese and butter on medium-high speed until pale and fluffy, about 3-4 minutes. Gradually mix in the confectioners’ sugar, cocoa powder, and salt. Beat in the melted and cooled chocolate and then the sour cream. Continue beating until the mixture is smooth and well blended. Frost cupcakes immediately. Top each cupcake with a strawberry half.

strawberry chocolate cupcakes 5

lahmahjoon (armenian lamb pizza)

lamb pomegranate pizza 3

Pizza was the first thing I cooked after having the baby. I’d prepped the dough, made the sauce, shredded the cheese, and sliced the pepperoni before going to the hospital, but even so, three days after giving birth, putting it all together and sliding it into the oven was about all I could handle. I was grateful that my mom and mother-in-law cooked the rest of the meals that first week.

lamb pomegranate pizza 1

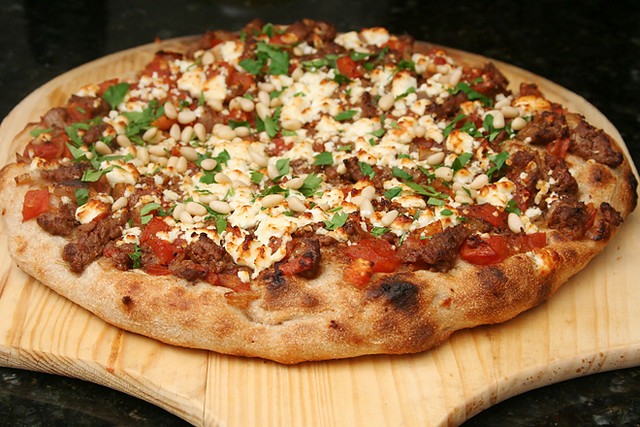
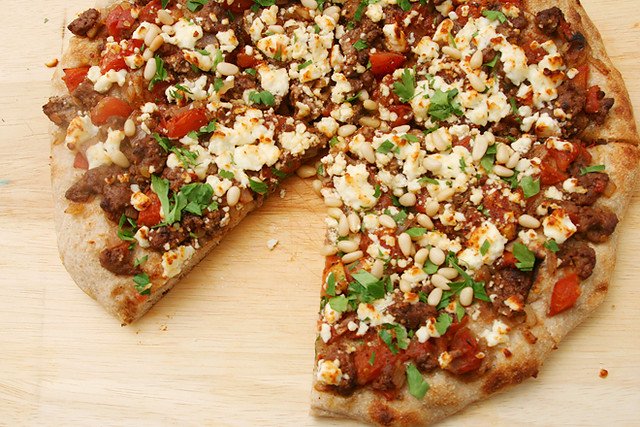
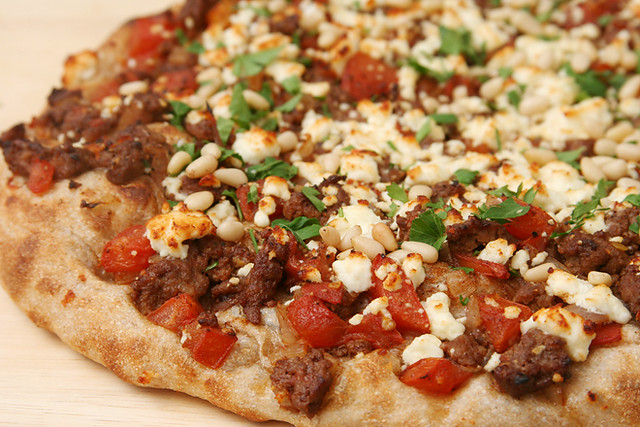
It’s over a month later, and now I’m actually able to make a pizza with toppings that require chopping and pre-cooking. This pizza isn’t difficult, and it’s one of my favorites for when I want something nontraditional. I have a bottle of pomegranate molasses that I impulse-bought from The Spice House, but I think you could just add twice the amount of pomegranate juice and let it reduce. I often don’t like cinnamon in savory recipes, but the flavor blends in perfectly here.

lamb pomegranate pizza 2

We still took turns eating while the other soothed the baby, but at least we got to eat something that wasn’t made specifically because it takes well to freezing. We’re making progress! And I’m grateful, because it means more meals like this.

lamb pomegranate pizza 6

Lahmahjoon (Armenian Lamb Pizza) (adapted from Eating Well)

See here for baking instructions using a baking steel.

I used a slicing tomato instead of plum tomato because Dave did the shopping and I forgot to specify which type I wanted. But you should use plum tomatoes if you can.

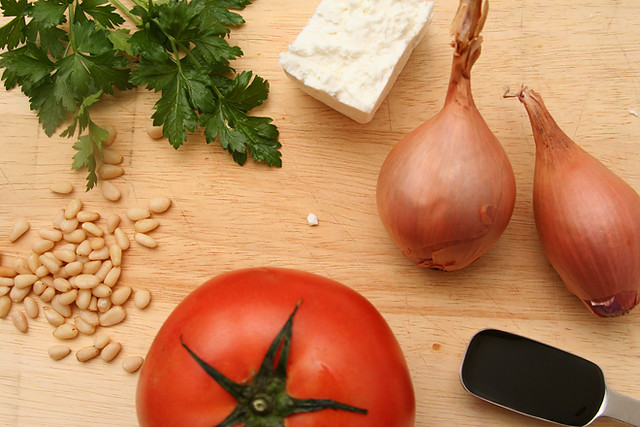
1 tablespoon olive oil
2 shallots, minced
8 ounces ground lamb
½ teaspoon salt
4 medium plum tomatoes, chopped
1 tablespoon pomegranate molasses
1 teaspoon ground cinnamon
½ teaspoon freshly ground pepper
1 pound prepared pizza dough
⅓ cup (2 ounces) crumbled feta
1 tablespoon pine nuts
2 tablespoons minced fresh parsley

1. Place a pizza stone on the lowest rack in the oven; heat the oven to its highest setting, at least 500 degrees. Line a pizza peel or the back of a baking sheet with parchment paper.

2. In a medium skillet over medium heat, heat the oil, then add the shallots. Cook, stirring occasionally, until softened, about 2 minutes. Add the lamb and salt, and cook, stirring to break up the meat, until lightly browned, about 5 minutes. Add the tomatoes and cook until they begin to break down, about 3 minutes. Stir in the pomegranate molasses, cinnamon, and pepper.

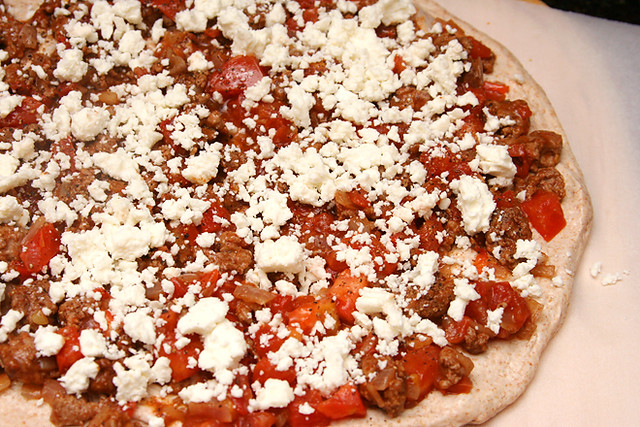
3. Divide the dough in half. Stretch a portion of dough to a 10-inch round; lay it on the parchment paper. If necessary to even out thick areas and fix the shape of the dough, pull the edges to an even circle. Spread half of the lamb mixture over the dough, then top with half of the feta and pine nuts.

4. Transfer the pizza on the parchment paper to the heated stone. Cook until the bottom of the crust is spottily browned, 6-7 minutes. Use the metal spatula and pizza peel to remove the pizza from the oven and transfer it to a cooling rack. Sprinkle half of the parsley evenly over the pizza. Cool for about 5 minutes before cutting and serving. Repeat with the remaining dough and toppings.

lamb pomegranate pizza 5

rhubarb sour cream pound cake

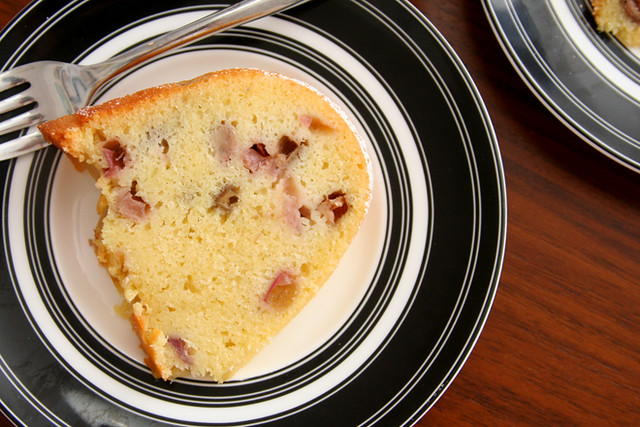
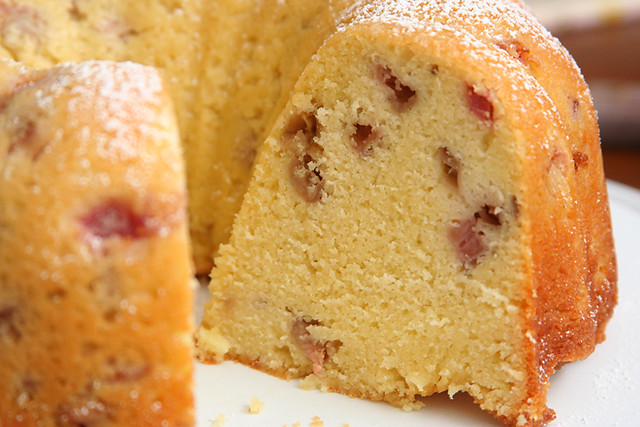
rhubarb pound cake 5

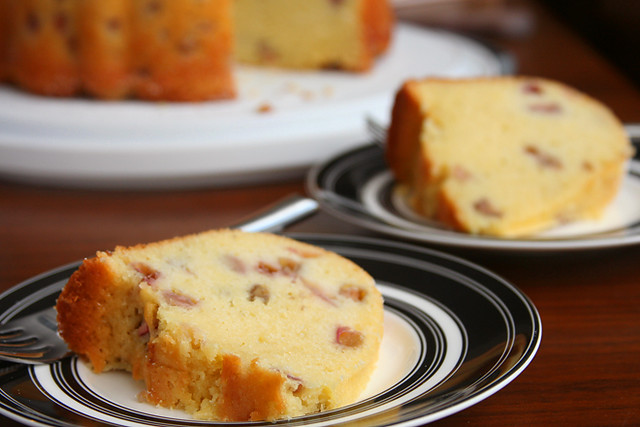
The newborn stage hit all of us hard – including the baby, who apparently found life outside the womb to be unsatisfactory. I was grateful for a freezer full of dinners, although I did manage to do some simple baking – chocolate chip cookies, pound cake. My favorite recipes, made almost more for the comfort of going through the motions, of feeling like me, than to have a delicious dessert to share and enjoy.

rhubarb pound cake 1

I’m hesitant to put this in writing, but things are a little better now. We’ve figured out how to calm the baby’s cries (usually), she smiles and even sometimes coos, and we’ve learned to adapt to a routine where nothing is really routine. For example, I learned the hard way, when a pissed off hungry baby had to wait to eat until the cookies I’d just put in the oven were done baking, that I can’t bake unless Dave is home to take things out of the oven if necessary. Also, it’s best if I divide up the baking as much as possible; for one cake I made recently, I had the measured dry ingredients and the baking pan sitting by the mixer for almost a week until I finally got a chance to mix it all together.

rhubarb pound cake 4

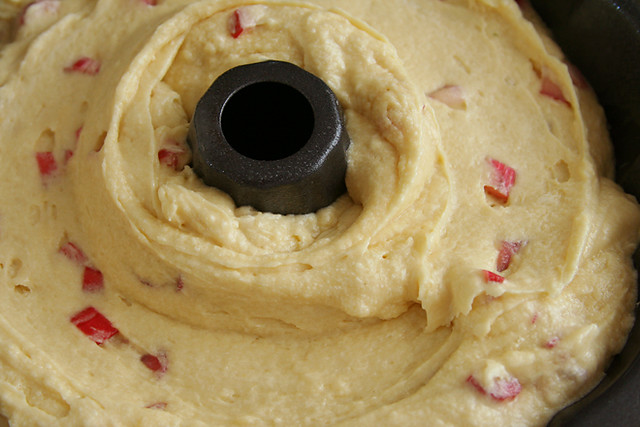
This cake was slightly more impromptu, only because the days before I baked it had gone so fast I couldn’t make time to prepare the ingredients. Fortunately, the baby had a particularly sleepy day on the last day of the weekend, and I was able to mix and bake a cake. She woke up hungry when I was doing the final mixing of the dough, so Dave did his best to soothe her while I rushed to get the cake in the oven. I left myself a bit of batter in the mixing bowl to enjoy after the nursing session. After this last month, I definitely deserve a treat.

rhubarb pound cake 7

Rhubarb Sour Cream Pound Cake (rewritten and slightly adapted from Cook’s Country)

16 servings

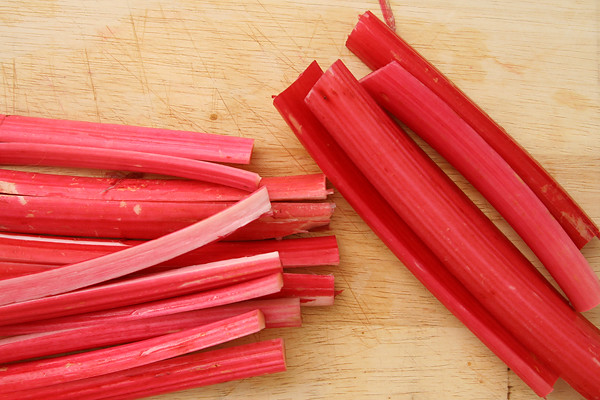
The original recipe is for cranberries (fresh or frozen), but I’ve found that rhubarb and cranberries are interchangeable in baked recipes like this. I also doubled the recipe so I could bake it in a bundt pan instead of a loaf pan.

10 large eggs, at room temperature
4 teaspoons vanilla extract
3½ cups (17.5 ounces) all-purpose flour
1½ plus ¼ teaspoons salt, divided
1 teaspoon baking powder
⅔ cup sour cream
½ cup milk
28 tablespoons unsalted butter, room temperature
2½ cups (17.5 ounces) granulated sugar
2 cups (8 ounces) finely diced rhubarb
2 tablespoons powdered sugar

1. Heat the oven to 300 degrees. Grease and flour (or spray with baking spray) a 12-cup bundt pan. In a medium bowl, combine the eggs and vanilla. In a separate bowl, combine the flour, 1½ teaspoons salt, and baking powder. In a small bowl, whisk together the sour cream and milk.

2. In a mixer fitted with the paddle attachment (or in a large bowl with a hand-held mixer), beat the butter on medium speed until smooth. Gradually add the granulated sugar, then increase the mixer speed to medium-high and continue to beat for another 3-4 minutes, scraping the sides of the bowl as necessary, until the mixture is pale and fluffy. Reduce the mixer speed to medium; gradually add the egg mixture. Scrape the sides of the bowl, then continue to mix on medium speed until evenly mixed; the mixture will probably look curdled. Reduce the mixer speed to low and add one-third of the flour mixture, followed by half of the sour cream mixture, another third of the flour, the remaining sour cream, and the remaining flour. Mix until almost combined, with a few streaks of flour remaining.

3. Toss the rhubarb with the powdered sugar and remaining ¼ teaspoon salt. Add the rhubarb to the batter and use a large rubber spatula to fold it in until the rhubarb is evenly incorporated and the batter is thoroughly mixed. Transfer the mixture to the prepared pan.

4. Bake until a toothpick inserted in the center of the cake comes out clean, 1½ to 2 hours. Transfer to a wire rack; cool in the pan for 15 minutes, then invert the cake onto the rack. Cool the cake completely, about two hours, before serving. Tightly wrapped, the cooled cake can be stored for up to three days.

rhubarb pound cake 6

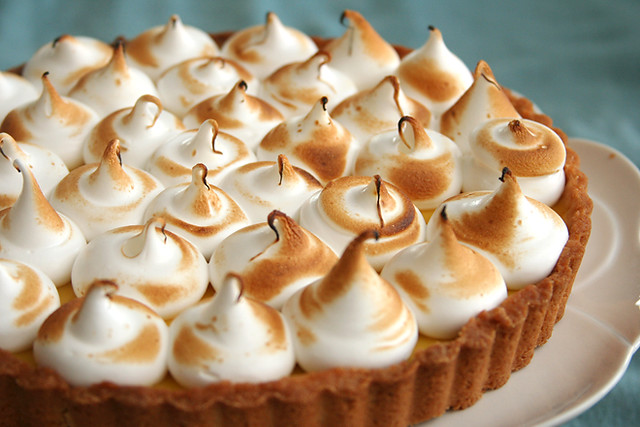
passion fruit meringue tart

passionfruit meringue tart 8

My original goal was to post this before Valentine’s Day – passion fruit, get it? But instead, I had a baby just a few days before that. And despite what everyone had told me about how difficult the newborn stage is, I’m surprised to find the newborn stage is, indeed, difficult. It seems like most of my days are spent bouncing on an exercise ball, as that’s the best way to keep this tiny creature from screaming in my ear.

baby hazel 1 day b

Needless to say, I haven’t been doing much cooking. I’m thankful to JanuaryMe for providing a very well-stocked freezer, not to mention all the other people who have cooked meals for us. Dave and I take turns eating while the other bounces.

passionfruit meringue tart 3

However, today, I baked a cake! A simple cake that I prepped as much as possible yesterday, but I still got to turn butter, sugar, and flour into a sweet treat. It was glorious.

passionfruit meringue tart 4

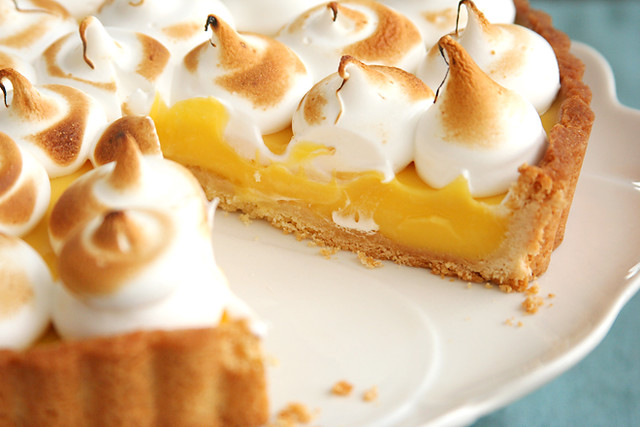
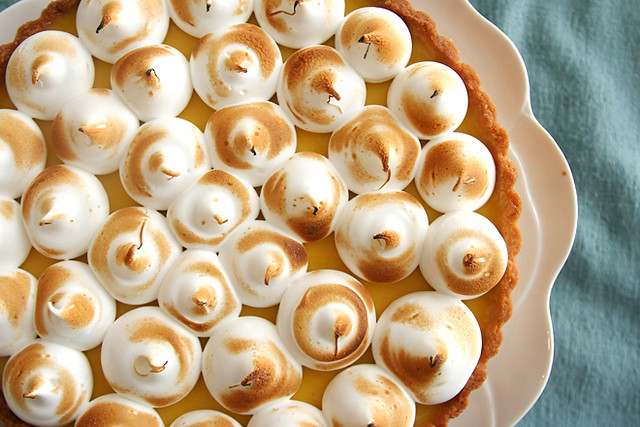
Still, I think it’s going to be a while before I make a dessert that involves multiple components. This tart is back from my friend’s cancelled party. I took it to work instead, but not before setting aside a slice for myself. It was such a great combination of tart filling and sweet topping, creamy curd and crisp crust. I’m looking forward to stable days of getting back into more elaborate baking, but for now, I’m grateful for any quality time I get to spend with my mixer.

passionfruit meringue tart 5

Passion Fruit Meringue Tart (crust recipe from Dorie Greenspan)

8-12 servings

I get passion fruit concentrate from amazon.

Crust:
1½ cups (7.2 ounces) all-purpose flour
½ cup (2 ounces) confectioners’ sugar
¼ teaspoon salt
9 tablespoons cold unsalted butter, cut into ½-inch cubes
1 large egg yolk

Passion fruit curd:
4 large eggs
3 egg yolks
¾ cup (5.25 ounces) granulated sugar
¾ cup passion fruit concentrate
6 tablespoons cold butter
¼ teaspoon vanilla
⅛ teaspoon salt

Meringue:
4 large egg whites, room temperature
¾ cup (5.25 ounces) granulated sugar
½ teaspoon vanilla extract
pinch salt

1. For the crust: Put the flour, confectioners’ sugar, and salt in a food processor and pulse to combine. Scatter the butter over the dry ingredients and pulse until the butter is coarsely cut, with some pieces the size of oatmeal flakes and some the size of peas. Stir the yolk with a fork and add it a little at a time, pulsing after each addition. Process in long pulses until the dough forms clumps and curds; the sound of the machine working will change. Scrape the sides of the processor bowl to incorporate any unmixed dry ingredients.

2. Grease a 9-inch fluted tart pan with a removable bottom. Press the dough evenly over the bottom and up the sides of the pan. Freeze the crust for at least 30 minutes before baking.

3. Center a rack in the oven and heat the oven to 375 degrees. Spray a piece of aluminum foil with nonstick spray and fit the foil, oiled side down, tightly against the crust. Put the tart pan on a baking sheet and bake the crust for 25 minutes. Carefully remove the foil. If the crust has puffed, press it down gently with the back of a spoon. Bake for about 8 more minutes, or until it is firm and golden brown. Transfer the tart pan to a rack and cool the crust to room temperature before filling.

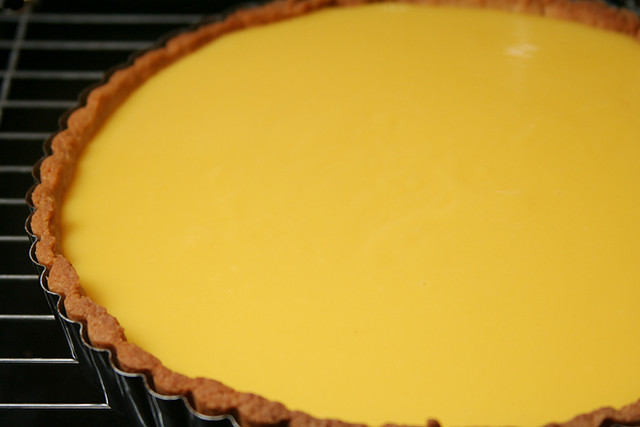
4. For the curd: Heat the passion fruit juice in a double boiler until hot but not boiling. Whisk the eggs and yolks in a medium nonreactive bowl; gradually whisk in the sugar. Whisking constantly, slowly pour the hot passion fruit juice into the eggs, then return the mixture to the double boiler and cook, stirring constantly with a rubber spatula, until the mixture registers 170 degrees on an instant-read thermometer and is thick enough to cling to a spoon, about 3 minutes. Immediately remove the pan from the heat and stir in the cold butter until it’s incorporated; stir in the vanilla and salt, then pour the curd through a fine-mesh strainer into a medium nonreactive bowl. Spread the curd evenly over the prepared crust.

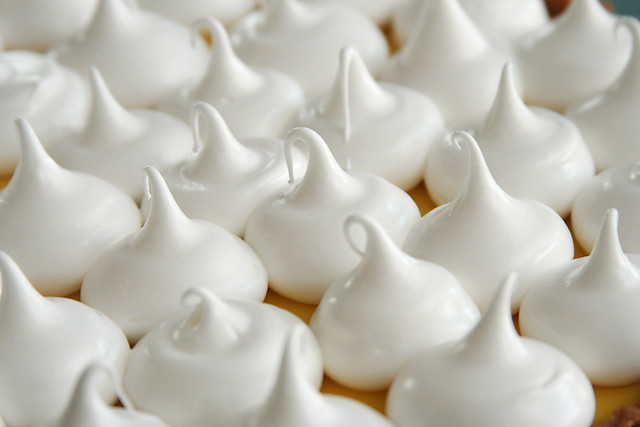
5. For the meringue: Beat egg whites until frothy. Beat in sugar, 1 tablespoon at a time; until sugar is incorporated and mixture forms soft peaks. Add vanilla and salt; continue to beat meringue to stiff peaks.

6. Pipe the meringue over the curd. Use a kitchen torch to brown the meringue. Serve immediately or chill for up 8 hours.

passionfruit meringue tart 6

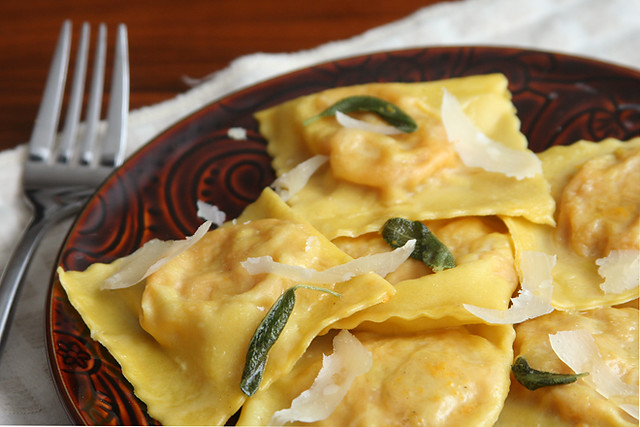
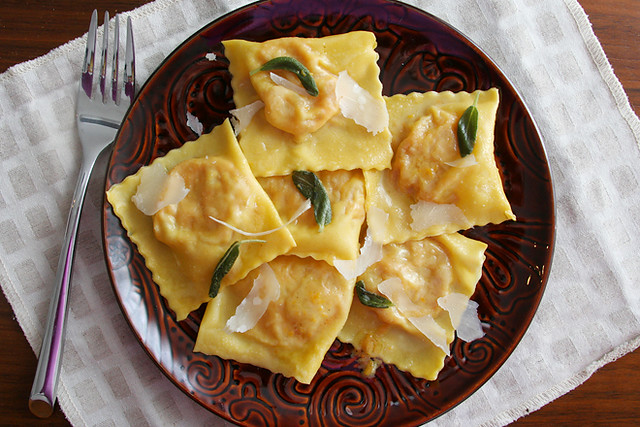
butternut squash and goat cheese ravioli with sage browned butter

goat cheese squash ravioli 7

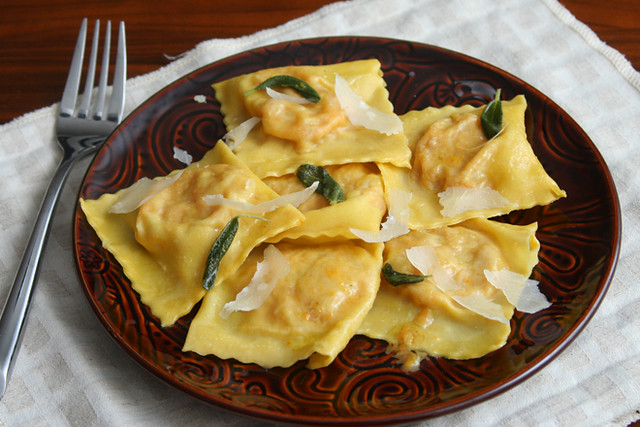
On that fateful homecoming from visiting my in-laws for Thanksgiving, this is what I’d planned to have for dinner. The ravioli were already filled and formed in the freezer, just requiring a quick drop in simmering water and a trip through a skillet of butter. But coming home to disaster made even that seem overwhelming; instead, we ate toppingless chili from the freezer in between shop-vaccing up buckets of water.

goat cheese squash ravioli 2

These are still in the freezer, and at least that’s one advantage of this mess. Actually, my freezer is stuffed to the brim now. In the absence of any other outlet for that stereotypical late pregnancy nesting urge, I cooked. I cooked until the freezer in the rental house was overflowing, then I transferred some meals to our home freezer, and cooked some more.

goat cheese squash ravioli 3

We’ve moved back home now, but there’s plenty of work to do before the house is back to normal. I have a feeling I’ll be very, very grateful to have a freezer full of food once I have a newborn on top of a million house chores. This meal, combining some of my favorite ingredients, will be saved for something special – maybe the day we get doors installed.

goat cheese squash ravioli 5

Butternut Squash, Goat Cheese, and Pancetta Ravioli with Sage Browned Butter

Serves 8 as a first course or 4 as a main course

I made my pasta using this method and the following ingredients: 5 ounces flour, pinch salt, 1 egg, 2 egg yolks, and ½ teaspoon olive oil.

6 ounces pancetta, diced into ¼-inch cubes
1 onion, diced fine
salt
1 small butternut squash, peeled, diced into ½-inch cubes
1 teaspoon fresh thyme leaves, minced
5 ounces goat cheese
pinch nutmeg
2 ounces (1 cup) grated parmesan
8 ounces fresh pasta, rolled to the second-to-last setting on a pasta roller
6 tablespoons unsalted butter, melted
12 sage leaves, sliced

1. In a 12-inch nonstick skillet over medium heat, cook the pancetta until crisp, about 8 minutes. Using a slotted spoon, transfer the pancetta to a large bowl. Drain the fat in the pan into a small bowl. Transfer 1 tablespoon of fat back to the pan and add the onions. Cook, stirring occasionally, until the onions are lightly browned around the edges, about 8 minutes. Transfer the onions to the bowl with the pancetta. Add another 1 tablespoon reserved pancetta fat to the pan; add the squash. Cover the pan and cook, stirring occasionally, until the squash is browned and tender, about 15 minutes. Use a potato masher to lightly mash the squash, then transfer it to the bowl with the onions and pancetta. Add the thyme, goat cheese, nutmeg, parmesan, and additional salt to taste to the bowl; stir to combine.

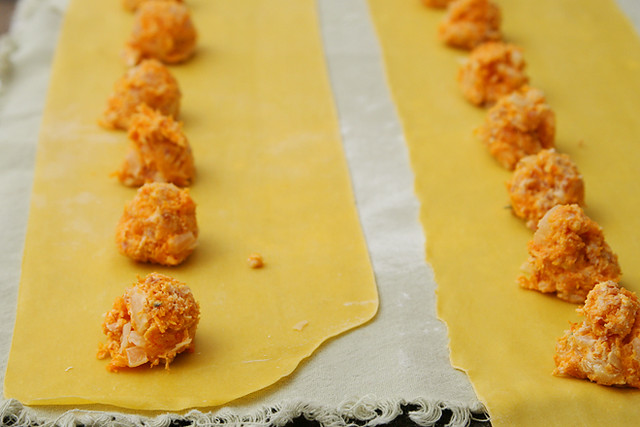
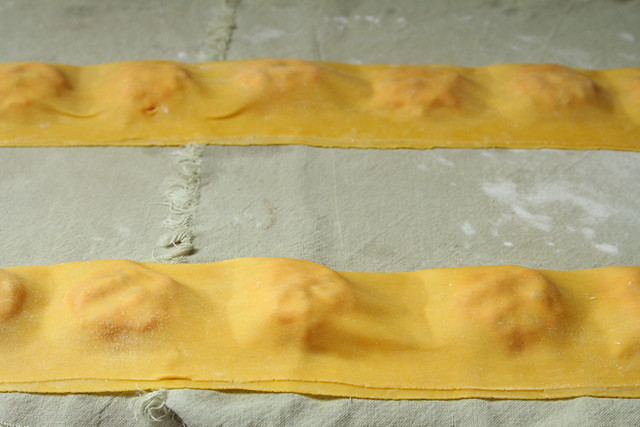
2. Place one rounded tablespoon of filling every 2 inches along the length of a pasta sheet. Use a pastry brush dipped in water to wet the pasta along the long edges and between the filling. Fold the pasta sheet lengthwise over the filling, pressing around each ball of filling to seal the two layers of pasta together. Use a pizza cutter to cut between the filling to form squares of ravioli. Store the ravioli on a dry dish towel. Repeat with the remaining dough and filling. (Ravioli can be formed several hours in advance and covered and refrigerated or can be flash-frozen, then transferred to freezer bags and frozen for several weeks. Do not defrost before cooking.)

3. In a large skillet, brown the butter with sage and a generous pinch of salt. Bring a large pot of water to a boil; add a tablespoon of salt and lower the heat until the water is at a lively simmer. Boil the ravioli in small batches for about 2 minutes. Use a slotted spoon to transfer the ravioli from the cooking water to the butter; simmer and shake over medium-high heat until the ravioli are evenly coated. Serve immediately, with additional parmesan if desired.

goat cheese squash ravioli 6

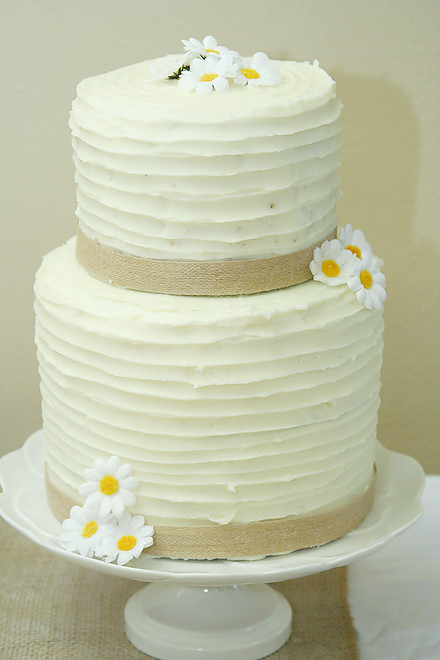
confetti cake

confetti cake 2

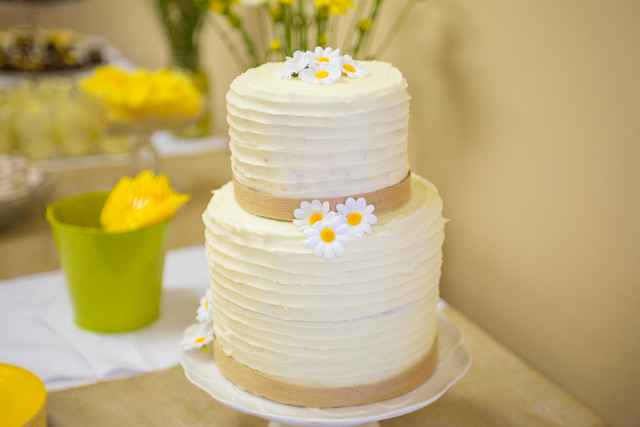
Because I don’t have enough to keep me busy between a house under construction and lugging around ten pounds of belly, I thought it would be a good idea to make my own baby shower cake too. What can I say? No one in my town can make a cake as delicious as I can.

confetti cake 1

Plus it was fun to choose my own flavors and design. Somehow in the three big cakes I’ve made previously, I’ve never made a chocolate cake, which needed to be remedied. Two of the three other cakes I’ve made had additional frosting in between the layers, and I wanted to use a different filling. All of the cakes, including this one, used cream cheese frosting, because there’s no need to fix what isn’t broken.

EH3A5018
Photo by Lisa Watson

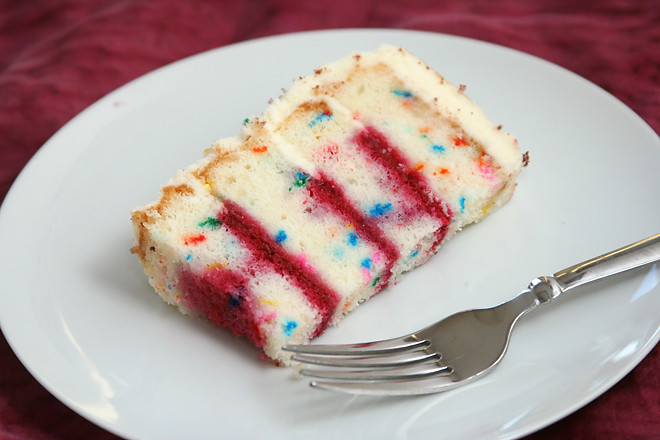
The blackberry cake has been a favorite since I made it for a bridal shower, and then a few weeks later, for my birthday. The confetti cake I first tried right after one of the big baby shower cakes last summer. I found out about my friend/coworker/husband’s boss’s (who was also my baby shower host, who also took a lot of the pictures in this post) birthday just one day beforehand, and it was a big one, so it couldn’t be ignored. Even though I was feeling a little caked out, I loved this cake so much that I had two pieces and have been thinking about it since.

EH3A5020
Photo by Lisa Watson

I assumed baking a tiered cake at 8-months pregnant would be a challenge, so I baked and froze the cake layers in December, in the 2-week window that we were home between drying out the house and when we moved out for construction to begin. It turns out that the big belly was the least of my issues; I did not expect to be working around contractors in a corner of the kitchen uncovered of plastic and washed of paint residue, but with my mom there to help, we actually got the cake finished in time to take Dave out for a birthday lunch before the shower.

EH3A4977
Photo by Lisa Watson

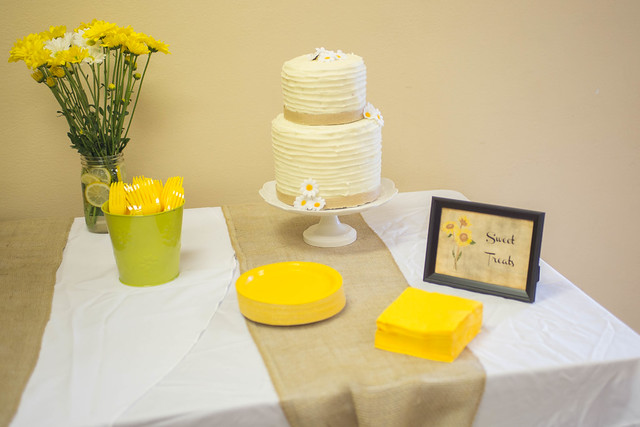
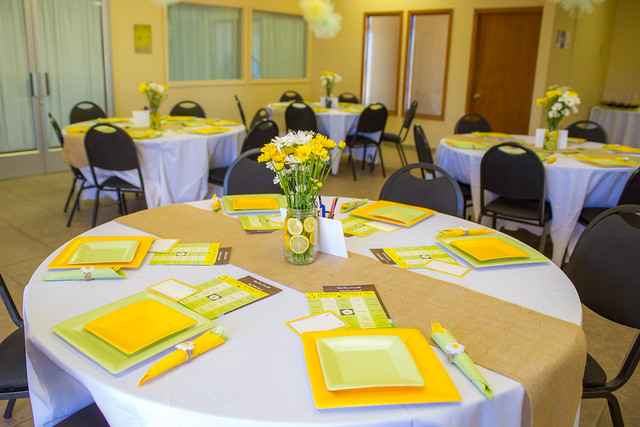
I kept the design simple, but it fit in perfectly with the rustic decorations at my shower, which I loved. As a bonus, I didn’t have to do the worst part, the cutting of the cake. I asked a friend to do that while I gushed over adorable tiny pink clothes. Even better, I got to take home the leftovers – which made a great lunch, snack, and dessert the next day as we continued to coast through this crazy time in our lives as best we can.

confetti cake 3

Printer Friendly Recipe
Confetti Cake (from Cook’s Country)

12-16 servings

Cook’s Country recommends pulsing a portion of the sprinkles in the food processor, but I’ve never bothered. I filled the cake with raspberry filling and topped with cream cheese frosting.

6 large egg whites, room temperature
⅔ cup whole milk, room temperature
2 teaspoons vanilla extract
3 cups (12 ounces) cake flour
1½ (10 ounces) cups sugar
4 teaspoons baking powder
1 teaspoon salt
16 tablespoons unsalted butter, cut into 16 pieces, softened
¾ cup rainbow sprinkles

1. Adjust an oven rack to the middle position and heat the oven to 350 degrees. Butter three 8-inch round cake pans with baking spray (or grease and flour the pans). Line with parchment or waxed paper and grease the paper.

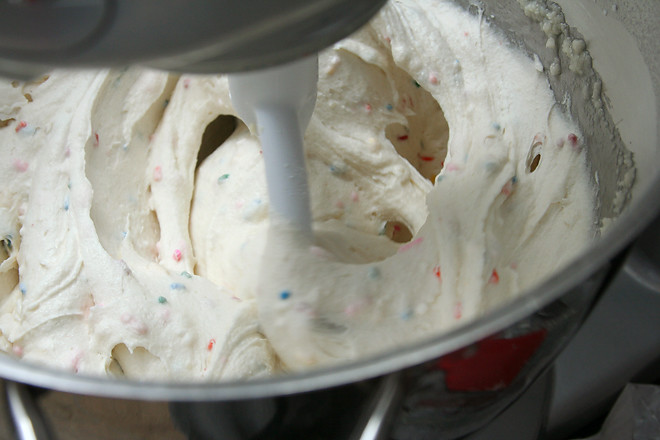
2. Using an electric mixer fitted with a paddle attachment (or in a large bowl if using a handheld mixer), mix together the flour, sugar, baking powder, and salt on low speed for about 30 seconds. With the mixer running, add the butter, one piece at a time, until it is incorporated and the mixture looks like moist crumbs. Add all but ½ cup of the milk mixture to the crumbs and beat at medium speed (or high speed if using handheld mixer) for 1½ minutes. Add the remaining ½ cup of the milk mixture and beat 30 seconds more. Stop the mixer and scrape the sides of bowl. Add the sprinkles, return the mixer to medium speed (or high for a handheld mixer) and beat 20 seconds longer.

3. Divide the batter evenly between the prepared pans. Bake for 21 to 25 minutes, or until a cake tester or wooden toothpick inserted into the center of a cake comes out clean. Allow the layers to cool in the pans for 5 to 10 minutes. Invert and turn out the cakes onto wire racks; peel off the paper liners. Let stand until completely cooled before assembling the cake, at least one hour.

EH3A4954
Photo by Lisa Watson

2015 favorites

I’m late on this, but with no end in sight to the flood repairs on our house, plus a daunting end in sight to being pregnant, I’m late on everything lately. Dave and I are getting by the best we can right now, but looking at last year’s recipes is a nice reminder of simpler times. Here are some of my favorites:

Beef Satay with Spicy Mango Dip
beef satay 5

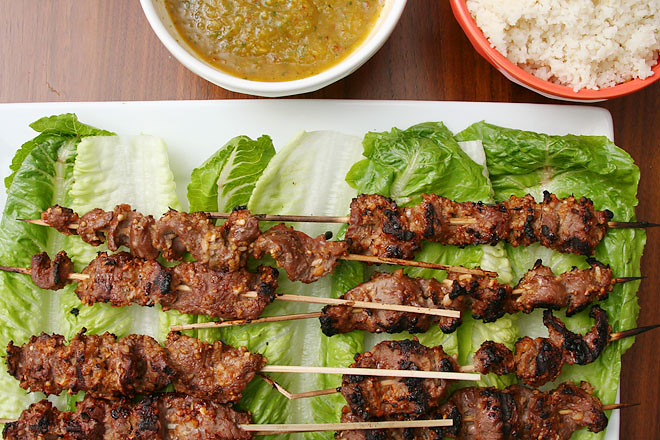
This was so good, I made it again for the tiki-inspired meal my brother and I served on our family’s annual beach trip. It stood out even among a spread of crab rangoons, coconut shrimp, kalua pork, and a pitcher of tonga punch (plus a virgin version for me and the kids).

Poblanos Stuffed with Black Beans and Cheese
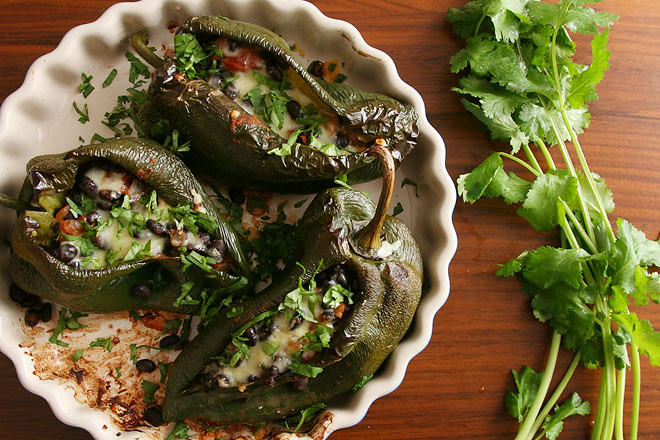
stuffed poblanos 3My standards for weeknight dinners are so high – delicious, healthy, easy, vegetarian or seafood-based – that it’s rare to add a new meal to our rotation. This one fits all of the requirements, and as an added bonus, it can be made ahead. I often make enough for two dinners and have it early in the week and then the night before we leave for a trip.

Confetti Cookies
confetti cookies 6

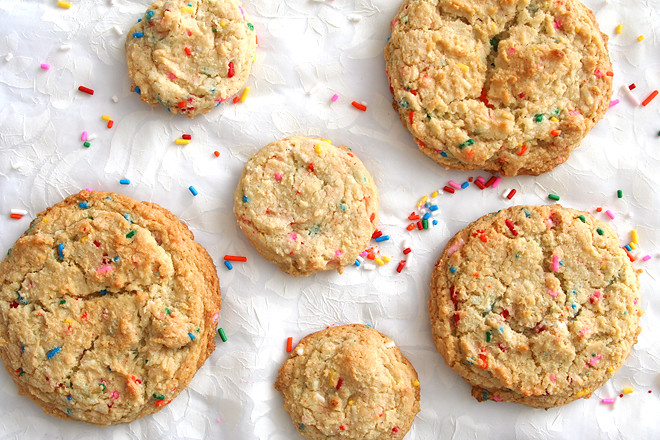
These cookies scream ‘birthday’ to me, but they’re also just a fun cookie – colorful enough to grab the attention of kids, and they taste just as good as they look.

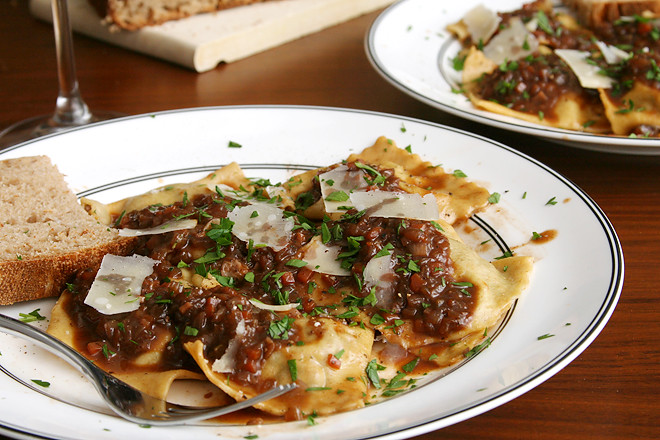
Goat Cheese and Braised Lamb Shank Raviolilamb goat cheese ravioli 6I wish I had infinite amounts of time to make this every week. It’s one of the best things I ate last year.

Cheesecake Squares with Sour Cream Topping
cheesecake squares 5
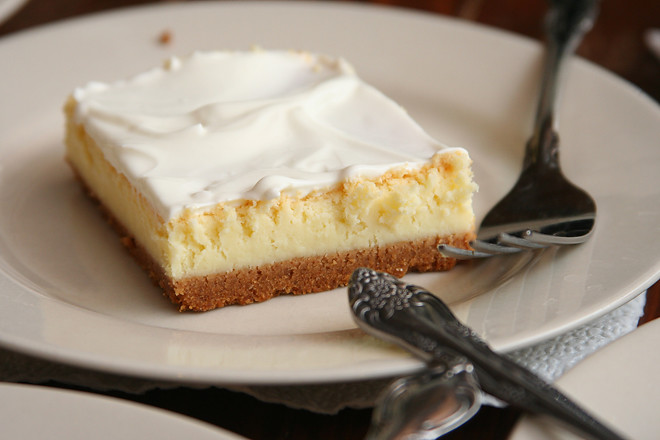
I love a grand and celebratory cheesecake, but this one can’t be beat for simple good flavor. It’s a childhood favorite that’s become an adulthood favorite.

Mai Taismai tai 6Dave and I have had so much fun making tiki a hobby, trying new drinks every week and sharing notes with my brother across the country. We struggled to find the perfect mai tai recipe and nailed it right around when I got pregnant. I’m looking forward to enjoying one of these next month.

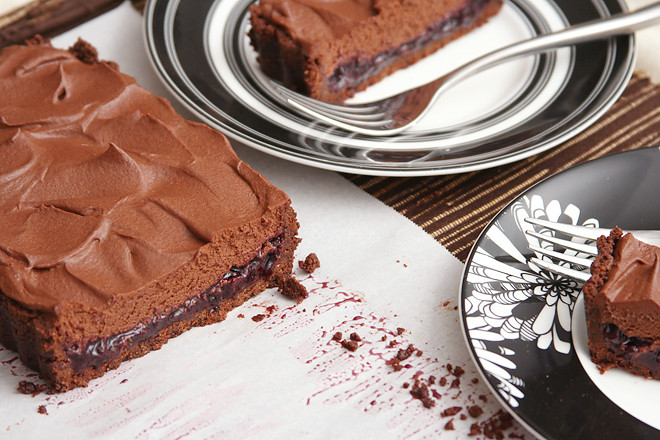
Berry Jam and Chocolate Mousse Tart
berry chocolate tart 11

I love chocolate, but I don’t think I’m one of those chocolate people. I always want something to brighten it up, and a thick layer of berry jam is the perfect tart balance to lots of chocolate mousse.

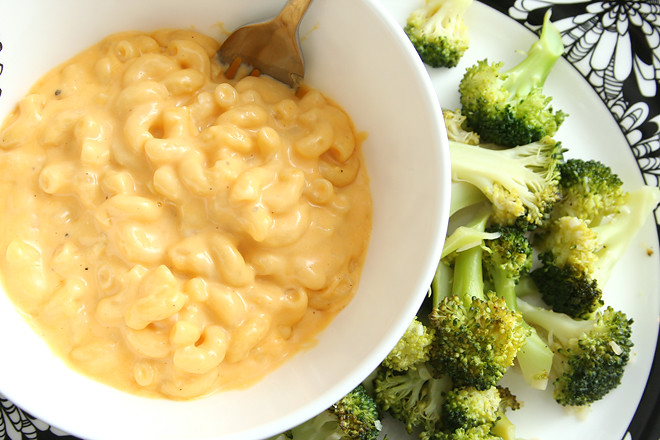
Stovetop Macaroni and Cheesestovetop mac and cheese 8
I started making this last year as a pregnancy craving, but in this rough beginning to 2016, it’s become a comfort food favorite.

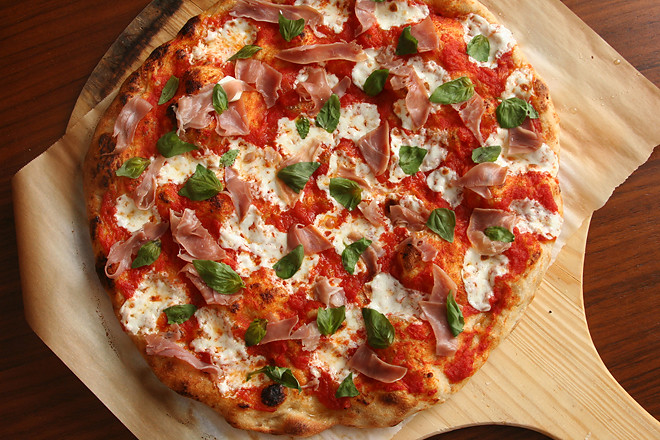
Slow-Ferment Pizza Dough
pizza dough 9
Definitely the recipe I made more than any other this year. A quick mix on Monday night makes bubbly, crisp pizza Friday after work.

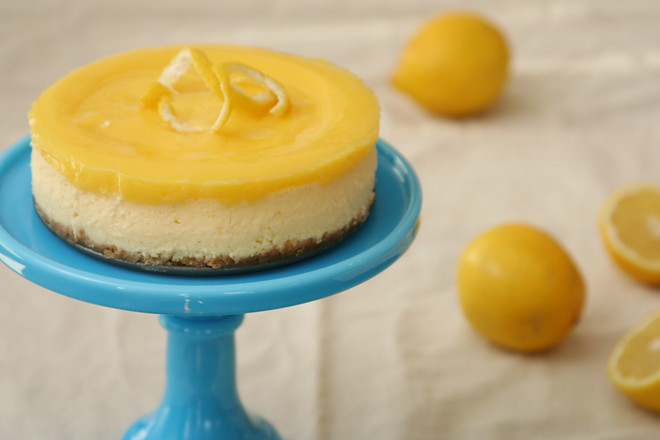
Lemon Cheesecake
lemon cheesecake 2
Macaroni and cheese and cereal have been my primary pregnancy cravings, yet somehow, I seem to have made cheesecake at every opportunity as well. That might not have anything to do with pregnancy and everything to do with how delicious and creamy cheesecake is. This one is one of my favorites; that lemon curd on top goes so well with the rich cake.

Honorable Mention: Transportation Cake
tranportation cake 1The coconut cake recipe I shared here is a light, moist, and coconutty, but what really makes this worth talking about is the decorating, which was so much fun that I’ve taken advantage of every opportunity to make layered cakes since then – including my own baby shower.

Frankly, it’s been a rough start to this year, but soon enough, we’ll have a baby and hopefully a house to put her in, and we can start finding our new normal. I can’t wait to see what that looks like.