Search Results for: scones

white wine gravy

white wine gravy 8

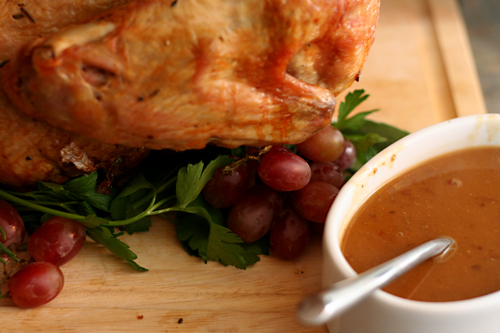
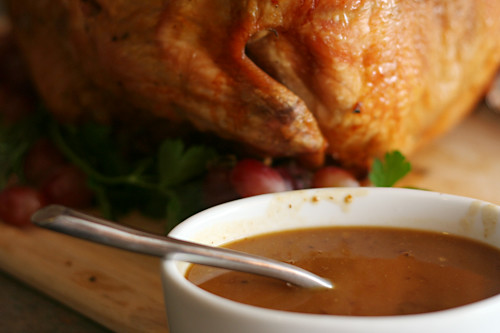
Here’s why this gravy is so good:

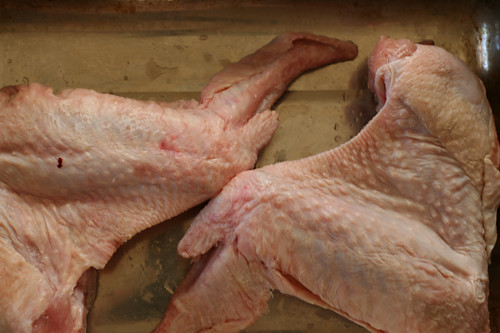
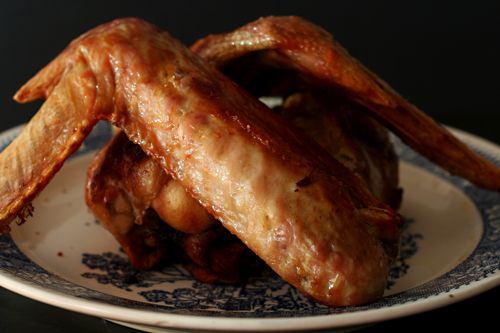
First, homemade turkey stock. I know, I go overboard, and while you aren’t wrong, keep in mind that this is not a difficult step. You throw turkey wings – they’re not expensive – in the oven, caramelize vegetables in a stockpot, and then mix the two with water and leave it alone for a few hours while it simmers away. Oh, and deglaze the roasting pan the turkey wings were in. That’s where the good stuff is.

white wine gravy 1

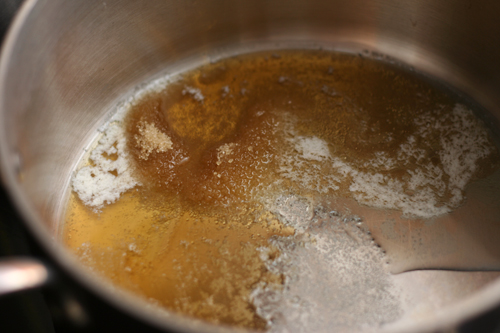
Second, a medium-dark roux. You aren’t just cooking the raw flavor out of the flour here, you want the flour itself to contribute a nutty flavor. It loses some of its thickening power when you do this, but you didn’t want gloppy gravy anyway, did you?

white wine gravy 2

Third, wine. You might be doing this already, but if not, what the heck? Deglaze that roasting pan after your turkey roasts with wine. If you want flavor, and why wouldn’t you, water isn’t enough.

white wine gravy 3

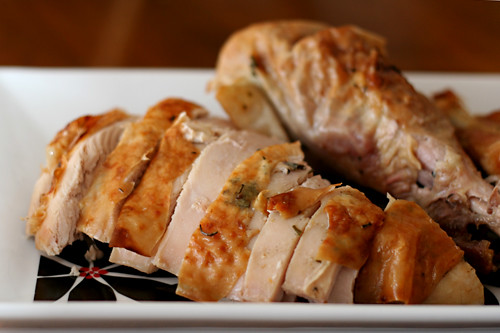
The first time I made gravy like this, I poured it over everything on the plate, and that’s the thing about gravy – it affects the turkey, the stuffing, and the potatoes. That’s half the Thanksgiving plate, which means that gravy shouldn’t be an afterthought. This gravy was so good I ate the leftovers with a spoon. The method isn’t so different from any other gravy, so why not follow these simple tricks for such a payoff?

white wine gravy 6

One year ago: Prosciutto-Wrapped Neufchatel-Stuffed Jalapenos
Two years ago: Pumpkin Scones
Three years ago: Gratin Dauphinois (Potatoes au Gratin)

Printer Friendly Recipe
White Wine Gravy (adapted from Emeril and Cook’s Illustrated)

4 cups Golden Turkey Stock (recipe below)
4 tablespoons unsalted butter
¼ cup all-purpose flour
1 cup dry white wine
Salt and freshly ground black pepper

1. In a small saucepan, bring the turkey broth to a simmer. Reduce the heat to low; cover to keep warm.

2. In a large heavy saucepan, melt the butter over medium-high heat. Stir in the flour and cook, whisking constantly, until the flour just starts to smell nutty and become caramel-colored, 6-8 minutes. Add the broth and bring to a simmer, whisking often. Turn off the heat and cover.

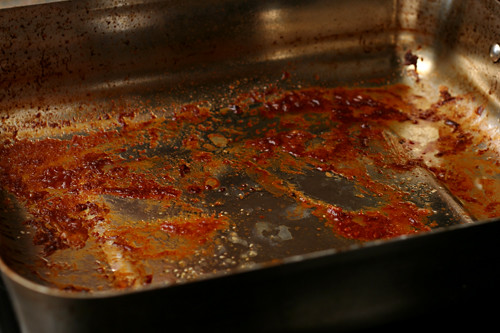
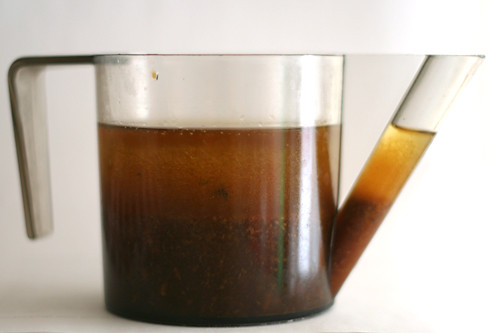
3. After the turkey has roasted, strain the pan juices through a fine-mesh strainer into a glass-measuring cup; skim or pour off the fat from the strained liquid. Discard the solids in the strainer.

4. Place the roasting pan on 2 stovetop burners over medium heat; add the wine and defatted pan juices to the pan, bring to a simmer, and scrape to loosen any brown bits from the bottom of the pan.

5. Add the liquids from the deglazed roasting pan to the broth mixture. Bring to a simmer over medium-high heat, then reduce the heat to low and simmer for 10 minutes, whisking occasionally. Adjust the seasonings with salt and pepper if necessary.

white wine gravy 4

Golden Turkey Stock (from Bon Appétit via epicurious)

Makes about 7 cups

If you’re roasting a salted or brined turkey, don’t add salt to the broth, because the gravy might end up too salty.

4½ pounds turkey wings, cut in half
1 large onion, chopped coarse
1 large carrot, chopped coarse
1 large celery stalk, chopped coarse
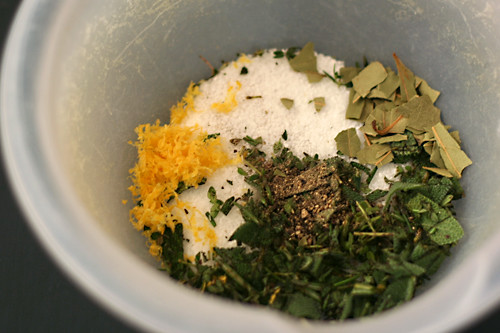
6 fresh Italian parsley sprigs
1 bay leaf
½ teaspoon dried thyme
¼ teaspoon whole black peppercorns

1. Heat the oven to 400 degrees. Arrange the turkey wings in a large roasting pan; roast until deep brown, turning once, about 2 hours total.

2. Transfer the wings to a large bowl. Spoon about 3 tablespoons of the turkey fat from the roasting pan into a large pot (reserve roasting pan). Add the onion, carrot, and celery to the pot. Sauté over medium-high heat until the vegetables are golden, about 20 minutes.

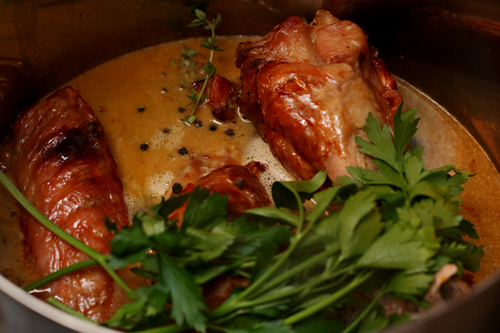
3. Meanwhile, add 2 cups of water to the roasting pan; place the pan over 2 burners and bring to a boil, scraping up the browned bits. Add the liquid from the roasting pan to the pot with the sautéed vegetables. Add the turkey wings, herbs, and enough cold water to cover the wings by 1 inch.

4. Bring the water to a boil. Reduce the heat to medium-low; simmer uncovered until the stock is very flavorful and reduced to 7½ to 8 cups, about 2½ hours. Strain the stock into a large bowl. Cool 1 hour, then refrigerate until cold, about 3 hours. (Can be made 3 days ahead. Cover and keep chilled. Can also be made and frozen 2 weeks ahead.) Spoon off the fat from the surface before using.

white wine gravy 7

salted herbed roast turkey

salt roast turkey 5

I don’t like brining turkey. The first time I tried it, I disinfected a cooler, carefully monitored the ice quantity throughout the soaking period, then disinfected the cooler again after removing the turkey. The second time, I stuck the turkey and brine in a stockpot, but couldn’t quite fit the lid on the pot, plus there was no way I could fit that in my fridge, so I stuck it outside overnight and hoped it was cold enough out there to prevent my turkey from turning into bacteria food. Brining turkey sucks.

salt roast turkey 3

Salting turkey isn’t a picnic, but it’s a heck of a lot more straightforward than brining. Just mix up some salt and herbs and sprinkle it inside the turkey’s cavities, over the skin, and under the skin. The salt draws moisture out of the turkey at first, where the liquid mixes with the salt and then flows back into the turkey, now with flavor. While you’re not actually adding moisture like you are with brining, you’re adding flavor and helping the turkey hold onto its natural moisture. And you don’t have to disinfect a cooler or buy a separate fridge.

salt roast turkey 4

And, more importantly, this was the best turkey I’ve ever eaten. It wasn’t bloated like brined turkey can be, but it was juicy throughout. It also had crisper skin than brined birds do. You can’t argue with a method that is not only easier, but produces even better results.

salt roast turkey 6

Two years ago: Buttermilk Scones
Three year ago: Brown Sugar Apple Cheesecake

Printer Friendly Recipe
Salted Roast Turkey with Herbs (adapted from Bon Appétit via epicurious and from Cook’s Illustrated’s Roast Salted Turkey)

Cook’s Illustrated explains that there are two main brands of kosher salt; Morton’s is denser than Diamond. Use the larger amount of salt called for in the recipe if you’re using Diamond Crystal; if you’re using Morton’s, use only 4 tablespoons of salt.

Don’t salt a kosher or self-basting turkey (like a frozen Butterball)!  Those are already salted and will end up way too salty if you add any additional salt.

8-12 servings

Herbed Salt:
6 tablespoons coarse kosher salt (4 tablespoons if finer-grained kosher salt)
1 tablespoon fresh rosemary, minced
1 tablespoon fresh sage, minced
1 tablespoon fresh thyme leaves
3 small bay leaves, coarsely torn
1 teaspoon black peppercorns, crushed
1 teaspoon finely grated lemon peel

Turkey:
1 14- to 16-pound turkey (neck, heart, and gizzard removed)
1 large onion, coarsely chopped
1 large celery stalk, coarsely chopped
1 whole lemon, coarsely chopped
1 tablespoon fresh rosemary
1 tablespoon fresh sage
1 tablespoon fresh thyme
½ cup (1 stick) unsalted butter, at room temperature
2 cups (or more) unsalted chicken broth or Golden Turkey Stock

1. For the herbed salt: Combine the salt, herbs, and pepper. (Can be made 1 week ahead; cover and refrigerate.) Stir in the lemon peel just before using.

2. For the turkey: Rinse the turkey inside and out (do not pat dry). Pull any fat pads from the main cavity and the neck cavity. Rub about half of the salt mixture over the outside of the turkey. Rub half of the remaining salt mixture in the cavities. Use your fingers to loosen the skin over the breasts and thighs. Rub the last portion of herbed salt under the skin. Transfer the turkey to a large bowl or plate, cover tightly, and refrigerate at least 24 hours or up to 48 hours.

3. Adjust an oven rack to the lowest position; heat the oven to 425 degrees. Rinse the turkey inside and out; pat very dry. Combine the chopped onion, celery, lemon, and herbs; divide the onion mixture between the main and neck cavities. Fold the neck skin under and secure with a skewer. Use kitchen twine to loosely tie the legs together. Place the turkey, breast-side down, on a roasting rack set in a large roasting pan. Spread the butter all over the turkey. Pour two cups of stock or broth into the bottom of the roasting pan.

4. Roast the turkey for 45 minutes. Remove the turkey from the oven; lower the oven temperature to 325 degrees. Using wads of paper towels, turn the turkey breast-side up. Continue to roast until the thickest part of the thigh registers 165 to 170 degrees, 1½ to 2 hours longer.

5. Transfer the turkey, still on the roasting rack, to a rimmed baking sheet. Tent loosely with foil and let rest 30 to 45 minutes before carving and serving.

glazed pecans

glazed pecans 4

One of the hardest parts of making a full Thanksgiving dinner for two is dealing with the ridiculous amounts of food. Probably I could have made a course or two less than what people make for a huge group, right? But that would be too easy. I have to go the other direction and make every single course I would make for a crowd.

glazed pecans 1

If family and friends were coming over, I would want casual snacks set out to munch on while people sip their wine and wait for the appetizers to cool. With only the two of us, these little pecans were supposed to hold us over between breakfast and the big eating part of the day, but instead they became irresistible little nibbles whenever the pecan bowl was in sight.

glazed pecans 2

I was surprised by just how much I enjoyed these, because pecans aren’t one of my favorite nuts. I think of them as bitter, but once they were coated in a sweet herby glaze, the nut itself seemed almost meaty. Now I know that sharing them with a crowd is actually a bad idea – because I want them all for myself.

glazed pecans 3

Two years ago: Cranberry Orange Scones
Three years ago: Chickpea and Butternut Squash Salad

Printer Friendly Recipe
Rosemary and Thyme Candied Pecans (adapted from Seven Spoons)

Makes 8 servings

I bought demerara sugar just for this recipe and have found other uses for it, but if you don’t want to buy it, I’m sure brown sugar would work just fine.

2 tablespoons unsalted butter
¼ cup maple syrup
2 tablespoons demerara sugar
¾ teaspoon finely minced fresh thyme
½ teaspoon finely minced fresh rosemary
¼ teaspoon cayenne
Scant ⅛ teaspoon ground cinnamon
1 teaspoon coarse salt
1 pound pecan halves

1. Heat the oven to 375 degrees. Line a baking sheet with parchment paper or a silicone mat.

2. In a large saucepan over medium heat, melt the butter, then add the maple syrup and the sugar. Remove the pan from the heat and stir in the herbs, spices, and salt. Add the pecans to the butter mixture; stir to coat. Spread the nuts in a single layer on the prepared pan.

3. Bake, turning occasionally, until the nuts are glazed, shiny, and deep golden, around 15 minutes.
Cool completely, then store in an airtight container.

glazed pecans 5

far breton

far breton 3

This doesn’t seem to be a very popular opinion, but I love custards. Far Breton isn’t the most custardy custard I’ve ever eaten, but it’s certainly on the eggy side of the cake spectrum. I was looking forward to a light, lightly sweetened and beautifully browned cake.

far breton 5

I wasn’t so sure about the dried fruit, but I thought using small fruits like a mix of raisins, cherries, and cranberries would meld better with the batter than large prunes, and softening them in brandy couldn’t hurt. Unfortunately my math skills failed me and I messed up the proportions of the batter, using one-third of the total amount of egg and milk, and one-half of the full recipe worth of sugar, flour, and butter.

far breton 1

Dave and I both enjoyed the cake, even with the mixed up ratios of ingredients in the batter. I still think the dried fruit were out of place, probably because I like cake/custard so much more than I like dried fruit. I think, for my tastes, pure custard would be just right.

far breton 4

Nicole chose this recipe for Tuesdays with Dorie, and she has it posted. Like I mentioned above, I made a handful of involuntary changes that I don’t recommend (even if the final result was quite good)!

My post on the honey nut scones, also chosen for TWD this week, will be up tomorrow.

One year ago: Peanut Butter Blondies
Two years ago: Cherry-Fudge Brownie Torte
Three years ago: Rugelach

far breton 2

basic biscuits

flaky biscuits 2

I just got back from two weeks in Italy, which I spent eating: croissants for breakfast, baskets of bread for lunch and dinner (and not a whole grain in sight), wine with lunch and dinner, gelato at least once a day, and so on and so on and so on. And guess what? I came home exactly the same size I was when I left.

flaky biscuits 1

I wish I could use this as justification to throw all of my healthy eating ideals to the wind (I accidentally typed “wine” at first – I’m still in vacation mode) and just eat what I want to eat. And maybe I could, if I spent hours upon hours walking in my normal life, walking until my feet ached and then ached more, and then they kept aching hours after I’d stopped walking. Instead, I spend hours upon hours of my normal life sitting at a computer, both at work and at home, and that, my friends, is the difference.

flaky biscuits 5

Biscuits, and their buttery bready cousins croissants and scones, become a weekend treat. Usually I make biscuits to sandwich with eggs and ham for breakfast, but occasionally I serve them alongside crab cakes for dinner. But just occasionally. If only my normal life burned as many calories as my vacation life, I could – and would! – eat biscuits almost every day.

flaky biscuits 4

Jennifer chose these for Tuesdays with Dorie, and she has the recipe posted. I…made no changes? Maybe? I don’t know, I made these a while ago. It seems likely that I followed the recipe exactly, except I definitely used the cake flour option, because I love how light biscuits are when they’re made with cake flour.

One year ago: Fold-over Pear Torte
Two years ago: Split-Level Pudding
Three years ago: Lenox Almond Biscotti

flaky biscuits 3

golden brioche loaves

brioche 6

Saturday I had a cooking extravaganza. I chose five fun recipes and spaced out the eating and the cooking over the course of the evening. I spent hours in the kitchen, and I had a great time.

brioche 3

I spent most of Sunday in the kitchen as well, but it wasn’t planned, so it wasn’t as fun. Plus, I made bread dough for three types of bread, but one (completely delicious) grilled pita was the only bread I ate all day. It’s a good reminder that the best part of cooking is eating.

brioche 4

Of course it’s worth it in the end. I was thankful for the Sunday’s batch of bagels at work Monday morning, and I was grateful for the brioche on Tuesday. My coworkers were particularly grateful for the brioche. Who can say no to bread that’s this flakey, and most importantly, buttery?

brioche 9

Margie chose brioche for Tuesdays with Dorie, and she has the recipe posted. Despite Dorie’s recommendation that the full recipe (enough for two loaves) of dough be made at once, I was able to make only half the recipe with no problems. For tiny brioches baked in a mini muffin pan, I divided the half recipe into 36 portions and baked them at 450 degrees for 12 minutes.

One year ago: Crunchy and Custardy Peach Tart
Two years ago: Applesauce Spice Bars
Three years ago: Chocolate-Banded Ice Cream Torte

brioche 7

sour cream chocolate cake cookies

chocolate cake cookies 4

Chocolate cake without frosting is just sad; likewise, chocolate cake cookies without frosting are clearly missing something important. Cream cheese frosting is important. Sprinkles are important.

chocolate cake cookies 1

The cookies were soft and tender, as cake should be. Despite a full container of sour cream, they weren’t overly rich, and their chocolate flavor was more than subtle, less than overpowering.  (I like overpowering.)  They might seem plain and homely on their own, but that’s nothing that a dollop of frosting can’t fix.

chocolate cake cookies 2

Spike chose these for Tuesdays with Dorie, and she has the full recipe posted. I chilled the dough for about an hour before baking to reduce spreading. I also left out the raisins and spices so that the cookies would mimic a classic chocolate cake.

Two years ago: Perfect Party Cake (compared to 2 other white cake recipes)
Three years ago: Apple Cheddar Scones

chocolate cake cookies 3

chicken gyros

chicken gyros 14

Elly’s chicken gyros are so very popular for good reason – it’s a simple recipe with exceptional results. I, of course, can’t keep anything simple. After I made Elly’s recipe a few times, I noticed how similar it is to chicken fajitas – marinated chicken wrapped in flat bread with vegetables. My favorite chicken fajita recipe has a few tricks up its sleeve that I love, so I started incorporating those into Elly’s chicken gyro recipe.

chicken gyros 1

My favorite trick is saving a portion of the marinade (before mixing it with raw meat, of course) to stir into the cooked and shredded chicken, reviving any flavors that might be lost during cooking. Another portion of the marinade is stirred into the vegetables, brightening their flavor while the vinegar tames the onion’s bite. I also insist on taking advantage of everyone’s favorite cooking method – fire. I love grilling the chicken and then toasting the pita over the remaining coals.

chicken gyros 2

I’m fairly certain that traditionally, gyros aren’t topped with red peppers and feta, and the first few times I made this recipe, I served those on the side as part of Mediterranean Pepper Salad. But each time, more and more of the salad made its way onto the gyro, and eventually I stopped keeping them separate at all. With the vegetables right on top of the marinated grilled chicken and toasted flatbread, topped with tart white sauce, these were even more similar to chicken fajitas, except – dare I say – even better.

chicken gyros 5

One year ago: Croissants (Martha Stewart’s recipe)
Two years ago: Rhubarb Scones
Three years ago: Pita (cook these right on the grill instead of baking!)

Printer Friendly Recipe
Chicken Gyros (adapted from Elly Says Opa and from Cooks Illustrated’s Chicken Fajita recipe)

Greek yogurt is often sold in 7-ounce containers. If you don’t have extra plain yogurt around to use in the marinade, using 2 tablespoons of the Greek yogurt meant for the tzatziki recipe in your marinade won’t hurt your tzatziki at all.

Chicken:
¼ cup juice from 1 to 2 lemons
2 tablespoons olive oil
3 medium garlic cloves, crushed
1 tablespoon red wine vinegar
1 teaspoon sugar
table salt and ground black pepper
2 tablespoons plain yogurt
3 boneless, skinless chicken breasts (about 1½ pounds), trimmed of fat, tenderloins removed, pounded to ½-inch thickness

Tzatziki:
½ cucumber, unpeeled, shredded
½ teaspoon kosher salt
7 ounces Greek yogurt
1 tablespoon freshly squeezed lemon juice
½ tablespoon white wine vinegar
½ tablespoon minced fresh dill (optional)
1 clove garlic, minced
¼ teaspoon freshly ground black pepper

For serving:
½ red onion, quartered lengthwise and sliced thinly
1 large red bell pepper, quartered lengthwise and sliced thinly
½ cucumber, quartered lengthwise and sliced thinly
1 tomato, chopped medium, or 1 cup grape tomatoes, halved
½ cup feta, crumbled
4-6 (6-inch) pocketless pitas

1. In a medium bowl, whisk together the lemon juice, oil, garlic, vinegar, sugar, 1 teaspoon salt, and ¾ teaspoon pepper. Reserve 3 tablespoons of the marinade in a small bowl; set aside. Add the yogurt and another teaspoon salt to the remaining marinade. Place the chicken in the marinade; cover with plastic wrap and refrigerate 15 minutes.

2. Meanwhile, using a large chimney starter, ignite 6 quarts of charcoal briquettes and burn until the coals are fully ignited, about 20 minutes. Empty the coals into the grill, spreading them in a single layer; place an additional 20 unlit coals over the lit coals on one side of grill to create a two-level fire. Position the grill grate over the coals and heat the grate for 5 minutes; scrape clean with a grill brush. (For a gas grill, light all burners and turn to high, cover, and heat the grill until hot, about 15 minutes; scrape the grill grate clean with a grill brush. Leave one burner on high heat while turning the remaining burner(s) down to medium.)

3. For the tzatziki: Place the cucumber in a strainer set over a medium bowl and add the salt. Set aside for at least 15 minutes to drain. Transfer the cucumber to a clean kitchen towel and squeeze dry. Combine the drained cucumber with the yogurt, lemon juice, vinegar, dill, garlic, and pepper.

4. Add 2 tablespoons of the reserved marinade to a bowl; add the sliced onion to the marinade. Set aside to lightly pickle while you prepare the remaining toppings. Mix all of the vegetables and feta into the bowl with the onion.

5. Remove the chicken from the marinade and place it smooth side down on the hotter side of the grill; discard the remaining marinade. Cook the chicken until it’s well browned, 4 to 5 minutes; using tongs, flip the chicken and continue grilling until it’s no longer pink when cut into with a paring knife or an instant-read thermometer inserted into the thickest part registers about 160 degrees, 4 to 5 minutes longer. Transfer to a plate; cover to keep warm.

6. Working in 2 or 3 batches, place the pitas in a single layer on the cooler side of the now-empty grill and cook until warm and lightly browned, about 20 seconds per side (do not grill too long or the pitas will become brittle). As the pitas are done, wrap them in a kitchen towel or a large sheet of foil.

7. Slice the chicken into ¼-inch strips and toss with the remaining tablespoon of reserved marinade in another bowl; arrange the chicken and vegetables on a large platter and serve with the warmed pitas.

chicken gyros 8

lemon bar comparison

front to back: Cooks Illustrated, Lebovitz

I don’t make lemon bars often, despite how much I love them. They feel so light and refreshing that I can’t convince my brain that these are, in fact, full of butter. So I end up eating a lot of them.  But if I don’t get to make them often, when I do get a chance to, they need to be perfect. I need the best recipe. And how do I know which is best without a side-by-side comparison?

I started with Cooks Illustrated as a trustworthy source of straightforward results. I chose Tartine’s lemon bars on brown butter shortbread because it was one of the first recipes in the book that caught my eye and is typical of their talent for taking a classic recipe up a notch. I also made David Lebovitz’s lemon bar recipe, which uses the whole lemon, pith and all.

Cooks Illustrated: As promised, this is a typical lemon bar recipe with no tricks up its sleeve. The crust is a combination of flour, powdered sugar, cornstarch, salt, and butter, which is combined in the food processor, pressed into a pan, and chilled before baking. The topping is eggs, sugar, flour, milk, salt, and lemon zest and juice. The topping is poured onto the hot crust and baked until firm.

Tartine: The browned butter shortbread in this recipe’s title is a misnomer, as it turns out that the crust is mixed like any other lemon bar crust, with no browning of the butter beforehand. Instead, the crust just browned in the oven, making it more of a butter crust that is browned instead of a crust that includes browned butter.  The filling is similar to Cooks Illustrated’s, except it contains no milk.

Lebovitz: David Lebovitz’s crust uses granulated instead of powdered sugar and melted butter instead of solid. Like the other recipes, this topping is based on sugar, eggs, and lemon, but instead of a small amount of flour, it incorporates cornstarch, as well as melted butter, which is not present in the other recipes. And most importantly, this recipe includes the entire lemon, pith in addition to juice and zest.

Comparing the lemon bars made me realize how important the crust is. I’d always focused on the filling before, wanting it as lemony and sour as I could stand, and I thought the crust was nothing more than a vehicle to hold up the filling. Now the crust seems like an important contrast to the tart filling. In fact, in many ways, the crust was the deciding factor in choosing preferences. The fillings were similar, but the crusts varied widely.

Cooks Illustrated: The all-important crust factor was the downfall of this recipe. The crust was dry and didn’t brown. I’m blaming this on the cornstarch. It’s probably important for structure, but it didn’t do the flavor any favors. The filling, on the other hand, was creamy and tart and wonderful. The top photo spotlights the CI bars in front, and you can clearly see their pale crust and luscious filling.

Tartine: This crust was substantial enough to hold up the filling and had just a bit of snap to it. It did, indeed, brown well, which gave it a nice flavor. The filling was lemony and smooth, although it  cratered when it was removed from the oven, resulting in a sunken middle.  I surprised myself by wanting a higher ratio of crust to filling.

Lebovitz: The granulated sugar lent this crust a great flavor, but it was crumbly and sometimes broke under the weight of the filling. The filling itself contained far too many chunks of lemon, although this might be a result of using a food processor instead of a blender to puree the lemon.  The topping was pockmarked like the moon (scroll down to see a picture of the tops of the three recipes).

I enjoyed the lemon squares from all three recipes, but I believe the one perfect bar would be made from Tartine’s crust and Cooks Illustrated’s filling.


left to right: Lebovitz, Tartine, Cooks Illustrated

One year ago: Stuffed Butterflied Leg of Lamb
Two years ago: Fresh Strawberry Scones
Three years ago: Asparagus and Arugula Salad with Cannellini Beans and Balsamic Vinegar

Printer Friendly Recipe
Lemon Bars on Brown Butter Shortbread (from Tartine)

For the crust:
½ cup (2 ounces) confectioners’ sugar
1½ cups (7.5 ounces) all-purpose flour
12 tablespoons (1½ sticks) unsalted butter, at room temperature
½ cup (2 ounces) pine nuts (optional)

For the filling:
½ cup (2½ ounces) all-purpose flour
2¼ cups (16 ounces) sugar
1 cup plus 2 tablespoons lemon juice
lemon zest, grated from 1 small lemon
6 large whole eggs
1 large egg yolk
pinch salt
confectioners’ sugar for topping (optional)

1. Preheat the oven to 350 degrees and butter a 9-by-13-inch baking pan.

2. To make the crust: Sift the confectioners’ sugar into the bowl of a stand mixer fitted with the paddle attachment. Stir in the flour. Add the butter and pine nuts (if using) and beat on low speed just until a smooth dough forms.

3. Press the dough evenly into the pan and allow it to come up about a ½ inch up the sides of the pan. Line the crust with parchment paper and fill with pie weights. Bake the crust until it is a deep golden brown, about 25-35 minutes.

4. To make the filling: While the crust is baking, sift the flour into a mixing bowl and whisk in the sugar until blended. Add the lemon juice and zest and stir to dissolve the sugar. In a separate mixing bowl, whisk the whole eggs and egg yolk with the salt. Add the eggs to the lemon juice mixture and whisk until well mixed.

5. Once the crust is ready, pour the filling directly into the pan. Reduce the oven temperature to 300 degrees and bake just until the center of the custard is set, about 30 to 40 minutes.

6. Let cool completely on a wire rock, then cover and chill well before cutting. Cut into squares and dust the top with confectioners’ sugar, if desired. They will keep in an airtight container or well covered in the baking dish in the refrigerator for up to 4 days.

Printer Friendly Recipe
Perfect Lemon Bars (from Cooks Illustrated)

For the crust
1¾ cups (8.75 ounces) unbleached all-purpose flour
⅔ cup confectioners’ sugar, plus extra to decorate finished bars
¼ cup cornstarch
¾ teaspoon table salt
12 tablespoons unsalted butter (1 ½ sticks), at very cool room temperature, cut into 1-inch pieces

Lemon filling
4 large eggs, beaten lightly
1⅓ cups (9.33 ounces) granulated sugar
3 tablespoons unbleached all-purpose flour
2 teaspoons grated lemon zest from 2 large lemons
⅔ cup lemon juice from 3 to 4 large lemons, strained
⅓ cup whole milk
⅛ teaspoon table salt

1. For the crust: Adjust an oven rack to middle position and heat the oven to 350 degrees. Lightly oil a 13-by-9-inch baking dish and line with one sheet parchment or wax paper. Dot the paper with butter, then lay a second sheet crosswise over it.

2. Pulse the flour, confectioners’ sugar, cornstarch, and salt in the food processor workbowl fitted with the steel blade. Add the butter and process to blend, 8 to 10 seconds, then pulse until the mixture is pale yellow and resembles coarse meal, about three 1-second bursts. (To do this by hand, mix flour, confectioners’ sugar, cornstarch, and salt in medium bowl. Freeze the butter and grate it on the large holes of a box grater into the flour mixture. Toss the butter pieces to coat. Rub pieces between your fingers for a minute, until the flour turns pale yellow and coarse.) Sprinkle the mixture into the lined pan and press firmly with fingers into an even, ¼-inch layer over the entire pan bottom and about ½-inch up the sides. Refrigerate for 30 minutes, then bake until the crust is golden brown, about 20 minutes.

3. For the filling: Meanwhile, whisk the eggs, sugar, and flour in a medium bowl, then stir in the lemon zest, juice, milk, and salt to blend well.

4. To finish the bars: Reduce the oven temperature to 325 degrees. Stir the filling mixture to reblend; pour into the warm crust. Bake until the filling feels firm when touched lightly, about 20 minutes. Transfer the pan to a wire rack; cool to near room temperature, at least 30 minutes. Transfer to a cutting board, fold the paper down, and cut into serving-size bars, wiping knife or pizza cutter clean between cuts, as necessary. Sieve confectioners’ sugar over bars, if desired.

Printer Friendly Recipe
Whole Lemon Bars (reformatted slightly but not actually changed from David Lebovitz)

I needed 2 lemons to make 6 ounces of lemon. I trim off the knobby ends when making whole lemon desserts.

Crust:
1 cup (4.8 ounces) all-purpose flour
¼ cup (1.75 ounces) sugar
¼ teaspoon salt
8 tablespoons (1 stick) melted unsalted butter
½ teaspoon vanilla extract

Lemon topping:
1 lemon (about 6 ounces), organic or unsprayed
1 cup (7 ounces) sugar
3 tablespoons freshly squeezed lemon juice
3 large eggs, room temperature
4 teaspoons cornstarch
¼ teaspoon salt
3 tablespoons melted unsalted butter
Optional: powdered sugar, for serving

1. Preheat the oven to 350ºF (180ºC). Line an 8-inch square with foil.

2. For the crust: In a medium bowl, mix the flour, sugar, salt, melted butter, and vanilla, stirring just until smooth. Press the batter into the bottom of the pan, using your hands or a small offset spatula to get it as level as possible. Bake the crust for 25 minutes, or until it’s deep-golden brown.

3. For the topping: While the crust is cooking, cut the lemon in half, remove the seeds, and cut it into chunks. Put the chunks of lemon in a food processor or blender along with the sugar and lemon juice, and let it run until the lemon is completely broken up. Add the eggs, cornstarch, melted butter, and blend until almost smooth. (A few tiny bits of lemon pieces are normal and encouraged.)

4. When the crust comes out of the oven, reduce the oven temperature to 300ºF (150ºC). Pour the lemon filling over the hot crust and bake for 25 minutes or just until the filling stops jiggling and is barely set.

5. Remove from the oven and let cool completely. Once cool, carefully lift out the bars grasping the foil. Cut the bars into squares or rectangles. Sift powdered sugar over the top just before serving, if desired.

Storage: The bars will keep in an airtight container at room temperature up to three days. You can freeze the lemon bars as well for up to one month, letting them come to room temperature before serving.

left to right: Cooks Illustrated, Tartine, Lebovitz

stromboli

If you roll your dough and toppings into a spiral instead of keeping them flat, it’s a whole new recipe and totally different from the normal Friday night pizza routine!

Friday evenings are pretty much my favorite part of the week. It’s one of the only times I just STOP. I don’t worry about chores, or exercise, or even hobbies. I just hang out in the kitchen with a beer, rolling out dough, shredding cheese, slicing toppings.

I’m not too interested in varying from this routine. I’m occasionally willing to get takeout sushi instead of make pizza, and, sometimes, I might really get wild and change the shape of the pizza. Usually that means calzones and this time it was stromboli, but let’s face it, it’s all basically the same thing.

You can certainly roll anything you want up in pizza dough, but sometimes I like to let other people do the thinking for me, so I follow a specific recipe. Emeril’s stromboli has three kinds of pork, green peppers (gross!), and jalapenos, so I was pretty sure I could get away with some paring down of ingredients. With only two kinds of meat and one type of pepper, plus three types of cheese, there were still plenty of flavors for me. Oh Friday. How I love your carbs, cheese, and freedom.

One year ago: Maple Oatmeal Scones
Two years ago: Twice-Baked Potatoes with Broccoli, Cheddar, and Scallions
Three years ago: Country Crust Bread

Printer Friendly Recipe
Stromboli (adapted from Emeril)

Serves 6

Based on the pictures, it appears I sautéed some sliced mushrooms with the peppers. Yum!

1 recipe pizza dough
1 tablespoon milk
⅛ teaspoon salt
¼ teaspoon sugar
8 ounces hot Italian sausage, removed from casings and crumbled
8 ounces ham, diced
1 large red onion, chopped fine
1 red pepper, diced small
4 cloves garlic, minced
8 ounces (2 cups) provolone, shredded
8 ounces (2 cups) mozzarella, shredded
2 ounce (1 cup) finely grated Parmesan

1. Preheat the oven to 375 degrees F. Line two large baking sheets with parchment paper or silicone mats. In a small bowl, mix the milk, salt, and sugar; set aside.

2. In a large skillet, cook the sausage over medium-high heat until it’s browned and the fat is rendered, about 5 minutes. Remove with a slotted spoon. Discard all but 1 tablespoon of fat from the pan. Add the ham, onions, and bell peppers; cook, stirring occasionally, until very soft and slightly browned, 5 to 8 minutes. Add the garlic and cook, stirring constantly, for 1 minute. Remove from the heat and cool.

3. Divide the dough in half. On the prepared baking sheet, stretch out one half of the dough to a large rectangle, about 10 by 14 inches. (If it becomes too elastic, let it rest for a few minutes, lightly covered.) Spread half of the cooled sausage mixture across the dough, leaving a 1-inch border. Top with half of each of the mozzarella and provolone. Using a pastry brush, paint the border of a long edge with the milk mixture. Starting at the other long end, roll up the dough into a cylinder, pinching the edges to seal. Repeat with the remaining ingredients. Let the dough rise for 20 to 30 minutes.

4. Brush the top of each stromboli with the milk mixture. Bake, one at a time, until nearly completely golden brown and starting to crisp, about 20 minutes. Sprinkle the stromboli with parmesan cheese and return to the oven until the cheese is melted and the dough is golden brown, about 5 minutes.

5. Remove from the oven and let stand 10 minutes. Slice thickly and serve with your favorite sauce.